Stream from Iphone to Computer
You usually need to stream your iPhone screen to a computer when the stakes are just high enough that improvising looks bad. A product demo for your team. A customer tutorial. A webinar where you need to show taps, gestures, and app states clearly. Pointing a webcam at your phone works in emergencies, but it introduces glare, focus issues, framing problems, and a constant feeling that the whole thing is held together with tape.
A direct iPhone-to-computer workflow fixes that. You get a clean image, a more watchable presentation, and a recording you can edit afterward. The part that trips people up is that there isn't one universal method. The right setup depends on what you're trying to do. A quick internal walkthrough has different requirements than a polished launch video.
Table of Contents
- Why Stream Your iPhone Screen to a Computer
- Comparing iPhone to Computer Streaming Methods
- Wireless Mirroring from iPhone to Mac with AirPlay
- Wired iPhone Streaming with a USB Cable
- How to Stream Your iPhone to a Windows PC
- Recording and Editing Your Stream for Professional Results
- Troubleshooting Common iPhone Streaming Problems
Why Stream Your iPhone Screen to a Computer
If you're showing a mobile app, the audience needs to see the screen, not your hand trying to hold the phone steady. That's the basic reason to stream from iPhone to computer. It turns a cramped handheld device into something you can present, record, review, and reuse.
The difference is obvious in common work scenarios:
- Product demos: You can show a feature flow live without asking people to squint.
- Customer education: Tutorial recordings look cleaner when the screen is captured directly.
- Sales calls and webinars: You can move between slides, browser windows, and your phone without changing cameras.
- Internal QA or support reviews: Teams can inspect exact user flows on a larger display.
The real goal is clarity
Often, the initial question is, “How do I mirror my iPhone?” That's not quite the right question. The better question is, “What result do I need?”
If you only need to show a screen for a few minutes in a meeting, convenience matters most. If you're recording a customer-facing tutorial, you need consistency. A stream that stutters, drops, or softens at the wrong moment creates extra editing work and makes the final video feel rushed.
Practical rule: Choose the method based on the outcome you need, not the setup that seems easiest in the first five minutes.
Two broad use cases
There are really two jobs people are trying to do:
| Goal | What matters most | Better fit |
|---|---|---|
| Live sharing | Speed and freedom of movement | Wireless mirroring |
| Recording polished output | Stability and repeatability | Wired capture |
That split matters on both Mac and Windows. Some setups are nearly frictionless. Others depend on receiver software, network conditions, or cable-based capture. Once you choose for the job in front of you, the rest gets simpler.
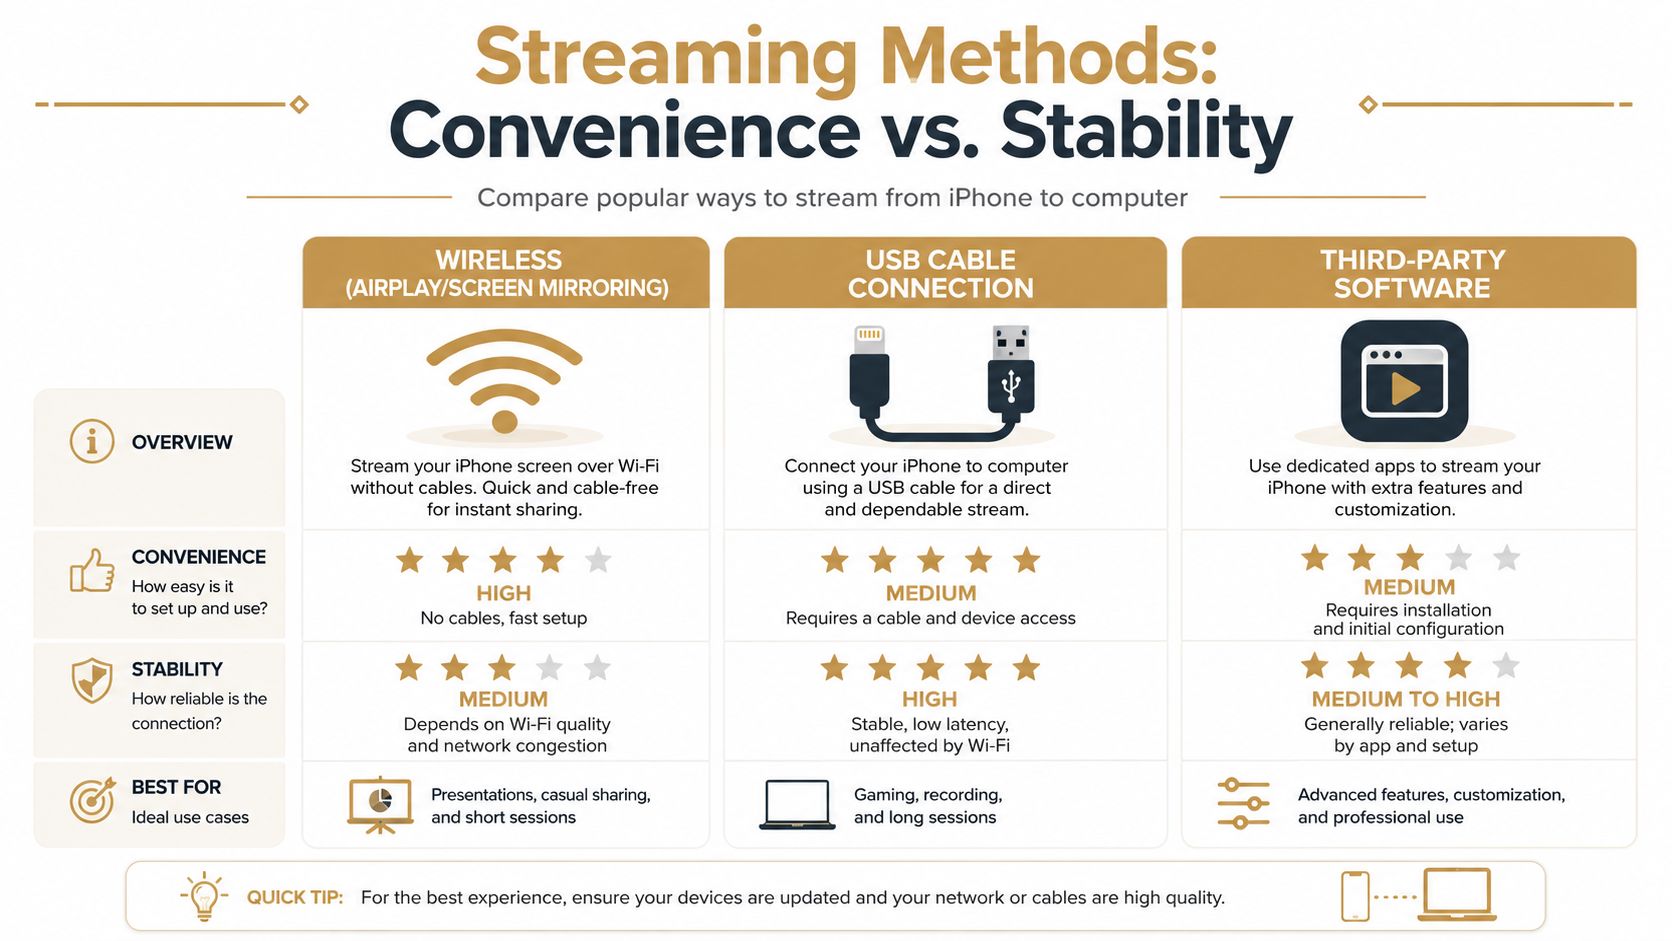
Comparing iPhone to Computer Streaming Methods
Before you open Control Center or plug in a cable, decide what you care about most. Streaming methods aren't interchangeable. They trade convenience for control.
By 2024–2026, mainstream guides had largely settled on two dominant ways to stream iPhone to PC: wireless mirroring on the same Wi‑Fi network and USB mirroring for stability, with the familiar steps of opening Control Center, tapping Screen Mirroring, selecting the computer, or connecting by cable and tapping Trust This Computer through the chosen app, as described in AirMore's iPhone-to-PC streaming guide.
Fast choice by use case
Here's the shortest version.
| Method | Best for | Trade-off |
|---|---|---|
| AirPlay to Mac | Quick demos, meetings, live presentations | Depends on network quality |
| USB to Mac | Tutorials, product videos, reliable recording | Less freedom of movement |
| Receiver software on Windows | Mirroring to a PC when you need a larger display | Adds software setup and compatibility variables |
What actually works well
Wireless mirroring feels smooth when you need mobility. You can stand, present, and interact naturally without being tethered to the desk. That's why it's useful for training sessions and informal walkthroughs.
A wired connection is better when the recording itself matters. If you're capturing app behavior, onboarding steps, or a repeatable support flow, a cable removes a lot of uncertainty. You won't be wondering whether the next notification, router hiccup, or handoff between networks is going to interrupt the session.
Convenience wins for live sharing. Stability wins for anything you'll publish later.
A practical way to decide
Use this filter:
- Need it in the next minute? Go wireless if your environment is already set up.
- Need to record without surprises? Use USB.
- Working on Windows? Plan for receiver software or a USB-based workaround, not a native AirPlay switch.
People often overcomplicate this step. You don't need the most feature-rich setup first. You need the method that matches the job.
Wireless Mirroring from iPhone to Mac with AirPlay
For Mac users, wireless mirroring is the cleanest starting point. It keeps the setup light and works well when you need to present quickly.
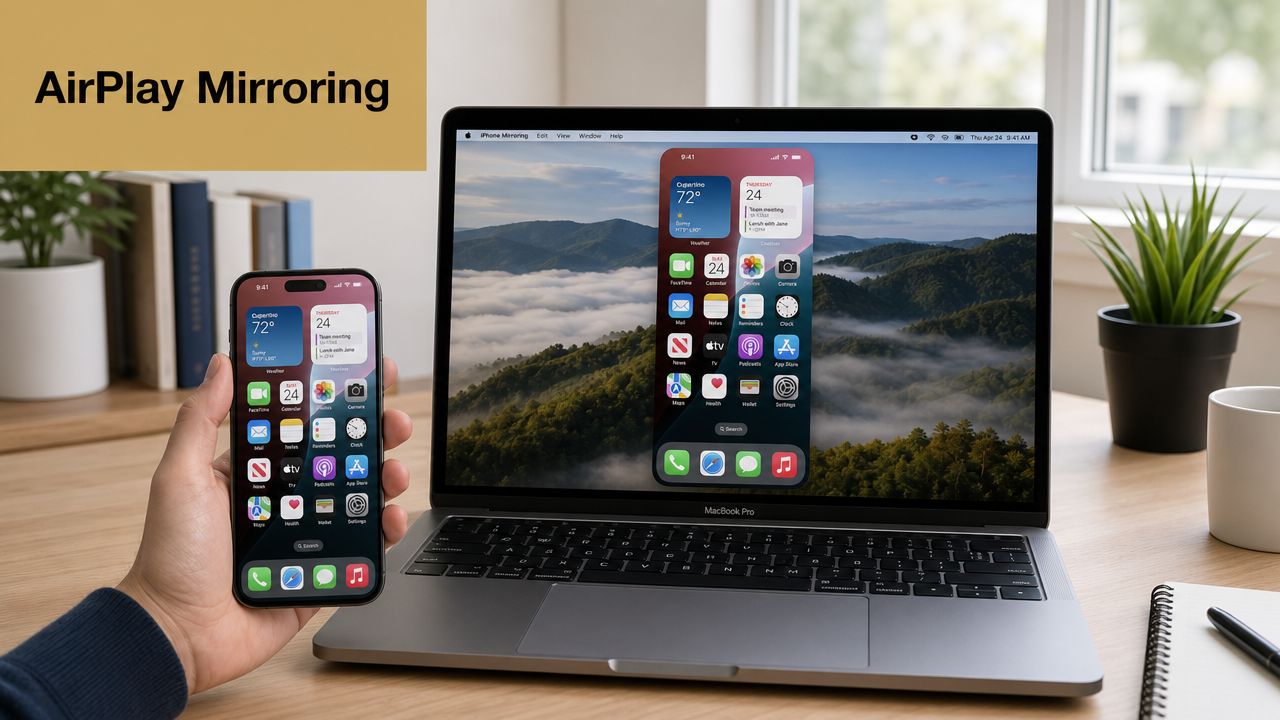
The setup that matters most
The critical condition is simple. Your iPhone and Mac need to be on the same Wi‑Fi network. If they aren't, discovery gets messy fast and the Mac may never appear as a target.
Once that's in place, the workflow is straightforward:
- Open Control Center on your iPhone.
- Tap Screen Mirroring.
- Choose your Mac from the list.
- Enter the on-screen code if your Mac asks for it.
That's the version I recommend for team meetings, workshops, and quick reviews where speed matters more than absolute recording stability.
Where wireless shines and where it doesn't
AirPlay is part of Apple's normal screen mirroring path, so on a Mac it feels native and low-friction. If you want a broader walkthrough of Mac casting options, this guide on screen casting on Mac is a useful companion.
Wireless mirroring starts to feel less ideal when the network is crowded or inconsistent. You may notice slight delay, softer motion, or the occasional hiccup during interaction-heavy demos. That doesn't make it unusable. It just means you should avoid trusting it for a one-take recording you can't afford to redo.
If the presentation is live, wireless is often good enough. If the output is permanent, treat wireless as a convenience tool, not the final capture path.
A visual walkthrough helps if you want to see the flow before trying it:
Wired iPhone Streaming with a USB Cable
When the stream has to hold up under recording, review, and editing, a cable is the safer choice. This is the setup I'd use for tutorials, launch assets, or any demo that needs a clean source on the first pass.
The simplest Mac workflow
On a Mac, QuickTime Player gives you a practical built-in route for wired capture.
Use this sequence:
- Connect your iPhone to your Mac with a Lightning-to-USB cable.
- Access your iPhone and tap Trust This Computer if prompted.
- Open QuickTime Player.
- Choose File and then New Movie Recording.
- Click the small dropdown next to the record control.
- Select your iPhone as the camera source.
Your iPhone screen should appear in the QuickTime window. From there, you can mirror the device live or record the feed directly.
Why creators keep coming back to USB
The biggest advantage is predictability. A wired connection removes the Wi‑Fi variable, which is where many frustrating stream issues start. You also don't need to wonder whether discovery is working or whether a receiver is visible.
That matters in a few specific situations:
- Polished tutorials: Gestures and interface transitions look more consistent.
- Long recording sessions: You're less exposed to dropouts.
- Detailed app walkthroughs: Small UI elements are easier to capture cleanly.
- Repeat takes: The setup behaves the same way each time.
The trade-off is obvious but acceptable
You lose movement. That's the whole downside. Your phone is attached to the Mac, so this isn't the method for pacing around during a webinar or passing the phone around a room.
Still, for most production work, that's an easy trade.
| If you need | Choose |
|---|---|
| Freedom to present from anywhere nearby | Wireless |
| A dependable source for recording and editing | USB |
A cable isn't glamorous, but it solves problems before they show up in your edit.
If you're deciding whether to stream from iPhone to computer for a live audience or for a final asset, this is usually the point where the answer becomes clear. Recording work rewards the less exciting setup.
How to Stream Your iPhone to a Windows PC
Windows is where many people hit a wall first. The reason isn't user error. It's the platform difference.
Apple's built-in Screen Mirroring workflow is tied to AirPlay, which became a core part of Apple's ecosystem after its introduction in 2010, and Apple community guidance notes that Windows does not natively support AirPlay, so users generally need receiver software or a USB-based workaround, as described in this Apple Community discussion about AirPlay support on Windows.
What that means in practice
On a Windows PC, the computer usually won't show up automatically in the iPhone's Screen Mirroring menu unless you've installed software that can act as an AirPlay receiver. That software is the bridge.
The workflow typically looks like this:
- Install receiver software on the PC: The app needs to advertise the machine as a compatible destination.
- Launch the app before mirroring: If it isn't active, the iPhone often won't detect the PC.
- Keep both devices on the same network: Discovery usually depends on that shared connection.
- Mirror from the iPhone: Open Control Center, tap Screen Mirroring, and choose the PC if it appears.
Why Windows setup feels less native
On a Mac, Apple controls both ends of the process. On Windows, you're mixing Apple's sender with a separate receiver environment. That creates more variables. App compatibility, firewall behavior, and background permissions can all affect whether the PC is visible and how stable the stream feels.
That doesn't mean Windows mirroring is unreliable by definition. It means you should expect one extra layer of setup.
For a more Windows-focused walkthrough, this guide on how to share iPhone screen on PC is a practical reference.
When to use a PC workflow
A Windows setup makes sense when your presentation environment already lives on a PC, when your team collaborates in Windows-first tools, or when you need to display an iPhone app alongside desktop software on the same machine.
If the connection feels fragile, don't keep fighting the wireless route indefinitely. At that point, a USB-based path is often the more productive answer.
Recording and Editing Your Stream for Professional Results
Mirroring gets the phone onto your computer. It doesn't make the result publishable on its own. Raw screen footage often needs trimming, pacing fixes, focus cues, and context before it's ready for customers or teammates.
What turns a mirror into a finished asset
A professional workflow usually includes three steps:
- Capture the cleanest source you can
- Trim the dead space and mistakes
- Add visual structure so viewers know where to look
That structure matters more than people expect. A plain screen recording can feel flat even when the information is good. Device frames, zooms around taps, and clearer sequencing make a tutorial much easier to follow.
A workable post-production stack
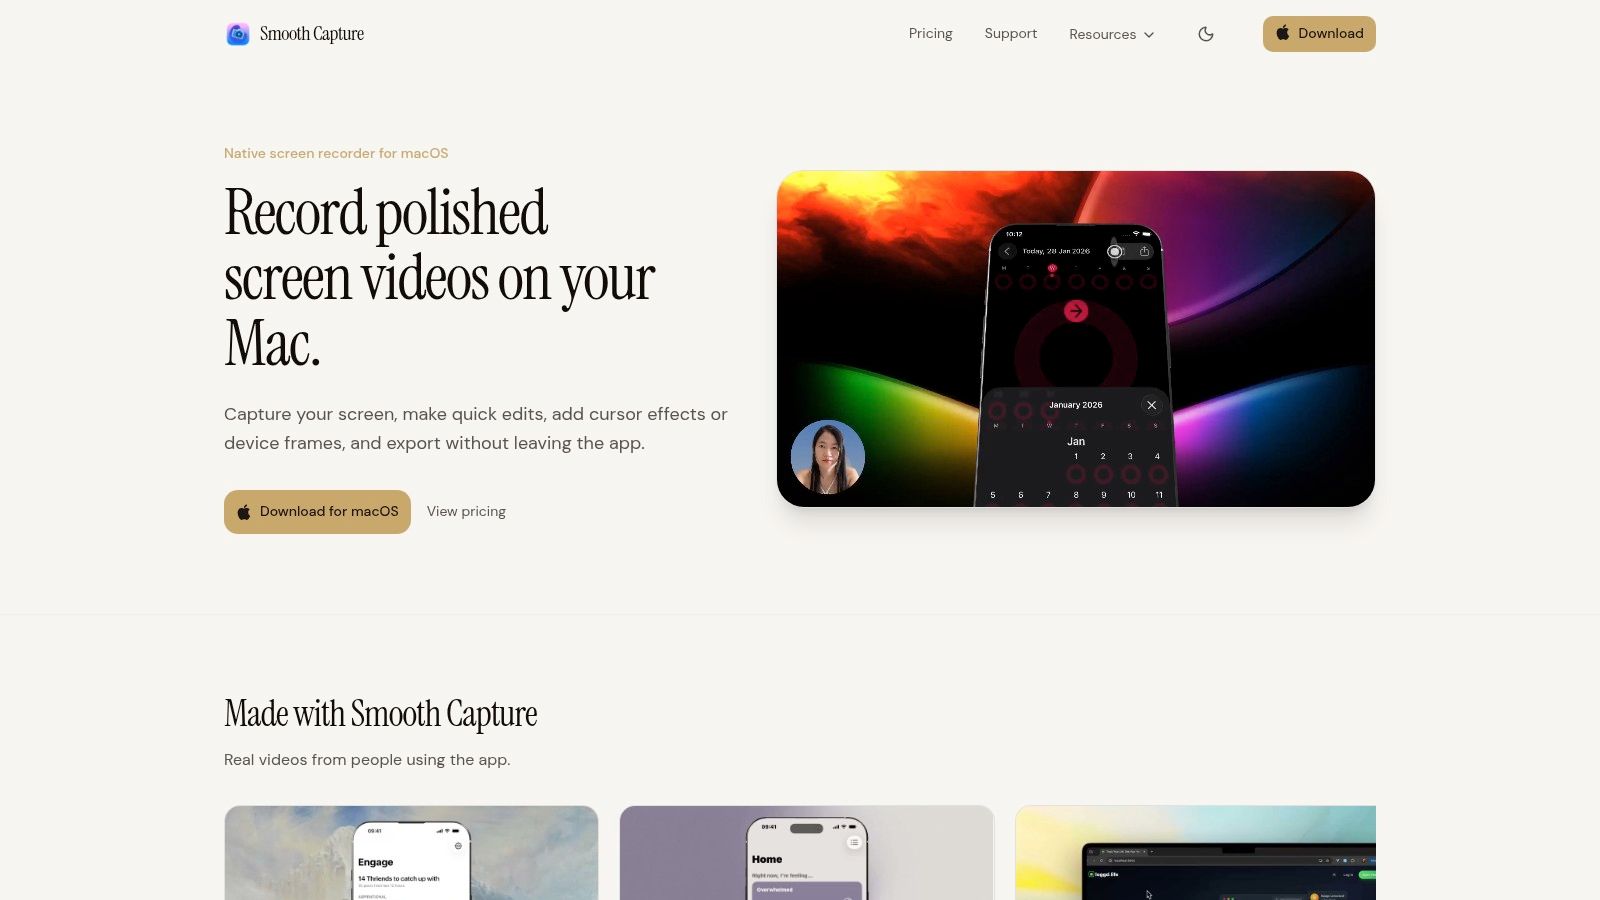
On macOS, one option is Smooth Capture, which can record an iPhone over USB from a Mac and then edit the result with device frames, zoom treatments, timeline edits, and multiple audio tracks. If you're also cleaning up narration or hybrid setups, this guide on how to use iPhone as microphone for computer is relevant.
Editing is also where one recording can become several assets. A long onboarding walkthrough can be cut into support snippets, release clips, or short social segments. If you also work with existing video libraries, this guide on how to repurpose YouTube video clips is a practical resource for turning longer footage into shorter pieces without rebuilding everything from scratch.
The stream is the source material. The edit is what makes people actually watch it.
What to clean up before export
- Remove pauses: Waiting for an app to load feels longer on video.
- Highlight taps and gestures: Viewers miss small interactions unless you draw attention to them.
- Add framing where useful: A device frame can make a mobile screen feel intentional inside a larger video layout.
- Cut alternate takes tightly: Don't leave in setup mistakes just because the capture worked.
If the final output is the goal, capture and editing should be treated as one workflow, not two separate tasks.
Troubleshooting Common iPhone Streaming Problems
Most failures come down to discovery, network conditions, or the computer not presenting itself correctly as a receiver. The fix is usually simpler than the first error message makes it seem.

For wireless mirroring, the most reliable setup is having both devices on the same Wi‑Fi network, and discovery can fail if the computer isn't advertising itself as an AirPlay or Miracast endpoint even when Wi‑Fi is active. Microsoft community guidance also notes that USB can be preferable when stability matters, which is a useful fallback when wireless keeps misbehaving, as discussed in this Windows 11 iPhone mirroring thread on Microsoft Tech Community.
Quick fixes that solve most cases
- Computer not appearing: Confirm the receiver app is open on the computer and the phone is on the same network.
- Laggy or choppy video: Close unnecessary apps, reduce local network load, or switch to USB if the session matters.
- Connection starts but drops: Restart the iPhone and computer, then relaunch the receiver.
- No audio on the computer: Check the capture app's input settings and the computer's output device.
- Mac or PC found once, then disappears: Reopen the mirroring target on the computer so it starts advertising again.
A short sanity check
Run this in order:
- Check network first
- Confirm the receiver is active
- Reconnect the iPhone
- Restart both devices if discovery still fails
- Move to USB when reliability matters more than convenience
Wireless problems often look mysterious. Most of the time, the computer just isn't presenting itself as a valid destination.
If you need a clean way to capture an iPhone on a Mac and then turn that recording into a polished demo, tutorial, or launch asset, Smooth Capture is built for that workflow. It combines direct iPhone recording over USB with timeline editing, device frames, zoom effects, and export options that fit repeatable production work.
Ready to create stunning app demos?
SmoothCapture makes it easy to record your screen with 3D device frames, cinematic cursor effects, and professional editing tools.