Screen Recorder with Audio: A 2026 macOS & iOS Guide
You're probably in one of two situations right now. You finished a clean screen recording, hit play, and realized the video has no system sound. Or the opposite happened: your app clicks and notification tones are there, but your voice is thin, distorted, or buried under the computer audio.
That's the difference between a quick capture and a production-ready asset. A good screen recorder with audio doesn't just save a video file. It gives you control over what gets recorded, how each source is isolated, and how easily you can fix the mix later without starting over.
On macOS and iOS workflows, that control matters more than commonly anticipated. Audio routing, permissions, device selection, and export choices all shape whether your final demo feels polished or improvised. The teams that produce repeatable launch videos, onboarding tutorials, and support walkthroughs don't treat audio as an afterthought. They build for it from the first click.
Table of Contents
- Why Perfect Audio in Screen Recordings Matters
- Choosing Your Audio Sources in Smooth Capture
- Recording a Connected iPhone or iPad with Audio
- Pro Configuration for Flawless Audio Quality
- Troubleshooting Common Audio Recording Issues
- Editing and Exporting for Your Use Case
Why Perfect Audio in Screen Recordings Matters
A flawed audio track ruins trust faster than a soft visual. Viewers will tolerate a cursor that moves too quickly. They won't tolerate narration they can't hear, app sounds that vanish, or a recording that makes every click feel disconnected from the explanation.
That problem shows up constantly in real production work. Product marketers need UI sounds for launch clips. Support teams need clean voiceover for walkthroughs. Developers making App Store previews need a recording that feels intentional, not pieced together after three retakes.
The hard part is that many people assume “record screen” includes all relevant sound by default. It often doesn't. Independent guidance notes that a major gap in this category is whether a screen recorder with audio captures system audio reliably across platforms, and that macOS support is often more constrained than Windows. Those roundups also separate tools by whether they can handle both microphone narration and system audio, because that's a meaningful differentiator, not a minor checkbox in a feature list, as noted in Zapier's screen recording software roundup.
Practical rule: If your recording setup doesn't let you choose audio sources deliberately, it's not ready for client-facing work.
There's also a historical reason users now expect more from this category. OBS Studio launched in 2012 as a free, open-source project and became a widely referenced baseline because it supported screen capture plus mic and desktop audio in one workflow, helping normalize the expectation that a recorder should combine visuals, narration, and system sound for tutorials, demos, and gameplay, as described in Atlassian's overview of leading screen recording tools.
Why audio errors cost more than visual errors
Audio mistakes are expensive because they usually force a rerun. If a crop is slightly off, you can often fix it in the edit. If the system sound never recorded, there's nothing to recover.
Three failures show up most often:
- Missing system sound because the recorder only captured the microphone
- Unbalanced levels where your voice fights with alerts, clicks, or video playback
- Noise in the chain from the mic, room, or routing setup rather than the recorder itself
What professional teams do differently
They decide the audio structure before recording. They don't just choose a screen area. They choose whether the final piece needs narration, product sound, both on separate tracks, or a silent visual for later voiceover.
That single decision changes everything downstream. Your edit gets easier. Retakes drop. The result sounds like it was made on purpose.
Choosing Your Audio Sources in Smooth Capture
The cleanest recordings start with source selection, not editing. When people say they need a screen recorder with audio, they usually mean one of three very different jobs. Voiceover only. System sound only. Or both at once, with enough control to edit them separately afterward.

Start with the recording outcome
If you're narrating a tutorial and don't want desktop noise, choose microphone only. This is the right setup for process walkthroughs, onboarding clips, and internal training where your explanation carries the value. It keeps the recording focused and avoids clutter from stray pings or UI sounds that add nothing.
If you're capturing a product interaction and want the interface to speak for itself, choose system audio only. This works well for app previews, feature reveals, and UI-focused clips where the sound design, transitions, or in-app feedback matter more than a spoken explanation.
The most flexible setup is microphone and system audio together on separate tracks. That's the workflow to use when you're teaching while demonstrating, because it lets you lower click sounds under narration, mute interruptions, or rebalance the whole mix in post without damaging the voice track.
A key technical point matters here. Reliable capture with both system audio and microphone audio requires you to explicitly enable two separate inputs, and the most common failure is assuming screen recording automatically includes computer audio. That's why an audio routing audit before recording is so important for demos, tutorials, and support walkthroughs, as explained in this Microsoft Tech Community discussion on recording screen audio correctly.
Don't trust the preview alone. A moving waveform for one source tells you only that one source is alive.
Use a quick pre flight check
Before you record, run a short check:
- Confirm the video source. Entire screen, window, region, or connected device.
- Select the audio sources intentionally. Mic, system, or both.
- Speak and trigger app sound. You want visible signal from each source you plan to use.
- Record a short sample. Ten seconds is enough to catch routing errors.
- Listen back with headphones. You'll hear noise, clipping, or a missing track immediately.
If you need a deeper walkthrough for Mac audio capture, this guide on capturing sound from your computer on Mac is useful because it focuses on the exact routing issue that trips people up.
What doesn't work is treating source selection as reversible. If you recorded the wrong thing, the editor won't invent the missing track later.
Recording a Connected iPhone or iPad with Audio
Desktop capture is only half the job for many teams. If you ship iOS apps, publish mobile walkthroughs, or build App Store assets, you need a workflow that records an iPhone or iPad cleanly on your Mac without turning the setup into a wiring exercise.
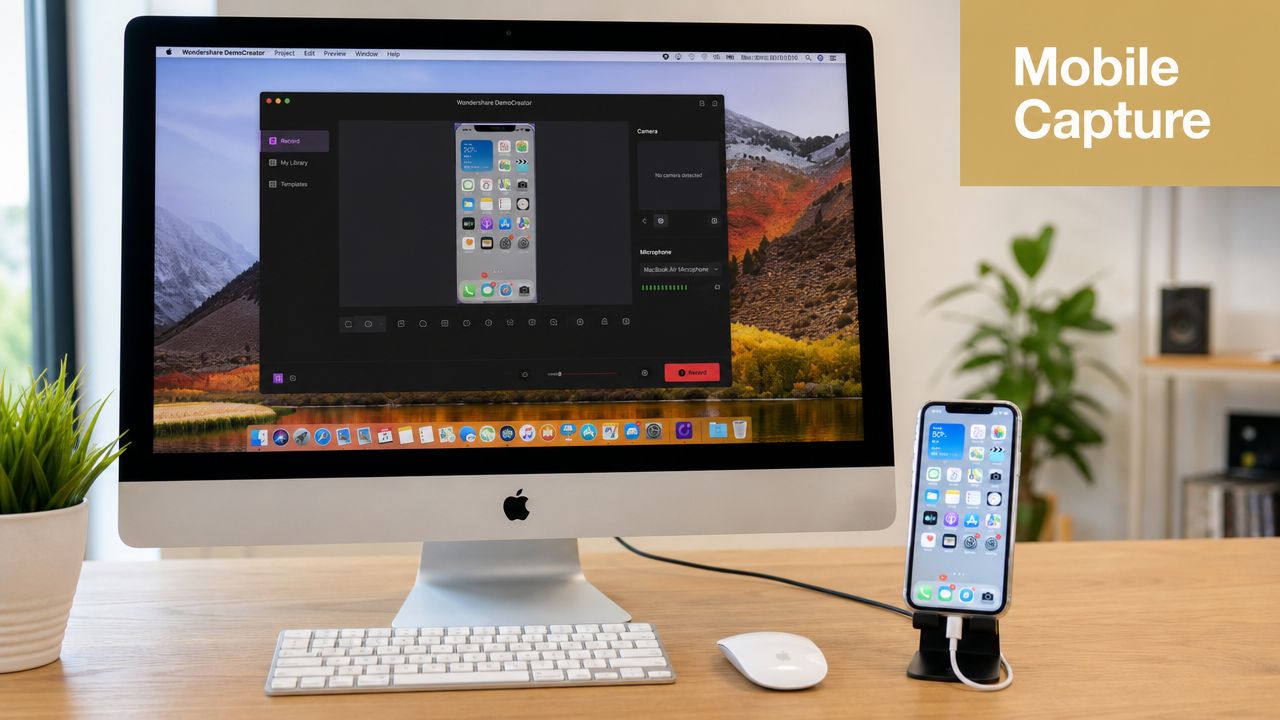
Set up the device correctly
Connect the iPhone or iPad to your Mac with a USB cable. Once the device is available as an input, select it as the video source in your recorder instead of choosing a desktop display or app window.
That gives you a direct mobile capture workflow from the Mac side. It's much cleaner than trying to record the phone separately, export the file, then rebuild the audio later in another app.
This is especially useful when one person is presenting while operating the phone. The Mac handles the capture and the microphone input, while the iPhone or iPad provides the visuals. If you want a step-by-step breakdown of that process, this tutorial on recording your iPhone screen on Mac covers the device capture flow.
Know which audio comes from where
The most important thing to understand is audio ownership. In this setup, your Mac microphone is the simplest source for live narration. That means you can talk through the mobile interaction in real time while the phone display is being recorded as the picture source.
For many teams, that's the best balance of quality and speed. A dedicated desktop mic is easier to position well, easier to monitor, and easier to keep consistent across takes than trying to build the narration around the mobile device itself.
If your goal is a product teaser with no spoken voice, skip the mic and focus on the visual performance of the app. If your goal is a tutorial, keep the phone recording visually clean and let the Mac carry the explanation.
A short video example makes that setup easier to picture:
When this workflow works best
Use connected iPhone or iPad capture when the final asset needs to feel native to the Apple ecosystem:
- App previews that need a device-based visual source
- Feature demos where gestures and transitions matter
- Customer education clips that show real mobile flows instead of mocked-up screens
This approach also reduces one common production mess. You don't end up syncing separate phone footage and desktop narration after the fact unless you choose to. For fast-moving teams, that's often the difference between shipping the video today and postponing it until next week.
Pro Configuration for Flawless Audio Quality
People often blame the recorder when the problem sits elsewhere. The mic is too far away. The input gain is too high. The system audio is overpowering the voice. Or the whole recording is technically fine, but impossible to mix cleanly because everything was baked into one track.
That's why professional setups treat audio configuration as part of capture, not a cleanup task for later.
Separate tracks give you editing control
Recording microphone and system sound on separate tracks is the single most useful upgrade you can make. This can be compared to prepping ingredients separately before cooking. If you throw everything into one bowl too early, you lose control over texture, balance, and timing.
The same thing happens with audio. When your voice and product sounds are fused together, you can't lower the click sounds under narration, remove a background interruption cleanly, or reshape the rhythm of the explanation without damaging the rest.
Here's where separate tracks pay off immediately:
- Narration balancing. Lower app sounds when you speak, then bring them back between sentences.
- Mistake recovery. Mute a cough, desk bump, or notification without flattening the rest of the recording.
- Versioning. Create one spoken tutorial and one silent teaser from the same source capture.
Editing truth: Multi-track audio feels optional during setup and non-negotiable once you're on the timeline.
Treat the capture chain as part of the recording
Industry guidance points out that audio quality in screen recordings is often limited by the capture chain, not the recorder itself. A common pitfall is noise and level mismatch, where microphone narration clips or sits too low relative to system sounds, which is why advanced workflows split audio sources and verify waveform balance before export, as described in Splashtop's discussion of screen recording formats and audio capture.
That aligns with what experienced editors see every day. The recording app may be perfectly capable, but if the mic input is peaking, the room is reflective, or the system output is too hot, the file will still sound amateur.
Use this checklist before a serious recording session:
- Mic position matters first. Put the microphone close enough for a strong voice signal without forcing you to raise gain aggressively.
- Watch for clipping. If your loudest words distort, lower input gain before the take.
- Compare voice to system sound. Trigger the actual app interactions you plan to record, then speak over them. If the interface wins, your mix will feel harsh.
- Monitor with a short sample. A short test recording tells you more than any meter alone.
If you need a deeper post-production mindset, this guide to flawless training video audio is worth reading because it focuses on synchronization and polish, which is where many otherwise good recordings lose credibility.
Keep technical settings boring and stable
Production audio should be uneventful. Use a consistent input device. Avoid switching between headset mics and desktop mics mid-project. Don't change your room, desk position, and monitoring method every time you record a new clip for the same series.
Consistency is what makes a tutorial library sound professional. Not a dramatic EQ curve. Not a flashy intro sting. Just steady, intelligible voice and controlled system sound across every export.
Troubleshooting Common Audio Recording Issues
Even a solid setup breaks when permissions change, the wrong input gets selected, or one source behaves differently than expected. The fastest way to fix screen recorder with audio problems is to diagnose them by symptom, not by guesswork.
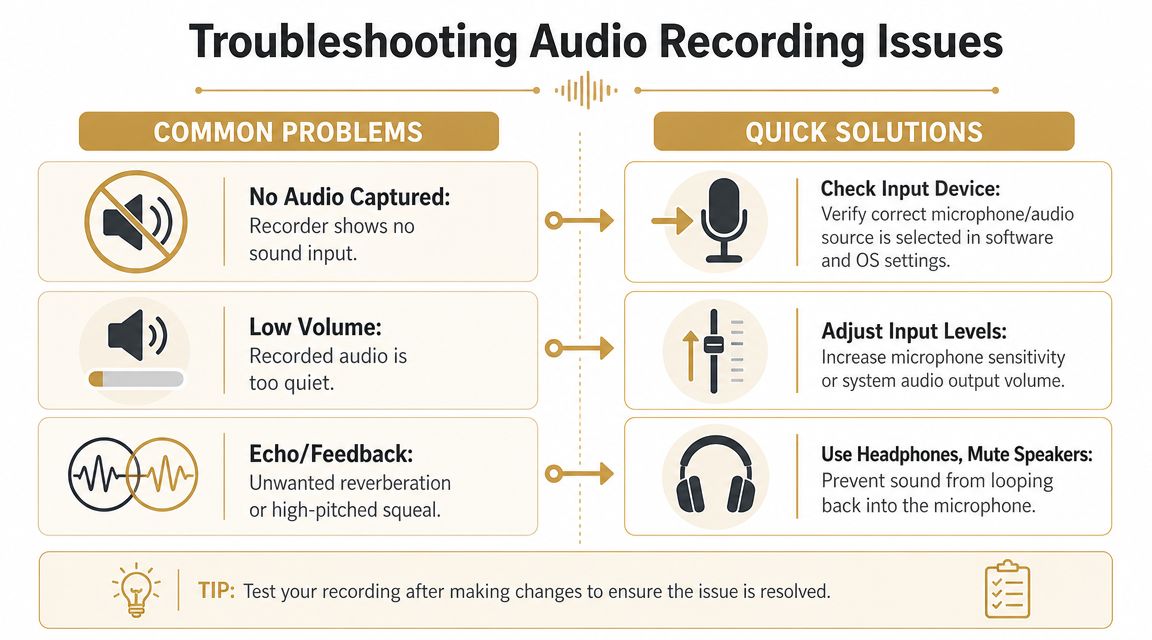
No system audio in the recording
Problem
The video looks perfect, your voice may be present, but app sounds, browser playback, or interface cues are missing.
Cause
Most often, the recorder is only receiving microphone input. In other cases, macOS permissions or app-level restrictions are involved. Some applications can block audio capture, and Google support has noted that many third-party tools can't capture audio from Meet sessions. That means the target app can be part of the problem, not just the recorder.
Solution
- Check macOS permissions. Open System Settings and review the app's access to screen recording and microphone input.
- Verify the selected audio source. Confirm that system audio is enabled in the recorder, not just the mic.
- Test with a known sound source. Use a browser video or a simple app sound you control.
- Rule out app restrictions. If one app won't expose audio but another does, the source app may be blocking capture.
If you need a focused walkthrough for this exact issue, this article on fixing screen recordings with no audio is a practical reference.
Voice is too quiet or distorted
Problem
Your narration is difficult to hear, or it breaks up when you speak normally.
Cause
Input gain is set poorly, the mic is too far away, or the room adds noise that forces aggressive level boosting later.
Solution
- Move the microphone closer before changing software settings.
- Lower gain if loud words crackle or smear.
- Raise gain gradually if the waveform is tiny and buried.
- Record with headphones on to catch buzz, hum, or room echo early.
Wear headphones while testing. They reveal hiss, distortion, and accidental speaker bleed much faster than laptop speakers do.
Audio and video feel out of sync
Problem
Clicks happen slightly before or after the visible interaction, or your spoken explanation feels detached from the action on screen.
Cause
Heavy system load, unstable monitoring, or a recording session that mixed too many tasks at once.
Solution
- Close unnecessary apps before recording long takes.
- Use one reliable input chain rather than switching devices mid-session.
- Record a short sync test with obvious click and voice cues.
- Edit with separated sources so small timing fixes don't damage the whole mix.
Most sync issues become manageable if the capture is organized. Most become painful if the entire audio bed is glued together.
Editing and Exporting for Your Use Case
The payoff for a disciplined recording setup appears in the edit. If you captured clean tracks, editing is straightforward. If you didn't, editing becomes repair work.
That's why an integrated workflow wins. You trim the false starts, cut dead air, rebalance narration against system sound, and move straight into export without shuttling files through separate capture, cleanup, and assembly tools. The more often your team produces product videos, the more that continuity matters.
Edit for clarity before style
Start by shaping comprehension, not decoration. Get the pacing right. Remove the pause before the feature appears. Trim cursor wandering. Lower system sounds under explanation. Mute any accidental notification or desk noise.
Only after that should you add optional polish such as background music, device framing, or motion treatments. A clean tutorial with balanced narration beats a visually flashy demo with muddy sound every time.
A simple editing order works well:
- Trim first so you're not mixing material that won't survive the cut.
- Balance narration and system audio before adding anything else.
- Check transitions between edits to make sure the audio bed doesn't jump unnaturally.
- Export a review copy and listen on speakers and headphones before final delivery.
Recommended export settings by use case
The right export depends on where the video will live and how people will consume it. Keep the decision practical.
| Use Case | Resolution | Audio Format | Key Considerations |
|---|---|---|---|
| Product demo for a landing page | High resolution suitable for desktop viewing | AAC or another broadly compatible export option | Prioritize crisp UI text, clear narration, and balanced system sound |
| App Store preview | Match the platform's visual requirements for the target asset | AAC or platform-compatible compressed audio | Keep pacing tight, remove unnecessary silence, and avoid cluttered mixes |
| Internal training video | Resolution that stays readable on laptops and shared screens | Broadly compatible export audio | Clarity matters more than cinematic polish. Voice should stay easy to understand for long sessions |
| Social cut-down from a longer screen recording | Vertical or square export if needed for the channel | Compressed, platform-friendly audio | Tight edits matter more than full interface context. Make captions and voice intelligibility the priority |
One more practical note matters here. Vendor guidance commonly describes screen recordings being saved in formats such as .webm or .mp4, and local saves in compatible formats can reduce export friction even though downstream editors may still prefer one format over another, as discussed in Microsoft Clipchamp's screen recorder documentation. The general lesson is simple: choose formats your editing and publishing stack already handles cleanly.
A professional screen recorder with audio should reduce handoffs, not create more of them. If your capture, timeline cleanup, audio balancing, and final export happen in one place, you save time on every single video and keep quality more consistent across the library.
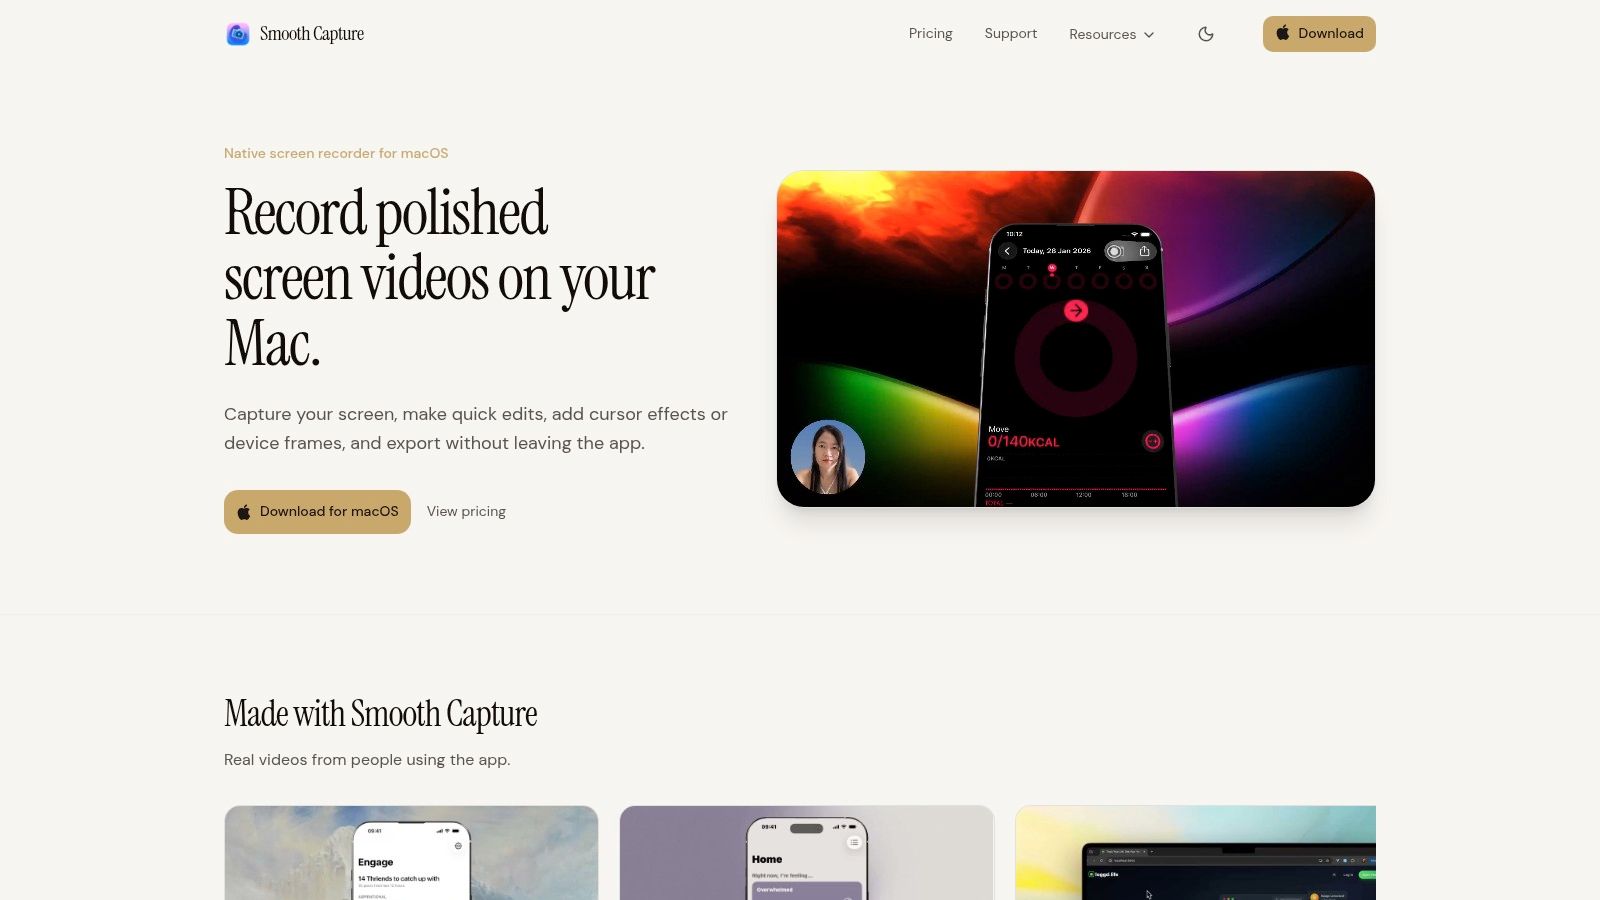
If you want that kind of production-ready workflow on macOS, Smooth Capture is built for it. It records screen, window, region, and connected iPhone or iPad sources, supports multiple audio tracks, and gives you a fast timeline for trimming, balancing, captioning, framing, and exporting polished demos without bouncing between separate tools.
Ready to create stunning app demos?
SmoothCapture makes it easy to record your screen with 3D device frames, cinematic cursor effects, and professional editing tools.