Screen Record for iPhone: Master Pro Videos
You’re usually in one of two situations when you need to screen record for iPhone. You need a quick clip right now, or you need a clean asset you won’t be embarrassed to publish later.
That distinction matters more than most tutorials admit. A bug report for a developer, a one-off support reply, or a fast walkthrough for a client can live happily inside Apple’s built-in recorder. An App Store preview, launch video, onboarding sequence, or reusable social asset usually can’t. The native tool is fast. A desktop capture workflow is controlled.
Table of Contents
- Why Screen Recording Your iPhone Is an Essential Skill
- Using the Built-In iPhone Screen Recorder
- Level Up Your Recordings with a Mac and USB Cable
- How to Include Your Microphone and Webcam
- Pro Tips for Editing and Exporting Your Recording
- From Simple Taps to Professional Demos
Why Screen Recording Your iPhone Is an Essential Skill
If you work with apps, support tickets, product marketing, training, or client communication, screen recording stops being a nice feature and becomes basic operational hygiene. A written explanation of a bug is often slow to parse. A short screen capture shows the tap path, the hesitation, the failure point, and the context in one pass.
That’s why knowing how to screen record for iPhone matters. It shortens feedback loops. It also removes the “I think this is what happened” problem that shows up in product reviews, internal QA, and customer education.
There are really two valid workflows, and each is right in different conditions.
| Use case | Best method | Why |
|---|---|---|
| Fast support clip | Native iPhone recorder | Minimal friction, no extra gear |
| Bug report | Native iPhone recorder | Quick capture beats perfect polish |
| Narrated internal demo | Native recorder or Mac | Depends on audio needs |
| App Store preview | Mac and USB workflow | Cleaner output and easier editing |
| Reusable onboarding asset | Mac and USB workflow | Better file handling and presentation |
| Social cut-downs | Usually Mac | Easier reframing and finishing |
Practical rule: If the recording will be watched once, optimize for speed. If it will be watched repeatedly, optimize for cleanliness.
That’s the decision filter I use. A disposable share should be easy to make and easy to send. A professional asset should start in a workflow that gives you cleaner capture, faster editing, and fewer things to fix later.
Using the Built-In iPhone Screen Recorder
You need to show a bug, capture a payment flow, or send a quick how-to to a teammate. In that moment, the built-in iPhone recorder is usually the right tool because it gets you from problem to shareable file with almost no setup.
Apple added native screen recording in iOS 11, which gave iPhone users a standard way to capture the screen without relying on third-party apps for basic recording.
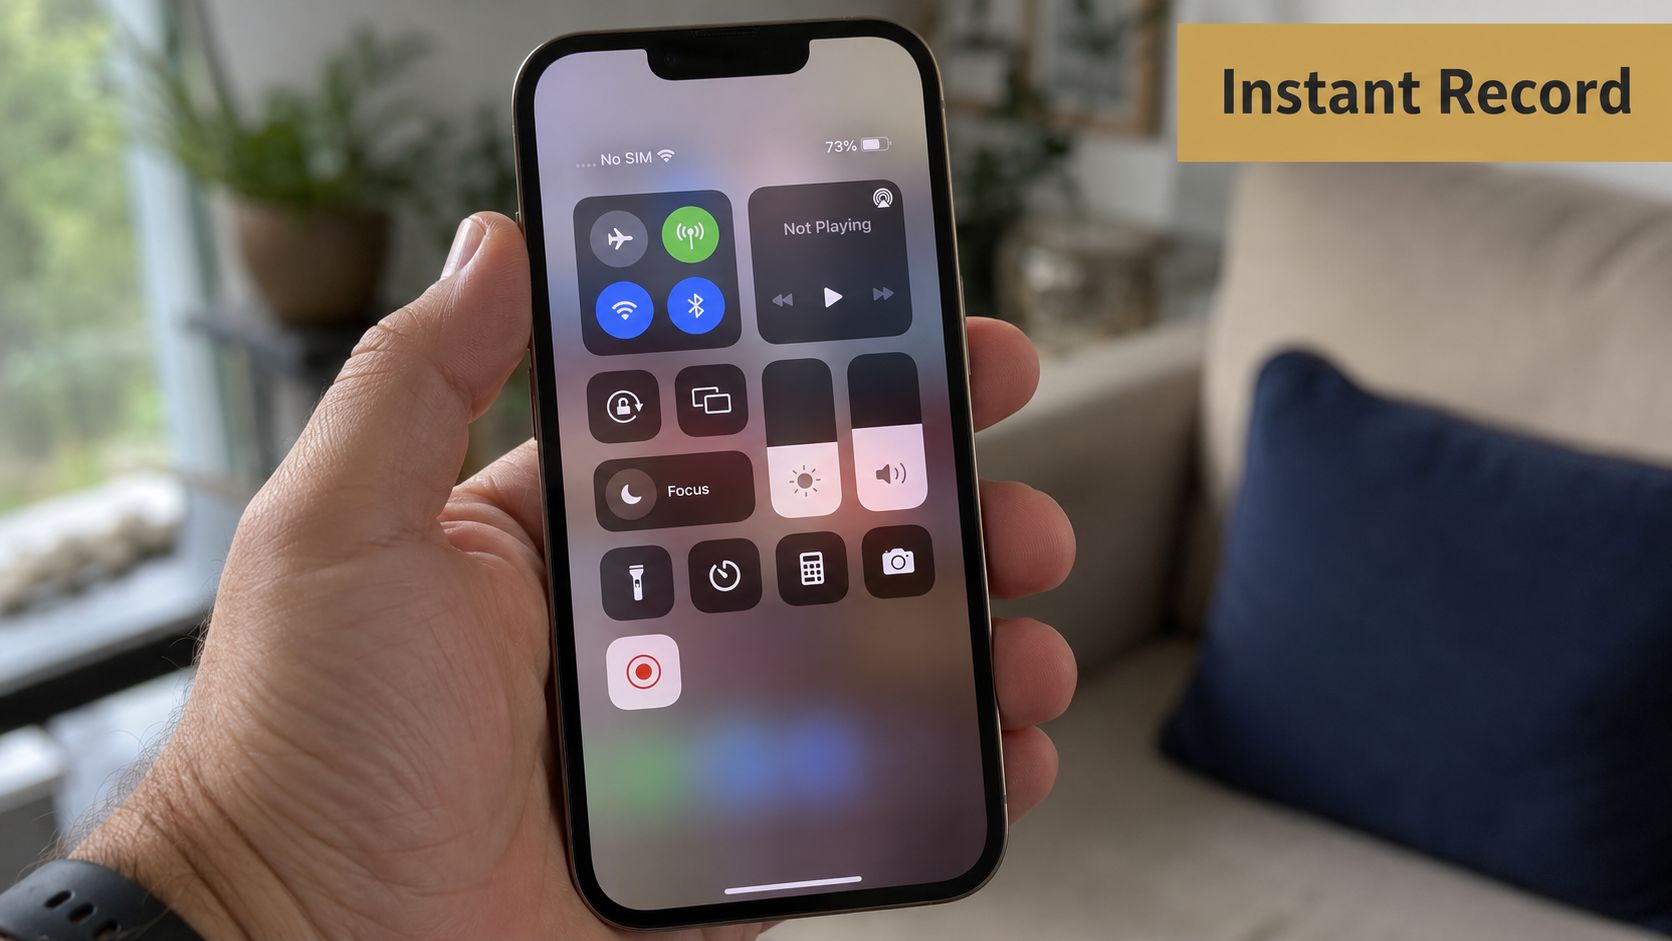
Set it up once in Control Center
If Screen Recording is not already in Control Center, go to Settings > Control Center and add it. After that, it is always one swipe away.
On Face ID iPhones, swipe down from the top-right corner to open Control Center. Tap the record button and iPhone gives you a short countdown before capture starts. That pause matters. It gives you time to close Control Center and land on the exact screen you want to record, instead of wasting the first few seconds of the clip.
Start with a clean plan
The native recorder works best when the goal is speed, not polish. I use it for bug reports, internal walkthroughs, and disposable shares where the value is in showing the exact tap path.
If you need narration, long-press the Screen Recording control before you begin and turn the microphone on. Missing that step is the fastest way to record a perfectly useful video with no context.
A simple sequence keeps the footage usable:
- Open the screen you want to show first. Do not make viewers watch setup you could have handled before recording.
- Open Control Center. Start from a known state.
- Long-press the record control if you need voiceover. Turn the microphone on before the countdown.
- Tap record and wait. Let the countdown finish.
- Move through the flow at a controlled pace. Deliberate taps are easier to follow and easier to edit around later.
Silent capture is fine for QA and support. It is much weaker for tutorials, stakeholder demos, or any clip that needs explanation.
If your team also needs to show an iPhone screen in a desktop workflow, this guide on sharing an iPhone screen on PC covers the options outside the native phone-only method.
If you want a visual walkthrough of the native process, this demo covers the basic on-device flow:
Stop, trim, and share
To stop recording, tap the red status indicator or reopen Control Center and tap the record control again. The file saves directly to Photos, which is why this method is so effective for fast communication. Record, trim the ends, send.
That convenience is also the trade-off. You are capturing and finishing on the device, so you have less control over presentation, file management, and post-production. For a support ticket, that is usually fine. For an App Store preview, sales demo, or reusable training asset, it starts to show.
Use the built-in recorder when these trade-offs fit the job:
- You need a fast share: No cable, desktop, or capture prep.
- The audience is internal: Product, QA, support, and client teams usually care more about accuracy than finish.
- You only need basic cleanup: A trim in Photos is often enough.
- You do not need production elements: No webcam overlay, no device framing, no timeline-heavy edit.
The short version is simple. If the recording is disposable, the native tool is usually the best choice. If the recording needs to hold up after repeated viewing, a desktop capture workflow gives you more control from the start.
Level Up Your Recordings with a Mac and USB Cable
You record a clean feature walkthrough on the phone, then lose time trimming in Photos, sending it to your Mac, renaming it, and dropping it into the edit. That friction is fine for a one-off share. It is wasteful when the clip is headed for an App Store preview, paid social cutdown, onboarding lesson, or sales demo.
A wired Mac workflow fixes that by putting the capture where post-production already happens.
Connect the iPhone to your Mac with a USB cable, open QuickTime Player, create a new movie recording, and switch the camera source to your iPhone. Record there instead of on the device. The file lands on the Mac, ready to label, sort, and move straight into your editor.
That one change affects the whole workflow. You are no longer treating the recording like a temporary clip that happens to be useful. You are capturing a production asset from the start.
I use this setup when the recording needs to survive more than one viewing.
Why producers still use a wired desktop workflow
The biggest advantage is control before editing begins. You capture directly into your working environment, which cuts out the usual handoff from Photos, AirDrop, or cloud storage. It also makes file management cleaner, especially if you are recording multiple takes for different aspect ratios, versions, or languages.
The visual result usually feels more deliberate too. Native iPhone captures are good, but they still belong to a phone-first workflow. A Mac capture fits better when the next step is Final Cut Pro, Premiere Pro, CapCut Desktop, or a motion graphics pass.
Teams that also need a Windows option can use a different setup. This guide on how to share an iPhone screen on PC covers that side of the workflow.
What this setup gives you that the phone alone does not
Here is the practical trade-off:
| Factor | Native iPhone recorder | Mac and USB workflow |
|---|---|---|
| Setup speed | Faster | Slower |
| File access | Saved to Photos | Saved directly on Mac |
| Best for quick shares | Yes | Usually overkill |
| Best for reusable assets | Limited | Stronger |
| Editing handoff | Extra step | Immediate |
| Overall presentation | Functional | Cleaner |
The Mac route is slower to start. You need a cable, a desk, and a machine nearby. For support clips, bug reports, and quick client answers, that setup cost can outweigh the benefit.
For polished output, it usually pays back fast. You save the file where the edit will happen, keep your takes organized, and avoid the casual feel that creeps in when the entire process starts and ends on the phone.
My rule is simple. If the recording is disposable, I stay on the iPhone. If it needs to look finished and hold up in repeated use, I capture on the Mac first.
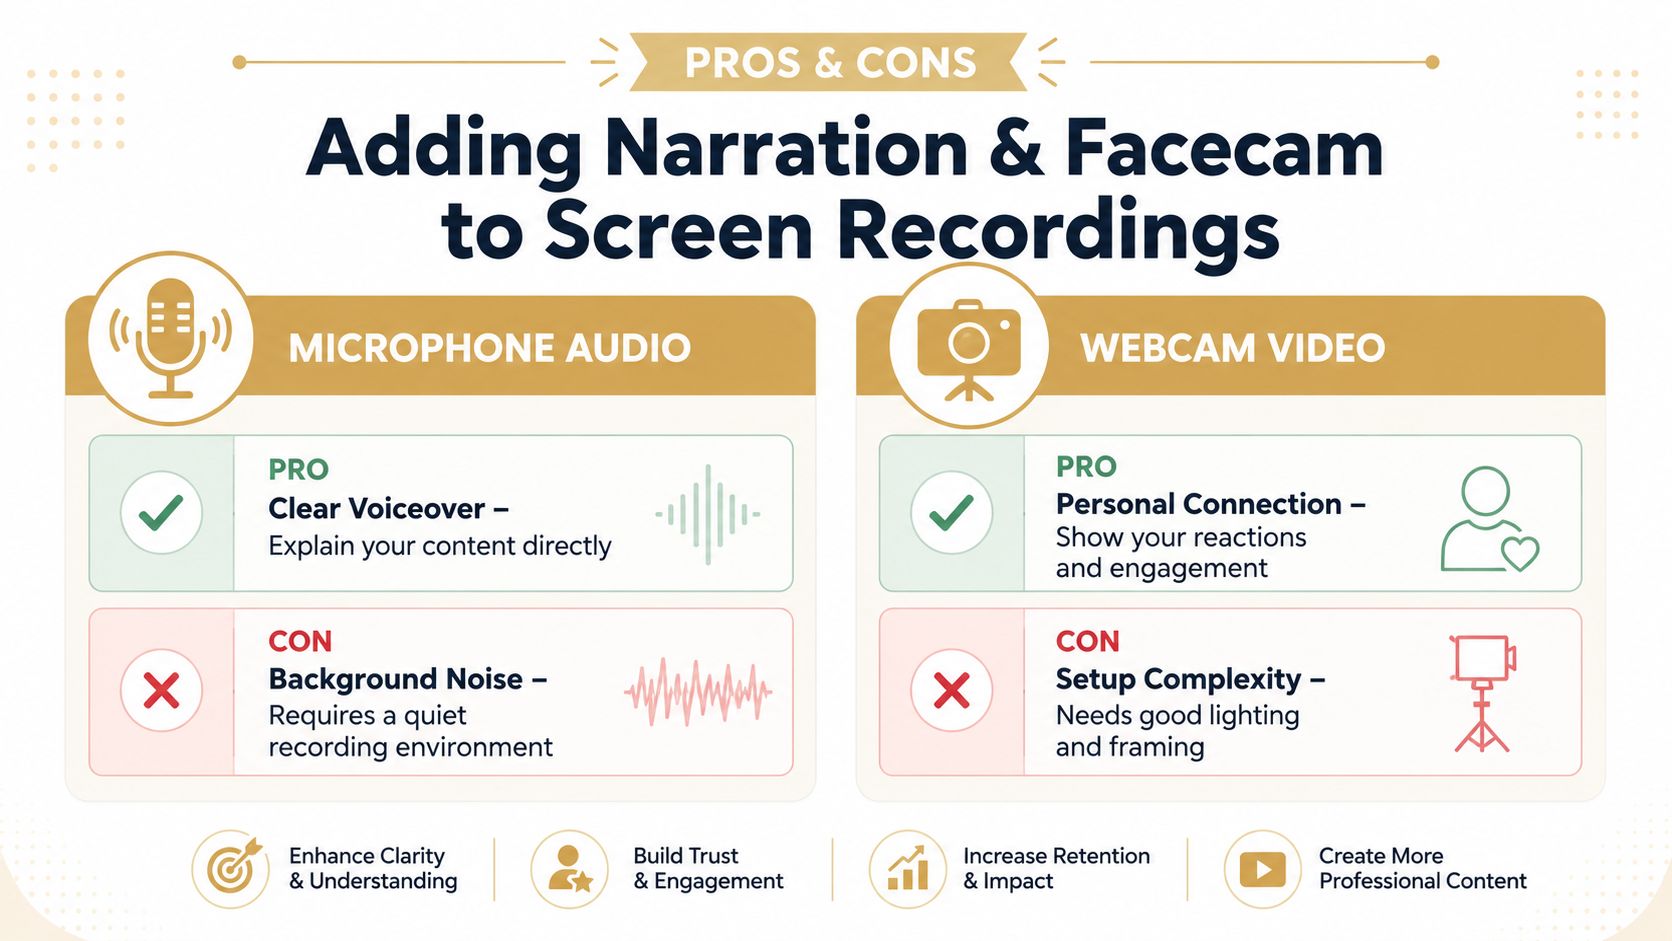
How to Include Your Microphone and Webcam
Screen recordings get better when a real person is present in them. Sometimes that means narration only. Sometimes it means a small facecam window that gives the viewer a guide to follow.
The right setup depends on what the viewer needs. For support and internal demos, voice is often enough. For tutorials, education, sales, and founder-led product demos, adding your face can improve trust and pacing.
When the built-in mic is enough
On iPhone, the simple route is still useful. Turn on the microphone before recording and speak clearly. This works well when you need fast commentary over a feature walkthrough or a quick explanation of a bug.
The drawback is consistency. Room noise, distance from the phone, and uneven volume can make the recording sound improvised, even when the visual side looks fine.
A practical threshold:
- Use the iPhone mic for short internal explainers, async team updates, and disposable walkthroughs.
- Avoid it when the recording needs polished narration, consistent tone, or repeat use.
- Record in a quiet room if you have no other option.
- Do a short test clip before the actual take.
When to move audio and camera work to the Mac
A Mac-based workflow gives you better choices. You can use a USB microphone, monitor levels more comfortably, and add a webcam or mirrorless camera feed as a picture-in-picture layer.
That changes the communication value of the recording. The viewer can hear emphasis, watch your reactions, and stay oriented during longer explanations. For education teams and product marketers, that often makes the difference between a clip that gets skimmed and one that gets watched.
If audio quality matters, a dedicated mic is the first upgrade I’d make. If you want to improve presence, add webcam second. If you want to experiment with using mobile hardware as part of your audio chain, this article on how to use an iPhone as a microphone for a computer is a useful starting point.
Better audio usually improves perceived production quality faster than better visuals do.
Keep the facecam small and intentional. A webcam overlay should support the screen, not compete with it.
Pro Tips for Editing and Exporting Your Recording
Most iPhone screen captures don’t fail because the recording feature failed. They fail because the operator left noise in the process. Notifications appear. The first seconds show setup fumbling. The last seconds show the stop gesture. Audio starts late. The result feels accidental.
Clean recording starts before you hit record
The best fix is prevention. Strong capture starts with a short checklist before you touch the record button.
Expert guidance recommends turning on Do Not Disturb or Focus to suppress notifications, then trimming in Photos right after capture to remove start and stop overhead, as explained in Loom’s guide to recording your screen on iPhone.
Use a simple preflight:
- Enable Focus mode: Prevent banners, message previews, and random interruptions.
- Clean the visible screen: Remove distracting badges, open tabs, or irrelevant apps.
- Plan the tap path: Know the sequence before recording.
- Check orientation: Don’t discover halfway through that you needed vertical instead of horizontal.
The fastest useful edit
For quick shares, editing in Photos is enough. Open the saved video, trim the start, trim the end, and remove the dead space around the action. That single step often turns a messy capture into something presentable.
For polished work, move to a desktop editor. On a Mac, you can cut pauses, tighten timing, add text, blur sensitive information, and reframe for multiple outputs without fighting the limitations of a phone screen.
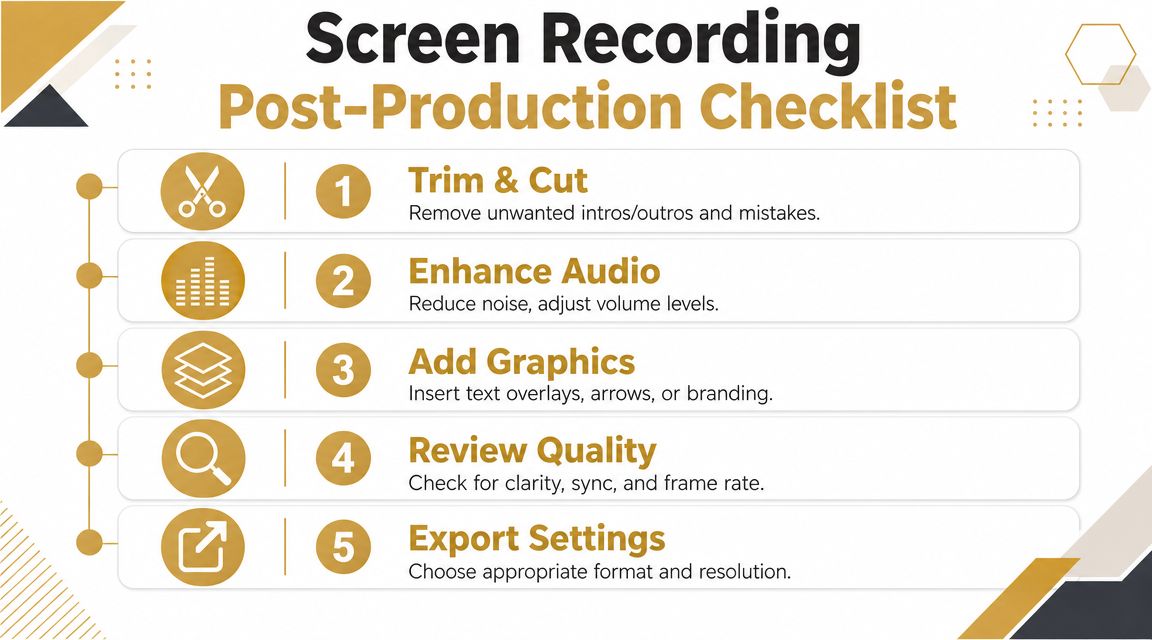
A good edit pass usually includes:
- Trim hard at the top. Remove countdown leftovers and entry hesitation.
- Trim the exit. Don’t let the viewer watch you stopping the recording.
- Fix the audio first. If the narration is uneven, the video will feel amateur fast.
- Add only useful graphics. Arrows, labels, and callouts should clarify, not decorate.
- Review once with sound on. Many weak exports are visually fine but sonically rough.
If the viewer can understand the action with the sound off, and understand the intent with the sound on, the recording is doing its job.
Export for the platform, not for your ego
A clean master file is nice. A fit-for-purpose export is better.
If the destination is social, design for the feed. Vertical framing, larger text, and tighter pacing usually beat wide desktop-style compositions. If the destination is product education, clarity wins over flashy motion. If the destination is a store listing or launch asset, every element should look deliberate, including framing, cropping, and timing.
That’s where many teams waste effort. They record once, export once, and expect the same file to work everywhere. It rarely does. The strongest workflow is to capture cleanly, make one solid master, then version it for where it’s going.
From Simple Taps to Professional Demos
The best way to screen record for iPhone depends on what the recording needs to become.
If it’s a disposable clip, use the native recorder. It’s built into iOS, quick to access, and good enough for support replies, internal demos, and bug reports. You can capture, trim, and send without opening a laptop.
If it’s a lasting asset, move upstream. A Mac and USB workflow gives you cleaner capture, faster file access, better editing control, and more room to shape the final piece for App Store previews, onboarding videos, and launch content. That’s also the point where editing discipline starts to matter more than recording itself.
If you’re turning screen captures into short-form social pieces, studying how editors pace visual beats, tighten openings, and cut for retention helps. A practical reference is Aicut’s shorts video edit techniques, especially when you’re adapting app demos into vertical content.
For teams that regularly ship walkthroughs and feature demos, it also helps to look at what separates a raw capture from a structured product video. This breakdown of a product demo video maker workflow is useful for thinking about repeatability, not just recording.
The short version is simple. Fast shares belong on the phone. Professional demos belong in a desktop workflow.
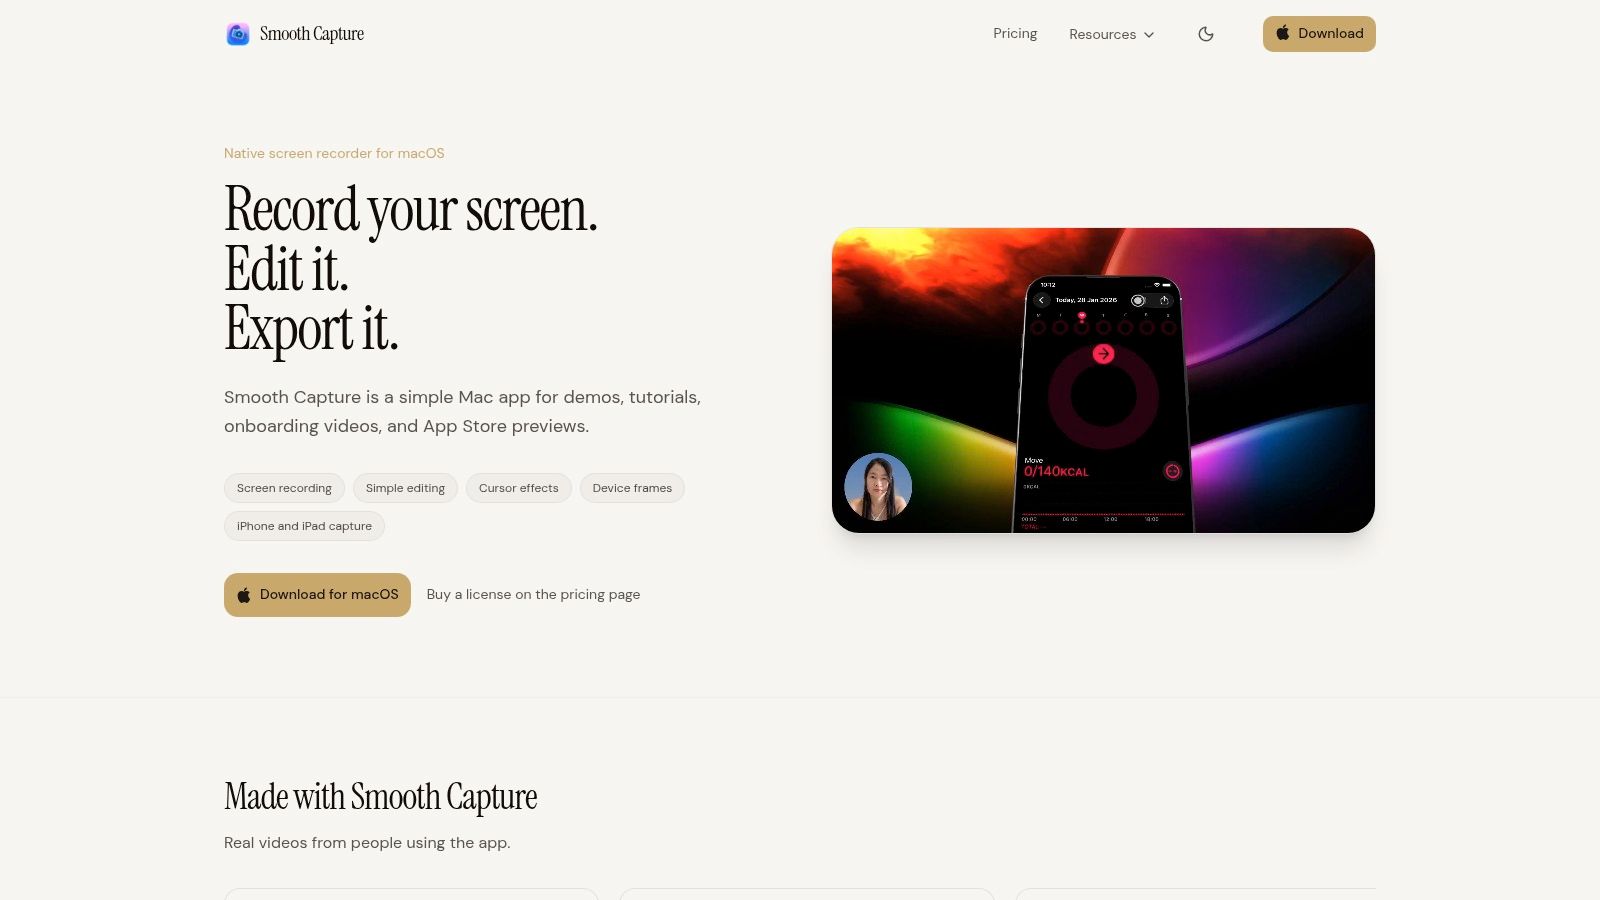
If screen recording has become part of your regular production work, Smooth Capture is worth a look. It’s built for creating polished Mac and iPhone recordings with cleaner editing, device framing, flexible layouts, and exports that are ready for demos, onboarding, social, and store assets.
Ready to create stunning app demos?
SmoothCapture makes it easy to record your screen with 3D device frames, cinematic cursor effects, and professional editing tools.