How to Add Music to Videos: Complete Guide 2026
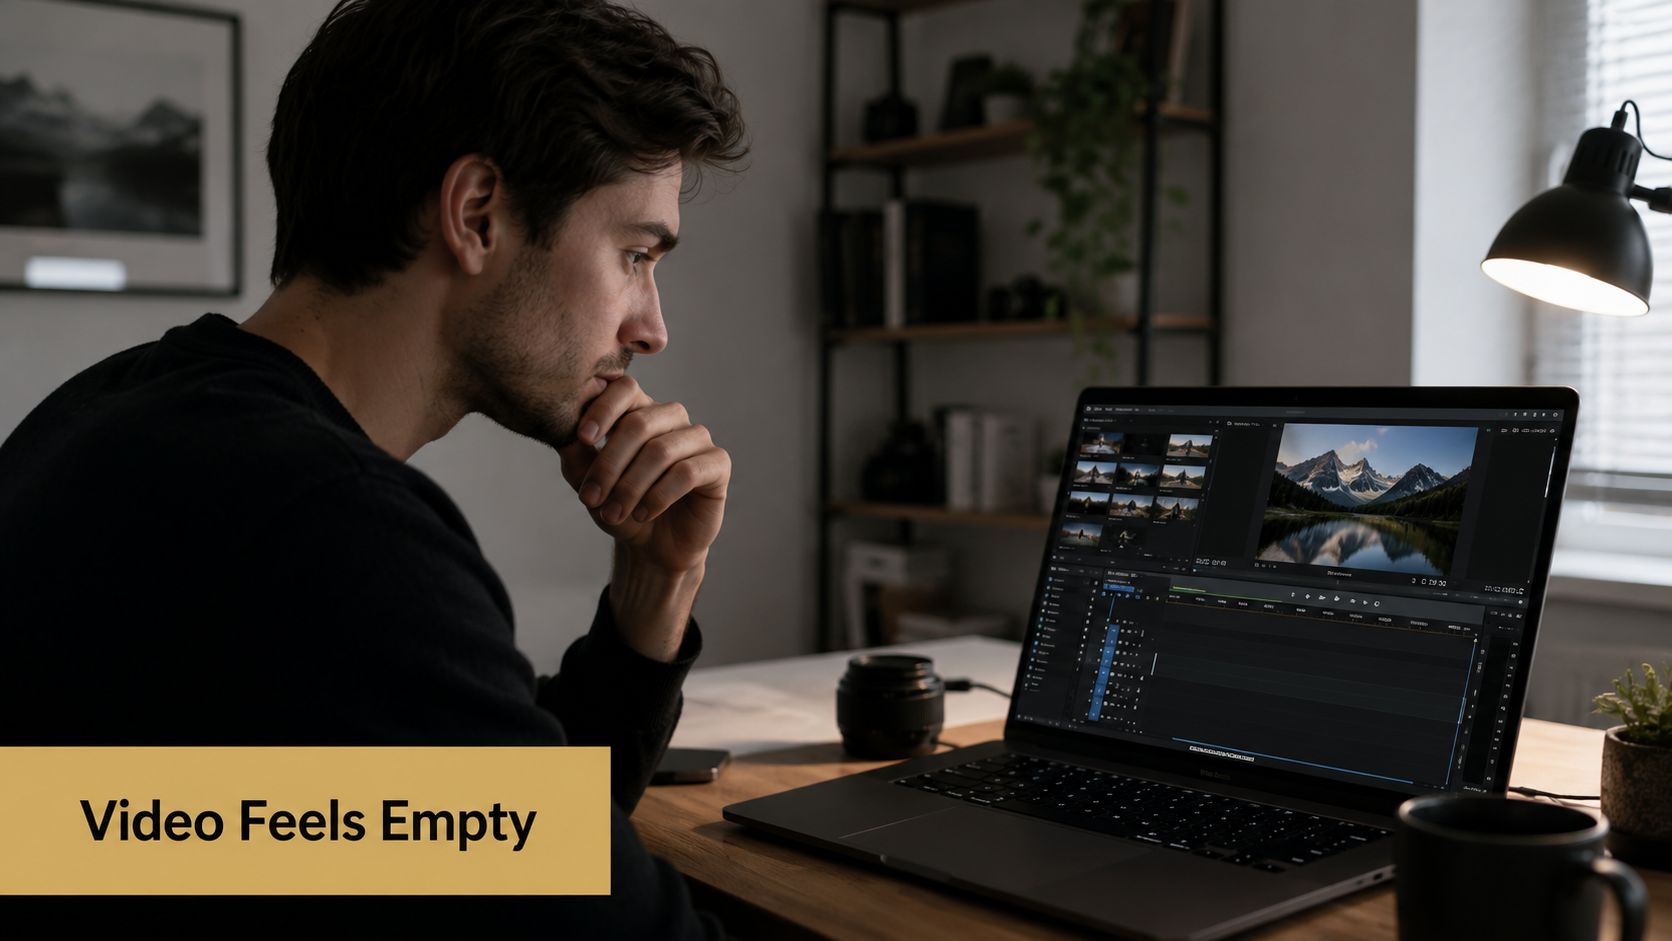
You've probably got a cut like this open right now. The screen capture is clean, the transitions are fine, the product flow makes sense, and the whole thing still feels flat. Most of the time, that's not a picture problem. It's a soundtrack problem.
Knowing how to add music to videos isn't just about dragging an MP3 under your footage and calling it done. For product demos, launch videos, tutorials, social cutdowns, and client-facing explainers, music affects pace, perceived polish, and whether the video feels intentional. It also creates one of the easiest places for teams to make legal mistakes, especially when the same asset ends up on YouTube, LinkedIn, paid social, a landing page, and inside a sales deck.
The practical job has two parts. First, choose and clear music you can use. Second, edit and mix it so the track supports the message instead of fighting it.
Table of Contents
- Why the Right Soundtrack Transforms Your Video
- Finding and Licensing Music for Commercial Use
- A Practical Workflow for Adding and Syncing Tracks
- Mixing Audio Levels for Professional Polish
- Polishing Your Soundtrack with Fades and Transitions
- Export Settings and Common Workflow Tips
Why the Right Soundtrack Transforms Your Video
A silent rough cut can be deceptive. It often looks finished because the visuals are there, but the pacing hasn't been tested yet. The moment you add music, weak transitions show up, pauses feel too long, and a product reveal either lands or misses.
Music changes the edit, not just the mood
Good editors don't treat music as wallpaper. They use it to define pacing, create structure, and smooth over cuts that would otherwise feel mechanical.
That matters even more now because music consumption and video consumption overlap heavily. A peer-reviewed study citing an IFPI report notes that 47% of all music streaming occurred on a video platform in 2019, which helps explain why soundtrack choices now affect more than atmosphere. They can shape attention and retention inside the viewing experience itself, framed in the study through Intention, Attention, Reaction, and Retention (music-video viewing research).
In practice, that means the track has a job to do:
- Set the opening expectation: The first seconds tell viewers whether the video feels premium, playful, serious, or fast-moving.
- Carry dead space: Music covers small pauses, mouse movement, and unavoidable visual transitions.
- Support memory: A consistent musical tone helps the whole piece feel unified, which is useful when a team turns one long demo into several shorter assets.
A weak edit sometimes improves with better music. A weak message rarely does. The soundtrack should support the point, not replace it.
A simple way to think about viewer response
The IARR model is useful because it matches how product teams make videos.
| Stage | What it looks like in a business video | What music can do |
|---|---|---|
| Intention | A viewer decides whether to start or keep watching | Signal tone fast |
| Attention | The viewer follows the feature walkthrough or story | Keep pace steady |
| Reaction | The reveal, payoff, or moment of clarity lands | Add lift without overpowering |
| Retention | The video stays memorable after it ends | Reinforce brand feel |
This is why learning how to add music to videos properly is a production skill, not a finishing touch. The best track doesn't just sound good on its own. It fits the edit, clears legally, and leaves enough room for the actual message.
Finding and Licensing Music for Commercial Use
Poorly trimming a song rarely causes issues. Trouble arises when a track is used without proper authorization for that specific context.
What teams usually get wrong about music rights
The common mistake is assuming that if a platform lets you add a song, you're covered everywhere. You usually aren't. A track that works inside one platform's built-in tools may not be cleared for paid ads, client deliverables, reposts, regional campaigns, or use outside that platform.
That's why licensing is the part most “how to add music to videos” guides skip. YouTube's help materials cover how to add and trim songs, but rights questions remain the operational issue for business teams. Copyright protects musical works, and permissions are needed for reuse (YouTube help on adding music).
Practical rule: “Royalty-free” doesn't mean free. It usually means you pay once for a defined set of usage rights instead of paying ongoing royalties for each use.
If your team also wants the artist-side view of placements, this sync licensing guide for artists is useful because it clarifies how songs get licensed into visual projects in the first place.
How to choose the right licensing path
Different projects need different buying behavior. A launch teaser for social isn't the same as a product film that will live on a homepage for a long time.
- Use a subscription library when your team publishes regularly and needs speed. This works well for tutorials, changelog videos, social snippets, and internal consistency.
- Buy a single license from a marketplace when one campaign needs a specific track and you want clear paperwork tied to one asset or one client.
- Commission custom music when the video is central to your brand and you don't want to hear the same track in someone else's ad or demo.
A simple internal intake form helps. Before anyone downloads music, ask these questions:
| Question | Why it matters |
|---|---|
| Where will this video be published? | Rights often depend on channel and distribution type |
| Is the video organic, paid, or both? | Paid usage can require broader clearance |
| Will clients, resellers, or regional teams reuse it? | Reuse often creates licensing surprises |
| Do you need exclusivity? | Library music rarely gives you that |
| How long will the asset stay live? | Some licenses are tied to term or campaign scope |
For teams pulling source material from online audio platforms, this guide on recording YouTube Music for editing review workflows is a useful reminder to separate review and reference from actual licensed use. Reference audio is not the same as cleared commercial audio.
Terms worth understanding before you download anything
Royalty-free is usually the easiest category for business teams, but only if you read the actual license. Some libraries allow broad commercial use. Others carve out paid media, broadcast-style placements, or redistribution.
Creative Commons can be workable for some noncommercial or attribution-based scenarios, but it often creates friction for business assets. If legal review is already busy, Creative Commons can become more trouble than it's worth.
Public domain is the cleanest in theory, but you still need to verify what is in the public domain. A composition and a specific recording aren't always the same thing.
When rights are unclear, skip the track. No edit is good enough to justify a future takedown, replacement rush, or awkward conversation with a client.
A Practical Workflow for Adding and Syncing Tracks
Once you've cleared the music, the edit itself should be boring in the best way. Reliable workflow beats clever improvisation.
A standard timeline-based method works across modern editors. Put the soundtrack on its own audio track, align it to the playhead, trim the clip, set clear start and end points, and adjust volume so it doesn't bury speech. That workflow is described consistently across common tools and is a dependable baseline for real production (timeline workflow reference).
Build the soundtrack on its own lane
Start with picture lock or something close to it. If the visual structure is still changing every few minutes, don't spend time on detailed music edits yet.
Then work in this order:
- Import the track cleanly: Use the highest-quality file you have access to under the license terms.
- Place it on a dedicated music track: Never bury music inside a mixed screen recording or a flattened audio file.
- Find the usable section first: Don't assume the beginning of the song is the right beginning for your video.
- Trim hard before you finesse: Get the rough in and out points in place before adjusting tiny beats.
- Leave your dialogue lane separate: Voiceover, effects, and music should stay independently adjustable.
A lot of rushed edits go wrong. Editors often drag in a song, leave it full length, lower the gain a bit, and move on. The result feels random because the arrangement of the music wasn't chosen to fit the structure of the video.
Sync music to moments that matter
You only need a few sync points for the video to feel intentional. Don't try to hit every beat.
The moments worth aligning are usually:
- The open: Start on a clean downbeat or a musical rise.
- Feature reveals: Match a beat, change, or accent to a key visual.
- Section transitions: Let the arrangement shift when the scene or message shifts.
- The close: End on a resolved phrase, not in the middle of a bar if you can avoid it.
Mark major beats with timeline markers before you start slicing. That gives you visual targets and stops you from nudging clips at random.
If you want a deeper breakdown of timing logic, this guide on how to sync audio and video perfectly is a solid companion to the hands-on edit.
When you need a quick visual example of pacing and placement, this walkthrough helps:
A final production note: use the strongest section of the track early. Most business videos don't earn a long ambient intro.
Mixing Audio Levels for Professional Polish
The fastest way to make a polished video feel amateur is to let the music fight the voiceover.
Set an audio hierarchy first
Every edit needs a clear priority order. For most business videos, it's simple: dialogue first, then essential sound effects, then music.
That hierarchy matters because music can be the hook, especially in short-form environments. Dac Group cites a MusicWatch statistic showing that 68% of social media users discover new music through short-form video content, which is a strong reminder that music affects mood, discoverability, and shareability at the same time (short-form music discovery context).
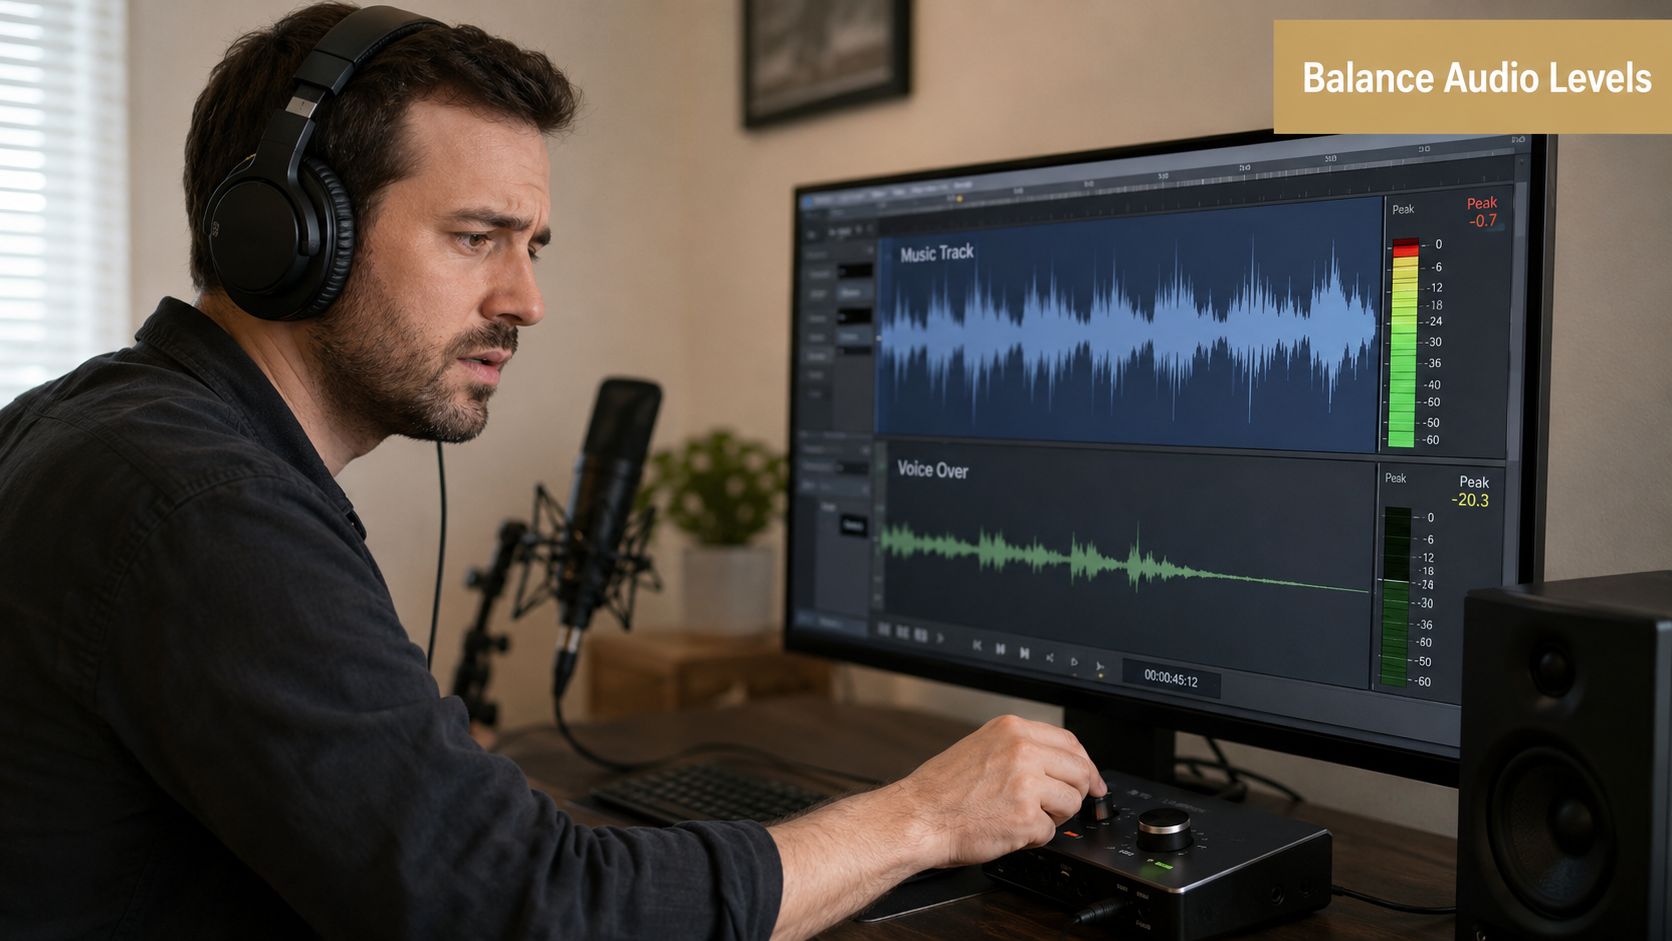
A good starting point for spoken-word videos:
| Element | Starting range |
|---|---|
| Voiceover or dialogue | 0 to -3 dB |
| Background music under speech | -6 to -12 dB |
| Music in intros, outros, or silent sections | Raise by ear, then check for clipping |
Those are starting targets, not laws. A dense track with vocals may need to sit lower than a non-vocal track.
Use ducking and keyframes instead of one fixed volume
Static volume is rarely enough. The right level in the intro is often the wrong level once someone starts speaking.
Audio ducking solves that. You lower the music automatically or manually when speech begins, then let it rise between phrases or in nonverbal sections. Most editors offer some version of this. If yours doesn't, keyframes do the same job with more control.
A practical approach:
- Pull music down before speech starts: Don't wait until the first spoken word is already masked.
- Raise it gradually in pauses: Small lifts keep the track alive without sounding obvious.
- Reduce busy frequencies if needed: Sometimes the problem isn't volume. It's a piano, guitar, or synth fighting the voice.
- Check transitions between speaking and silence: Fast jumps in level call attention to the edit.
For cleaner spoken tracks before you mix against music, this guide on removing background noise from recordings is worth keeping in the workflow. Music won't hide bad dialogue nearly as well as people think.
If viewers have to strain to understand one sentence, the soundtrack is too loud, too busy, or both.
Check the track on bad speakers before export
Studio headphones can fool you. Laptop speakers, cheap earbuds, and a phone speaker are better tests for business video because that's how many people will hear it.
Listen for three things:
- Does the voice stay intelligible at low volume?
- Does the bass vanish or become muddy?
- Do cymbals, claps, or bright synths make the mix feel harsh?
If the answer is yes to the last one, the fix is often subtraction, not more loudness.
Polishing Your Soundtrack with Fades and Transitions
The last layer of audio work is where the edit starts feeling deliberate instead of assembled.
Clean transitions hide rough edits
Hard cuts in music are useful when you want impact. They're distracting when they happen because the track was trimmed carelessly.
The easiest polish move is a short fade in and fade out at every obvious music boundary. That removes clicks, softens abrupt entries, and makes even a simple edit feel more finished. If you're combining two tracks, use a crossfade rather than butting one waveform directly against another.
A common product-video scenario looks like this:
- A brighter track opens the video while the title card and first interface shots appear.
- The edit shifts into a denser walkthrough with spoken explanation.
- A subtler bed replaces the intro track underneath the main demo.
- The outro returns to a stronger musical phrase to close.
Without fades and overlap, that structure feels stitched together. With them, it feels scored.
Use J-cuts and L-cuts when the picture changes faster than the mood
These are film-editing terms, but they're useful in software demos too.
A J-cut brings in the next audio element before the visual cut happens. An L-cut lets the current audio continue after the picture changes. Both help when the viewer needs continuity across quick interface changes, scene swaps, or chapter breaks.
For example, if you cut from a talking-head intro to a screen recording, letting the music or voice carry slightly across the edit keeps the transition from feeling abrupt. If you switch from one product area to another, introducing the next music layer just before the visual change can make the move feel intentional.
A polished soundtrack doesn't call attention to itself at every cut. It helps the viewer move through the edit without noticing the seams.
Small effects go further than dramatic ones
Subtle processing is usually enough:
- A light reverb on dry voiceover can add a bit of richness if the original recording feels too flat.
- A low-pass filter can help create a brief “through-the-wall” or muted transition effect.
- A short riser or whoosh can support a reveal if the visual moment needs extra lift.
The mistake is stacking effects because the timeline feels empty. If the video already has clear narration and strong visuals, the soundtrack should stay restrained.
Export Settings and Common Workflow Tips
Export is where careful editing can still fall apart. Wrong settings, clipping, or a sync issue can undo a good mix fast.
Safe export settings for most business videos
For general web delivery, a simple setup works well:
| Setting | Recommended choice |
|---|---|
| Audio codec | AAC |
| Sample rate | 48 kHz |
| Bitrate | 192 to 320 kbps |
| Channels | Stereo |
These settings are widely accepted and keep quality high without making files unnecessarily heavy. If the final file is too large for distribution, compress the video after export rather than crushing the audio too aggressively. This guide on compressing video on Mac without wrecking quality is a practical follow-up when delivery size becomes the constraint.
If you're exporting versions for YouTube, LinkedIn, Instagram, and a landing page, render from one approved master timeline. Don't keep making platform versions from different project branches unless there's a reason.
Common audio problems and the likely fix
Here's the troubleshooting table I use most often:
| Problem | Likely cause | Fix |
|---|---|---|
| Music feels late or early | Track placed visually, not rhythmically | Align to beats and key moments, not just clip edges |
| Audio drifts out of sync over time | Frame rate or source mismatch | Recheck timeline settings and source interpretation |
| Voice sounds buried | Music too loud or too dense | Lower music, use ducking, or swap the track |
| Mix distorts on export | Clipping in master output | Reduce gain before export and watch peak levels |
| Transitions feel awkward | No fades or poor phrase selection | Add fades and cut on musical structure |
| Track feels generic | Song chosen for convenience, not fit | Recut with a track that matches the message |
A lot of teams try to rescue a bad soundtrack with more automation. Usually the fix is simpler. Pick a better segment, lower the music, and cut on cleaner musical phrases.
Team workflow habits that prevent rework
Teams that produce video regularly need repeatable rules, not one-off heroics.
- Keep a licensed music library with notes: Store license documents, usage scope, and renewal details where editors can find them.
- Name tracks by mood and use case: “Upbeat corporate 01” is less helpful than “light tech, clean intro, no vocals.”
- Approve a small shortlist of brand-safe music styles: This speeds review and makes your catalog feel coherent.
- Save mix templates: If your team makes the same kind of demo every week, don't rebuild routing and level structure every time.
- Export a clean master plus platform variants: That makes future edits, language versions, and cutdowns easier.
The best workflow for how to add music to videos is the one your team can repeat without guessing. Clear rights, separate tracks, deliberate sync, controlled levels, and clean exports will get you there much faster than chasing flashy tricks.
If your team records and edits product videos on Mac regularly, Smooth Capture is built for exactly that workflow. It combines recording and timeline editing in one native app, with multi-track audio control, fast trimming and keyframing, polished device framing, cursor effects, subtitles, and export options that fit launch videos, tutorials, and social cutdowns without a bloated post-production process.
Ready to create stunning app demos?
SmoothCapture makes it easy to record your screen with 3D device frames, cinematic cursor effects, and professional editing tools.