Master record computer sounds mac in 2026
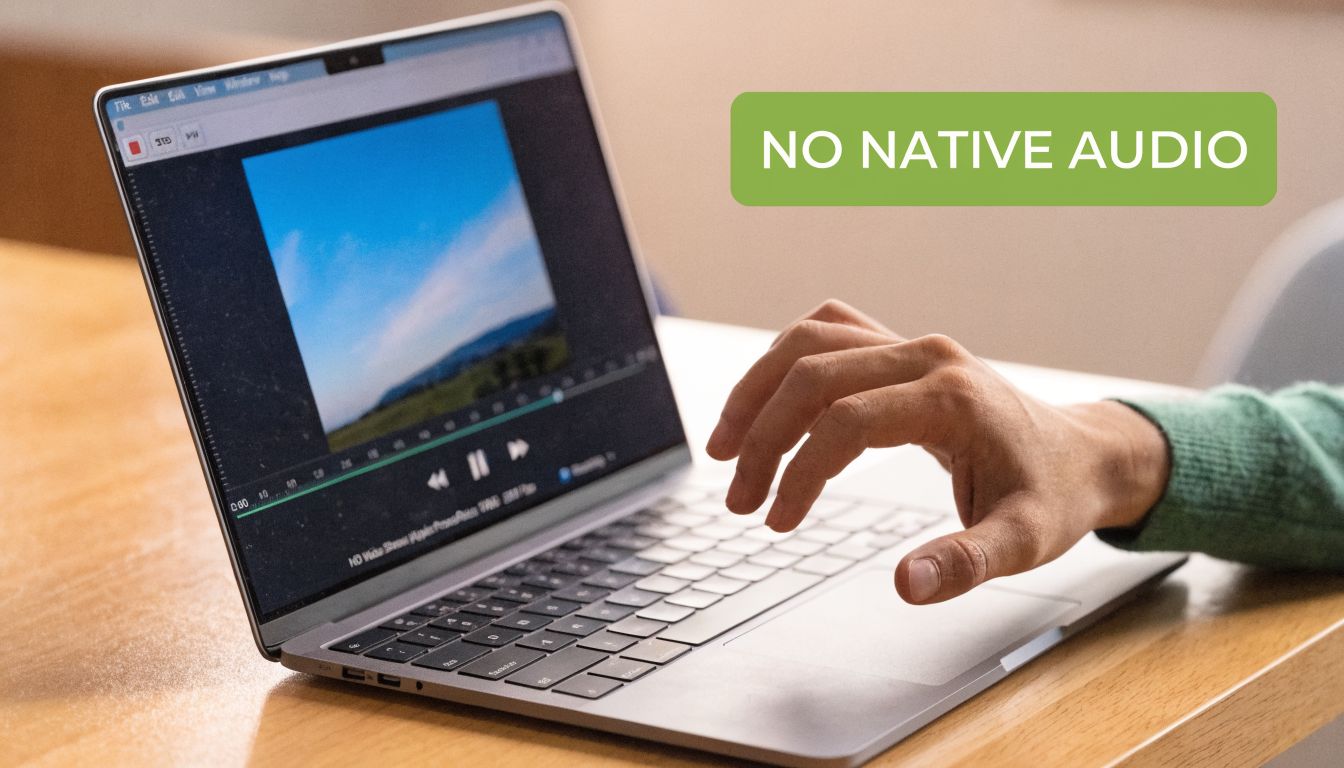
You're probably here because you hit Record on a Mac, played a demo, a webinar clip, or app sound, and ended up with silent footage. That's the classic Mac audio trap. QuickTime records the screen just fine, but the computer audio you needed never makes it into the file.
If you only need a one-off capture, there is a free workaround. If you record demos, onboarding videos, support walkthroughs, or launch assets every week, that workaround gets old fast. The choice is often free but fragile versus paid but professional. That's the lens that makes the whole problem easier to solve.
Table of Contents
- Why You Cannot Natively Record Computer Sounds on a Mac
- The Free Workaround Using a Virtual Audio Driver
- Recording System Audio and Your Microphone Together
- The Professional Solution for Flawless Audio Capture
- Troubleshooting Common Audio Recording Issues
- FAQ Recording Computer Sounds on Mac
Why You Cannot Natively Record Computer Sounds on a Mac
The frustrating part is that nothing looks broken. You open QuickTime or the Screenshot toolbar, start a recording, and assume the sound coming from your Mac will be included. Then you play the file back and hear nothing except your microphone, or nothing at all.
That happens because macOS does not natively expose internal system audio as a simple recordable source. According to this breakdown of Mac internal audio limits, Apple has enforced that restriction since at least macOS 10.5 Leopard in 2007 as part of a security and privacy model meant to reduce malware risks and unauthorized surveillance.
Why Apple made it hard
On Windows, people are used to options like stereo mix or loopback-style capture. On macOS, Apple chose a more locked-down model for internal audio routing. The result is simple for Apple, but annoying for creators. Apps can't just grab another app's output without extra routing.
That's why searching for record computer sounds mac usually leads to weird-sounding instructions involving virtual drivers, Audio MIDI Setup, aggregate devices, and output rerouting. It isn't a hidden checkbox you missed. It's a platform limitation.
Practical rule: If your Mac recorder only shows microphone inputs, it will not capture app audio by itself.
What this means in daily work
For a casual clip, this is just irritating. For business recording, it becomes a workflow problem. Product marketers need clean app sound for launch videos. Support teams need repeatable capture for help docs. Customer education teams need system audio and voiceover that stay editable.
If you've ever wondered why some tools can record tab or app sound and others can't, that difference usually comes down to whether the app built a proper audio-routing layer around macOS's limitation.
If you want a short explanation of what screen recording does and doesn't pick up by default, this guide on whether screen recording records audio is a useful companion.
The Free Workaround Using a Virtual Audio Driver
A common real-world scenario goes like this. You need to record a product demo in 10 minutes, the app audio sounds fine through your speakers, then QuickTime captures silence. On Mac, the usual free fix is BlackHole. It can do the job, but it asks you to reroute audio at the system level and keep track of settings that are easy to disturb.
How the BlackHole method works
BlackHole creates a virtual audio device that your Mac can send sound into. Your recording app then sees that routed sound as an input source.
To make the setup usable, you also need a Multi-Output Device in Audio MIDI Setup. That lets macOS send audio to BlackHole for recording and to your speakers or headphones for monitoring at the same time. Skip that step and the recording may still work, but your Mac often appears to go silent, which is why many first attempts feel broken.
Step by step setup
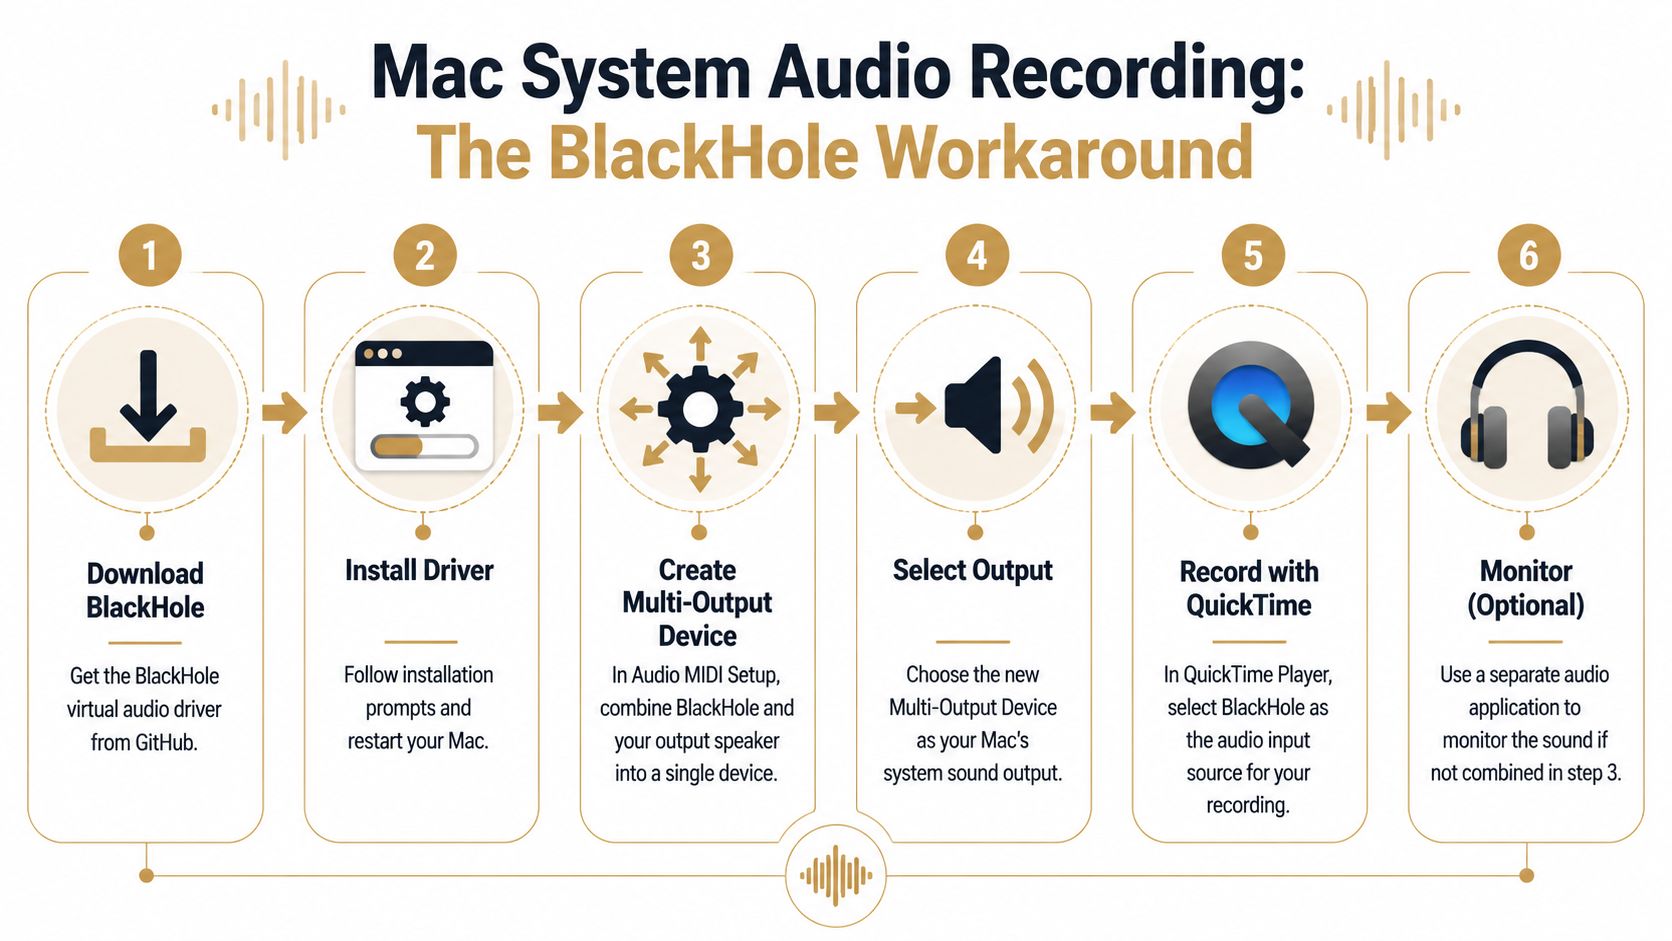
Install BlackHole
Download the version you want and finish the installation.Open Audio MIDI Setup
Go to Applications > Utilities.Create a Multi-Output Device
Click the plus button, choose Multi-Output Device, then check both BlackHole and your normal output, such as MacBook speakers, AirPods, or an external interface.Turn on Drift Correction for the non-clock-source device
This setting is easy to miss and often causes sync problems during longer recordings. In many BlackHole setups, enabling Drift Correction on the device that is not the clock source helps keep monitoring and recorded audio aligned.
If audio starts in sync and drifts later, check Drift Correction before changing anything else.
Set macOS output to the Multi-Output Device
Open System Settings > Sound and choose the new Multi-Output Device as your output.Select BlackHole in your recording app
In QuickTime Player, start a new audio or screen recording and choose BlackHole 2ch as the microphone or input source.Set monitoring volume before you record
Volume controls often become less convenient once the Multi-Output Device is active, especially with certain headphones and interfaces.
What works and what usually goes wrong
BlackHole is popular for a reason. It is free, widely used, and good enough for occasional recording. For solo creators who do not mind tinkering, it can save money.
It also breaks the flow fast.
The friction usually shows up in the same places:
- No live monitoring: audio is being routed correctly, but you forgot to include your speakers or headphones in the Multi-Output Device.
- Wrong input selected: the recorder is still listening to the built-in microphone instead of BlackHole.
- Unexpected echo or room noise: the app is capturing your mic along with system audio.
- Output settings changed by another app or device: plugging in headphones, switching to Bluetooth, or opening conferencing software can alter the route you just configured.
- macOS updates or permission resets: a setup that worked last month may need to be checked again before an important session.
That is the trade-off. The free path costs time, attention, and a little trust every time you press Record. For internal training clips, that may be acceptable. For client demos, sales walkthroughs, support libraries, or any repeatable business workflow, it is a fragile foundation.
If you are comparing free options first, this guide to the best free screen recorder for Mac gives a useful overview of where no-cost tools help and where they start to slow teams down.
Recording System Audio and Your Microphone Together
Recording system sound alone is only half the job. Frequently, the app audio and a voiceover are needed in the same session. That's where the free setup gets more technical.
The Multi-Output Device helps you hear system sound while routing it. It does not automatically create a clean input that combines your microphone and computer audio as is often expected.
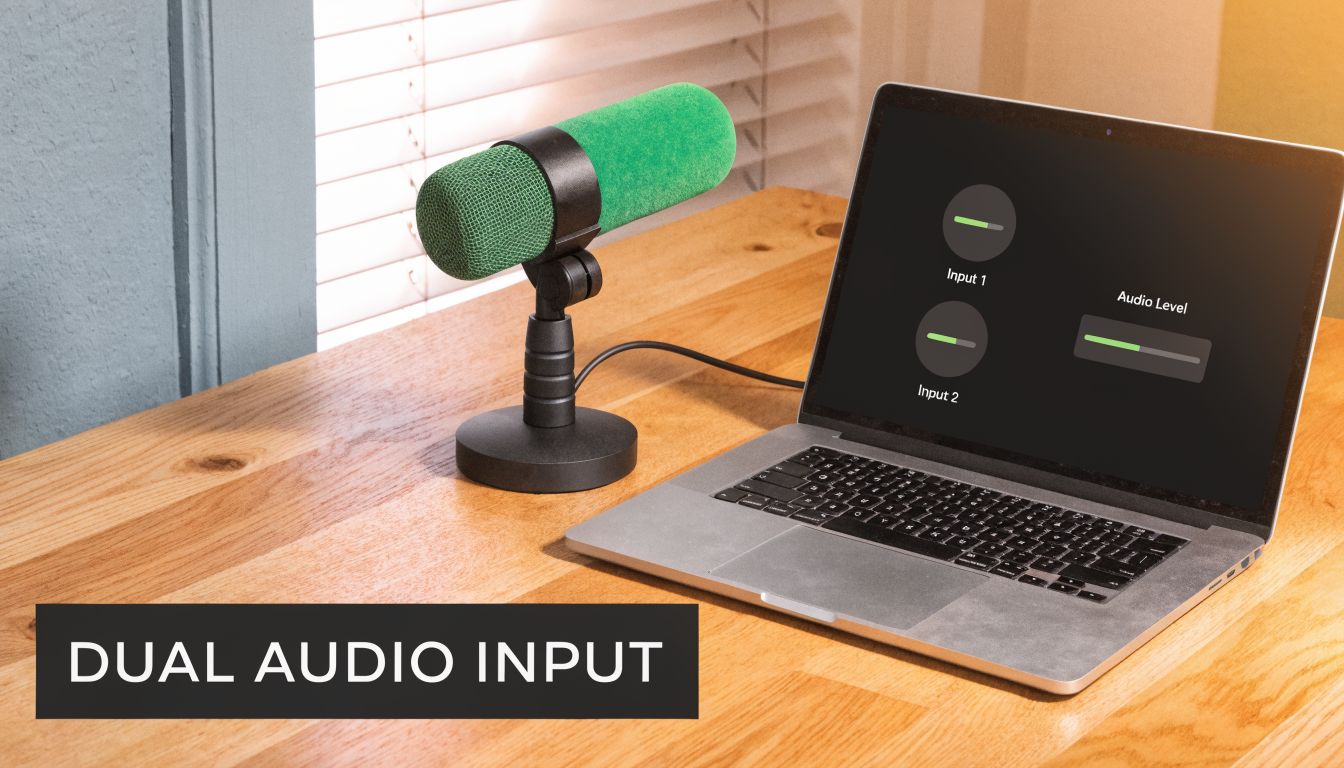
Use an Aggregate Device for combined input
In Audio MIDI Setup, create an Aggregate Device. This is different from the Multi-Output Device.
The idea is simple:
- BlackHole carries the system audio
- Your USB mic or built-in mic carries your voice
- The Aggregate Device combines both so one recording app can see them together
Basic setup flow
- Open Audio MIDI Setup
- Click the plus button
- Choose Create Aggregate Device
- Check BlackHole and your microphone
- Rename the device so you can spot it quickly in apps
- Select that Aggregate Device as the input in your recording software
This gives you one selectable input source. It does not automatically guarantee beautiful editing flexibility later.
The free method can capture both sources, but getting them as clean, separate, easy-to-edit tracks is where most setups start to feel improvised.
The real limitation for editors
For polished work, teams usually want system audio and microphone audio on separate editable tracks. That way you can lower app sound under speech, cut mouth noise from the mic, or replace a bad narration section without touching the product audio.
That's the gap most free tutorials skip. They show how to get sound into the recording, but not how to structure it for editing. In practice, that's the difference between “I captured it” and “I can ship this.”
You can make the BlackHole approach more advanced with multi-channel routing, but it's not the kind of setup people typically want to rebuild every time a Mac gets updated or a mic changes.
The Professional Solution for Flawless Audio Capture
A client call starts in five minutes. You need to record a polished demo with product audio, your voice, and clean tracks for editing later. That is the moment the free setup stops feeling free.
For business use, the primary concern is reliability. A virtual driver can work. It can also fail after a permission reset, a device change, or a macOS update. A native recorder built for Mac removes that dependency and gives you a repeatable process your team can trust.
What separates a business setup from a hobby setup
The gap is not just setup time. It is what you get at the end of the recording.
Business teams usually need system audio and microphone audio in a form they can edit. Product marketers need to lower app audio under narration. Support teams need to replace one spoken line without touching the software sound. Trainers need a clean file for captions, exports, and revisions. The Apple Discussions thread on separate internal audio and mic capture limitations on Mac reflects that same frustration. macOS does not give people a simple built-in path for clean internal audio capture with separate voice handling.
That is where the free-but-fragile route starts to show its limits. BlackHole can get audio into the recording. It does not give business users a dependable, low-maintenance workflow.
Comparing Mac audio recording methods
| Method | Setup Effort | Records Mic + System Separately? | Reliability | Best For |
|---|---|---|---|---|
| QuickTime | Low | No | Low for internal audio capture | Mic-only captures, basic recordings |
| BlackHole + QuickTime | High | Not easily | Mixed | One-off free workaround |
| Native paid recorder with built-in editing | Low to moderate | Yes, in a workflow designed for editing | High | Business videos, repeatable team workflows |
That is why paid native apps make sense for onboarding videos, product walkthroughs, training libraries, and sales demos. The cost is usually lower than the time lost rebuilding audio routing, re-recording failed takes, or fixing a file where the mic and app audio were merged too early.
I have used both approaches on Mac. The free method is fine for occasional personal use if you are willing to babysit the setup. For client work or internal production, I want one recorder that opens, captures system sound correctly, keeps the mic separate, and does not require Audio MIDI Setup every time.
Why integrated capture changes the workflow
A professional Mac recorder should handle four jobs well:
- Capture internal audio without a virtual driver
- Record microphone audio cleanly
- Keep tracks editable after recording
- Let you trim and clean up the result without exporting into another app first
That last point matters more than many guides admit.
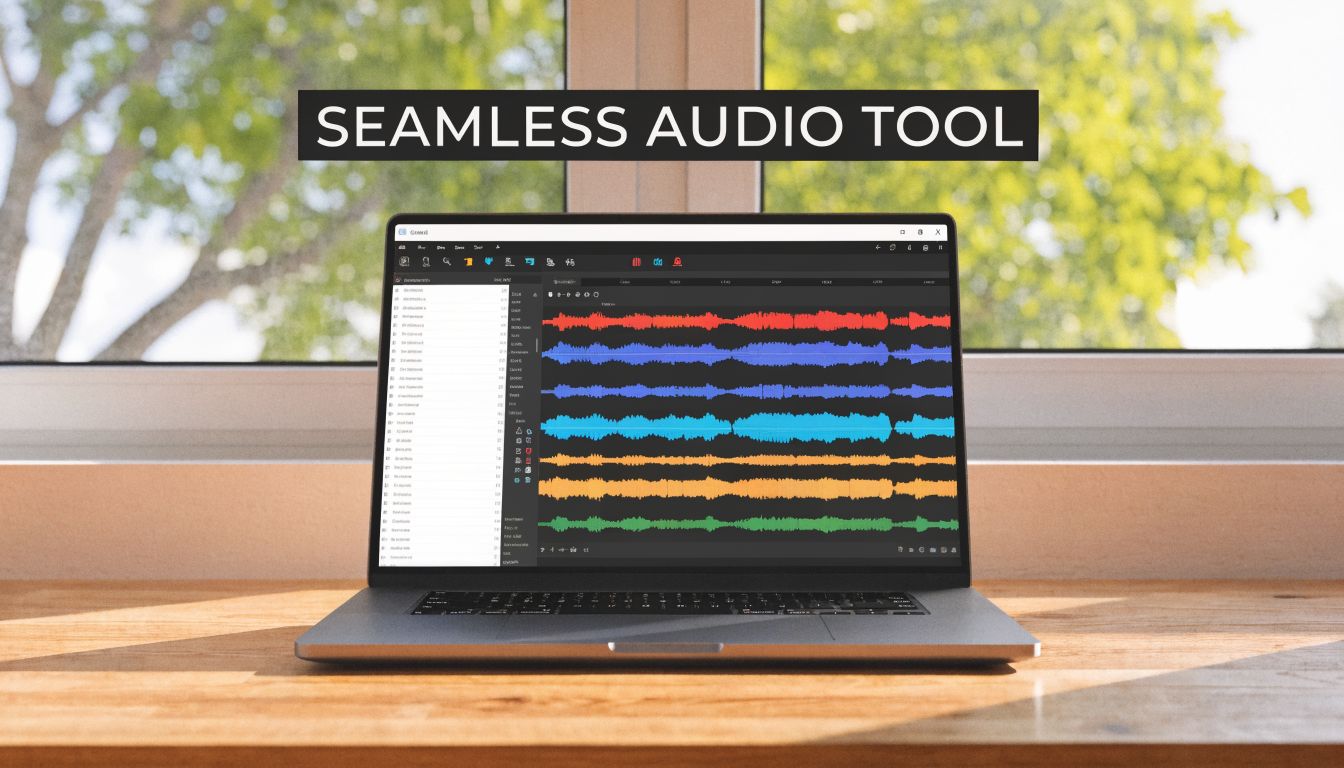
Once the recording is done, teams often need to cut dead air, fix pacing, clean up cursor movement, add zooms, and export different versions for help docs, LMS platforms, and social clips. Doing that inside one native app is faster than stitching together QuickTime, BlackHole, and a separate editor. Smooth Capture is a good example of the paid-native approach because it records Mac system audio directly and keeps the workflow focused on shipping the final video, not troubleshooting the input chain. If you have run into silent exports before, this guide on why screen recordings end up with no audio on Mac covers the common failure points.
If your recording setup also includes external mics, speakers, or hybrid event gear, this guide on choosing live sound equipment for events gives a clear explanation of when you need a mixer versus an audio interface.
A short demo helps if you want to see that category of workflow in action.
Troubleshooting Common Audio Recording Issues
A Mac audio setup can look correct and still fail the moment you hit Record. That is the actual downside of the free method. BlackHole works, but it adds another layer you have to verify every time. If you record customer demos, training, webinars, or executive updates, that extra check becomes part of the job.
You can't hear audio while recording
The usual problem is simple. macOS is sending sound to BlackHole, but not to the speakers or headphones you are using to monitor.
Open Audio MIDI Setup and inspect your Multi-Output Device. It needs to include both BlackHole and your listening device. Then check System Settings > Sound and confirm the Mac is outputting to that Multi-Output Device, not to BlackHole by itself.
If monitoring still sounds wrong, remove the Multi-Output Device and build it again. I have had old device combinations stay listed even after a macOS change, and rebuilding them is often faster than trying to diagnose a half-broken setup.
Your recording has no sound
This usually means the recording app is listening to the wrong input. QuickTime is the classic example. It often stays on Built-in Microphone unless you change it manually.
Before each session, open the input menu inside the recording app and confirm the source. Do not assume yesterday's setting held. macOS audio routing can appear unchanged while one input reverts.
If you keep ending up with silent files, this guide on why screen recordings end up with no audio on Mac walks through the failure points step by step.
Audio breaks after a macOS update
The free workaround reveals a significant limitation. Virtual audio drivers depend on permissions, driver signing, and device routing that can change between macOS versions. After an update, BlackHole may still appear installed while the routing no longer works properly.
The practical fixes are familiar. Reinstall BlackHole. Recheck microphone and screen recording permissions. Open Audio MIDI Setup and rebuild the Aggregate Device or Multi-Output Device if needed. Then run a short test recording before you start the actual session.
For occasional use, that may be acceptable. For business recording, it is usually wasted time. A native paid app like Smooth Capture avoids much of this upkeep because it records internal audio without relying on the same fragile chain of virtual devices.
Export settings that keep things simple
For tutorials, sales demos, and internal training, keep the handoff format boring. AAC audio in an MP4 file opens cleanly in nearly every editor, LMS, and review tool.
Check levels before export. Voice should lead, system audio should support it, and peaks should stay clean. If you are hearing distortion, lower the input or app volume and record another short sample before exporting the full take.
FAQ Recording Computer Sounds on Mac
Can I use Soundflower instead of BlackHole
You can, but most Mac users now choose BlackHole because it's the more current option people reference in modern setup guides. If you're starting fresh, it's usually the cleaner place to begin.
Does recording computer audio slow down a Mac
It can, depending on the app, capture settings, and how much else the Mac is doing. The routing itself isn't usually the main problem. The trouble tends to come from combining screen capture, webcam, browser tabs, and extra audio layers in one session.
Is it legal to record audio playing on my Mac
That depends on what you're recording and where you live. Copyright rules apply to media, and consent rules may apply to calls or conversations. If you're recording customer calls, interviews, or third-party media, get clear permission first.
What's the biggest mistake people make
They assume “system output” and “recording input” are the same thing on macOS. They aren't. With the free workaround, you have to manage both.
If you record polished videos regularly, Smooth Capture is the simpler path. It's a native Mac app built for repeatable business recording, with internal audio capture, editing, multiple audio tracks, device frames, cursor effects, subtitles, and exports for demos, onboarding, and launch content. There's a free trial, so you can test it on a real project instead of rebuilding your audio routing again.
Ready to create stunning app demos?
SmoothCapture makes it easy to record your screen with 3D device frames, cinematic cursor effects, and professional editing tools.