Does Screen Recording Record Audio: Screen Recording Audio:
You press stop on a product demo, feeling good about the take. The clicks landed where they should, the pacing was clean, and the flow finally made sense. Then you play it back and realize the recording is silent, or worse, it captured your room noise but not the app audio you needed.
That’s why “does screen recording record audio” is a trickier question than most guides admit. The short answer is yes, often. The useful answer is that it depends on which audio source you need, which platform you’re on, and whether your recorder can separate those sources cleanly.
For marketers, trainers, support teams, and SaaS founders, audio isn’t optional polish. It changes whether a walkthrough feels clear or amateur. A 2023 Statista survey found that 78% of screen recordings worldwide include audio, up from 42% in 2018, and HubSpot reports that videos with sound achieve 52% higher completion rates for product demos and tutorials in this screen recording audio roundup.
Table of Contents
- Why Your Screen Recording Might Have No Audio
- The Three Types of Audio in Screen Recording
- What Each Platform Can and Cannot Record Natively
- How to Enable Audio for Your Screen Recording
- Achieving Professional Results with Multi-Track Audio
- Common Audio Problems and How to Fix Them
Why Your Screen Recording Might Have No Audio
Most silent recordings come from one of three issues. You recorded the wrong source, you didn’t grant the right permission, or your platform never supported the kind of audio you assumed it did.
That last point catches people constantly. A lot of articles answer “does screen recording record audio” as if there’s one universal rule. There isn’t. Recording your narration through a microphone is one thing. Recording the sound coming out of an app is another. Recording both at once, cleanly, is where the main distinctions begin.
Practical rule: Before you record, decide what the viewer needs to hear. Your voice, the product’s sound effects, a webinar clip, or all of them together.
When a demo fails, the damage usually shows up in one of these ways:
- No audio at all because the mic was disabled, muted, or denied permission.
- Voice only because the recorder captured microphone input but not internal sound.
- Messy audio because the app sound leaked back through speakers into the mic.
- Wrong balance because everything got baked into one track and you couldn’t fix levels later.
For business video, audio changes comprehension. A feature announcement with no click feedback, alert tone, or narration feels unfinished. A tutorial with muddy voiceover feels harder than the task itself.
The fix starts with identifying the source you need. In practice, that means understanding three different kinds of audio capture, because recorders don’t treat them the same way.
The Three Types of Audio in Screen Recording
If you think about your computer like a room, the audio problem gets easier to understand. The app or browser is the TV in the room. Your voice is a person talking. And the worst version of screen recording is when the mic hears the TV playing through speakers instead of capturing the signal directly.
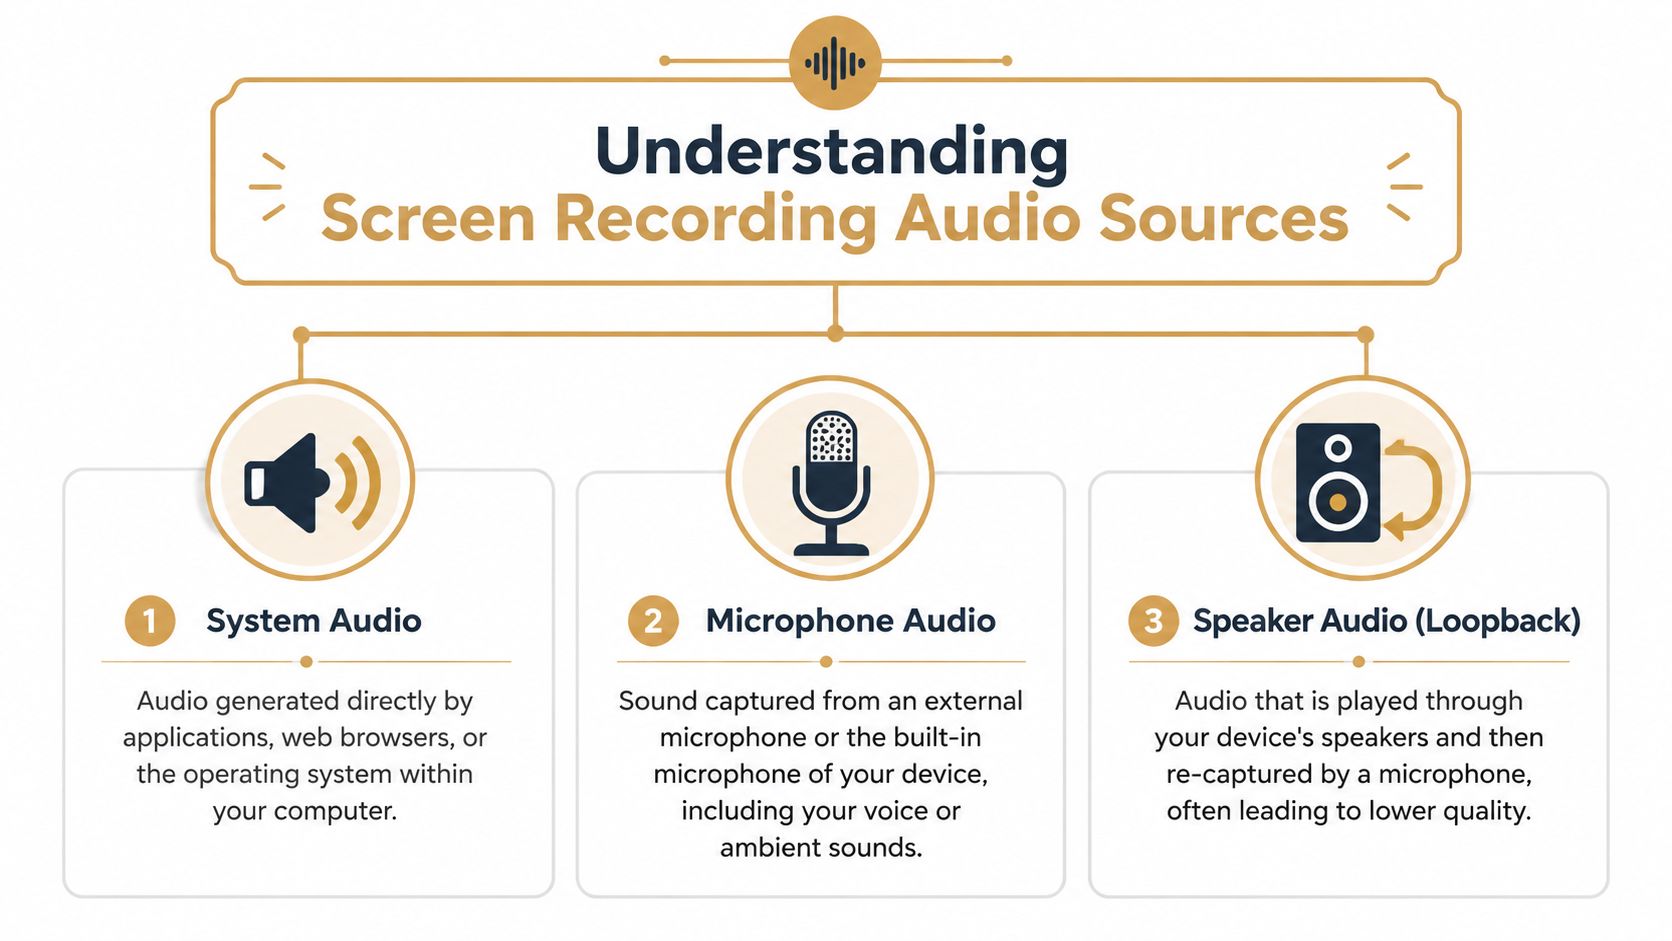
System audio
System audio is the sound generated inside the device. Think app alerts, browser video playback, interface clicks, or the sound from a product walkthrough video embedded in a tab.
This is the audio generally implied when someone asks if a screen recorder can capture “computer sound.” On some platforms, that works natively. On others, it doesn’t. If you’re on a Mac and need app sound, it’s worth reviewing a dedicated guide to record internal audio on Mac.
Microphone audio
Microphone audio is your narration, your breathing, your keyboard if it’s loud enough, and anything else your mic hears. It comes from a built-in laptop mic, headset mic, USB microphone, or audio interface.
This is usually the easiest source to capture. It’s also the one most basic recorders prioritize. That’s why people often finish a recording and discover they captured their voice but not the software they were demonstrating.
If your video teaches a workflow, your voice explains intent. System audio proves the product is actually doing something.
Speaker loopback
Speaker loopback is what happens when audio plays out loud and gets re-recorded by the microphone. It works in the loosest possible sense, but it’s not clean. You can get echo, room tone, fan noise, and a hollow sound that makes a polished demo feel improvised.
The platform history matters here. The ability to capture both system and mic audio became a standard feature with iOS 11 in 2017. Before this, iOS screen recordings could only capture microphone audio, a limitation that affected 100% of captures and was a major pain point for users creating tutorials, as described in Apple community discussion around screen recording audio.
That distinction still matters today. Many people assume “audio enabled” means “everything I hear will be recorded.” In real use, it often means only one source is available unless the tool is built for more.
What Each Platform Can and Cannot Record Natively
The cleanest way to answer does screen recording record audio is to stop thinking in general terms and look at each platform as it really behaves. Built-in tools are convenient, but they don’t all capture the same thing.
Windows generally gives you fewer surprises if you need app sound. Mobile platforms are straightforward once you know where the toggle lives. macOS is the outlier that frustrates teams making product demos.
The Mac exception that causes most confusion
On Windows, native tools commonly capture internal sound as part of the recording flow. On macOS, Apple’s built-in screen recording tools don’t natively record internal system audio. They can capture microphone input, but not the app sound coming from the machine itself.
That distinction matters most for marketers, educators, and support teams. If you’re demonstrating onboarding, UI feedback, or a workflow with embedded media, the missing app sound changes the whole result.
Native macOS recording is fine for a silent visual capture or a narrated capture. It’s not fine when the software audio is part of the story.
Native Screen Recording Audio Capabilities by Platform 2026
| Platform | Tool | Microphone Audio | Internal System Audio |
|---|---|---|---|
| macOS | QuickTime Player or built-in Screen Recording | Yes | No |
| Windows | Xbox Game Bar or Snipping Tool | Yes | Yes |
| iPhone and iPad | Built-in screen recording | Yes, when mic is enabled | Yes |
| Android | Native screen recorder | Varies by device settings, but supports mic on modern native recorders | Yes on modern native recorders |
The key platform fact is simple. Windows tools like Xbox Game Bar and Snipping Tool natively record system audio by default, while Apple’s built-in Screen Recording on macOS explicitly excludes internal audio, which creates a real limitation for teams producing demos on Mac, as noted in this Windows community discussion contrasting native behavior.
For practical use, here’s what that means:
- macOS is fine for narration-first captures. If your only requirement is “record my screen and my voice,” QuickTime can be enough.
- Windows is more forgiving for app demos. If a feature makes a sound, the native tool is more likely to include it.
- iPhone and iPad work better than many people expect. The system matured once dual-source capture became standard.
- Android depends more on manufacturer flavor and recorder settings. Native support exists, but the exact menu path can vary.
If you work across devices, don’t assume a successful mobile recording setup translates to desktop, or that Windows behavior matches Mac behavior. That assumption causes a lot of wasted takes.
How to Enable Audio for Your Screen Recording
The fastest way to avoid another silent file is to do a ten-second preflight check before every take. Confirm the source, confirm permissions, then record a short test clip.
Windows
Open your recorder first, not your presentation. In Xbox Game Bar or Snipping Tool, make sure the microphone option is enabled if you want narration. Then play a short sound from the app you’re demonstrating and record a few seconds.
If the app sound is missing, check the recorder’s audio settings before you assume the feature is broken. On Windows, the issue is often selection or muting, not platform limitation.
macOS
On Mac, the built-in screen recording path is simpler and more limited. You can enable microphone input in QuickTime or the Screenshot toolbar, but that only covers your voice. It won’t capture internal app sound through the native tool.
That’s the point where many teams lose time trying to “find the hidden toggle” that doesn’t exist. If your project depends on internal app audio, you need a different workflow than native recording. This guide on capturing sound from your computer on Mac walks through the Mac-specific issue clearly.
iPhone and iPad
On iPhone or iPad, open Control Center and press and hold the screen record control before you start. That expanded panel is where you can turn the microphone on if you want narration along with the screen capture.
If you skip the long press, you can start recording without realizing the mic is off. That’s one of the most common mobile misses.
A quick visual walkthrough helps if you haven’t used the setting in a while:
Android
Android is less uniform because manufacturers present the controls differently, but the principle is the same. Open the native screen recorder, look for audio options before recording, and choose whether you want device audio, microphone audio, or both.
Two habits make a big difference on Android:
- Run a short test clip when switching devices or OS versions.
- Watch your notification and privacy settings because they can affect what gets captured or blocked.
- Use headphones when needed if speaker playback is bleeding into the mic.
- Review the file immediately before moving on to a full-length demo.
If you only remember one thing, make it this: always test the exact combination you need, not just “audio on.”
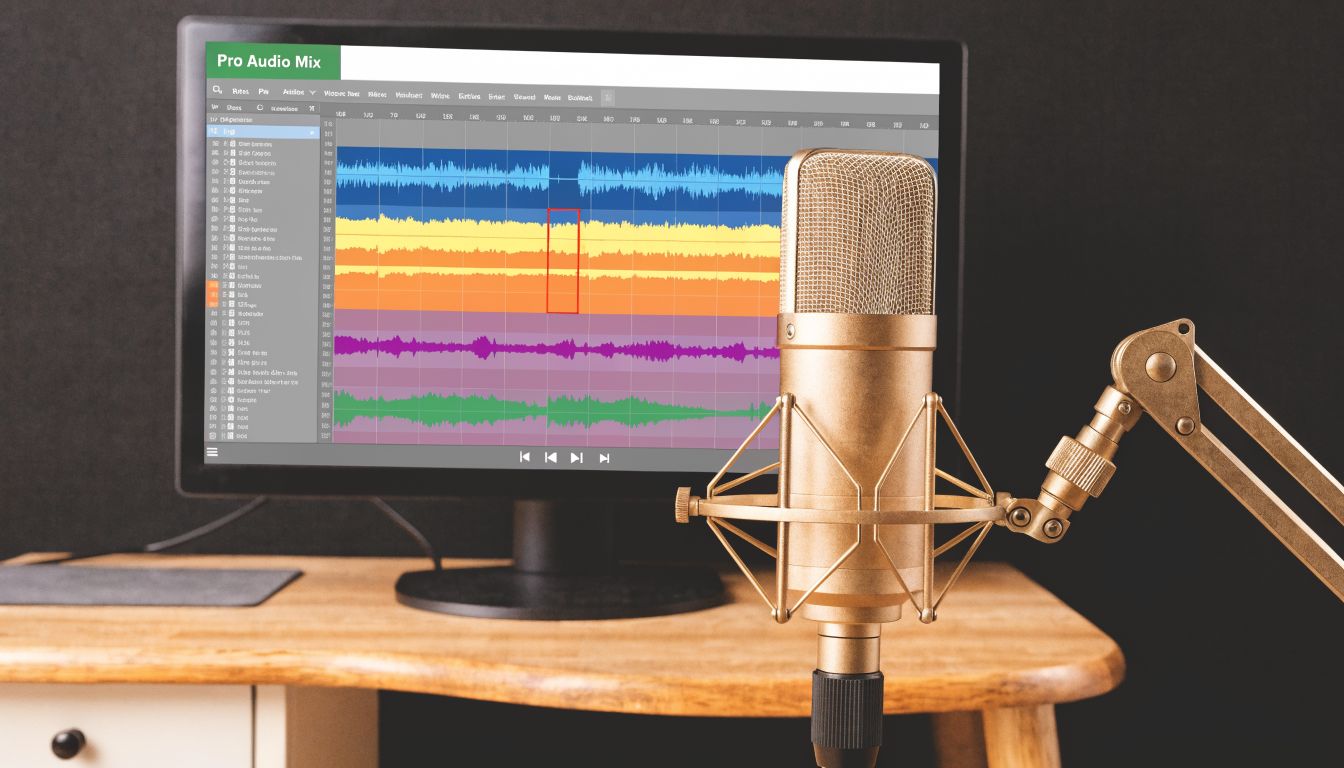
Achieving Professional Results with Multi-Track Audio
A basic screen recorder gets you a file. A professional workflow gives you control over that file after the recording is done.
That difference matters because real takes are messy. Your narration level changes halfway through. A Slack ping lands over an important explanation. The app sound is a little hot. If everything is baked into one audio track, every fix becomes clumsy.
Why one mixed track creates cleanup work
When a recorder mixes your voice and system sound together, you lose precision. Lower the app sound and your narration drops too. Cut a noise spike and you may damage the sentence under it. Try to improve clarity later and you’re working against the recording instead of with it.
Professional users are increasingly looking for ways to edit audio tracks separately after recording. Basic recorders that mix all audio into one track can increase post-production time by 25% due to time spent on audio fixes. Advanced tools with multi-track editing address this gap directly, according to this discussion of separate audio track workflows.
Record once. Fix selectively. That’s the difference between a fast editing session and a frustrating one.
What a better workflow looks like
For polished demos, the better approach is simple:
- Capture the mic and system audio on separate tracks. That gives you independent volume control.
- Trim the take without flattening everything first. You keep options open.
- Keyframe where needed. Lower the app audio during spoken explanation, then bring it back up for feature feedback.
- Add subtitles after the audio is clean. Captions work better when your voice track is clear and consistent.
For Mac-based teams, this matters even more because native recording doesn’t solve internal app audio cleanly. A dedicated recorder and editor that handles separate tracks removes the biggest source of rework.
In practice, this is the jump from “I got the screen” to “I can ship this.” Product marketing teams need launch videos that sound intentional. Customer education teams need tutorials that don’t force a re-record because one sound was too loud. Agencies need edits that survive client feedback without rebuilding the whole piece.
Common Audio Problems and How to Fix Them
Most screen recording audio failures are easy to diagnose once you stop treating them as one problem. Start with the symptom, then work backward from the likely cause.
No audio at all
Use this checklist first:
- Check permissions: Your recorder may not have access to the microphone.
- Confirm the input device: Many laptops default to the wrong mic after you connect a headset or USB microphone.
- Test the mute state: The mic might be selected but muted in the recorder or system settings.
- Review a short sample immediately: Don’t trust the meters alone.
If you’re collecting clips from teammates or customers and need a simple way to organize, trim, and manage your video recordings, a shared workflow tool can reduce the back-and-forth that happens when files arrive with missing sound.
You recorded your voice but not the app
This is the classic Mac problem, but it can happen anywhere if the recorder was set to microphone only. If the video has narration and no app sound, don’t keep re-recording until you verify the tool supports internal audio on that platform.
On Mac, the native recorder won’t solve this by toggling one more setting. If you keep hitting the same wall, use a Mac-specific troubleshooting guide for screen recordings with no audio.
The audio sounds bad even when it exists
Bad audio usually comes from the source chain, not the export. Fix the capture conditions first:
- Move off the built-in laptop mic if the room is noisy.
- Wear headphones when system sound is feeding back into the microphone.
- Lower app volume before recording if alerts or UI sounds are overpowering narration.
- Choose a quieter room if you’re hearing fan noise, HVAC, or keyboard clatter.
Clean audio starts before the record button. Editing helps, but it can’t fully rescue a bad source.
If you build demos often, the fastest improvement is consistency. Use the same mic, the same input settings, the same test routine, and the same recorder each time.
If you create demos, onboarding walkthroughs, or launch assets on Mac, Smooth Capture gives you the control native tools don’t. You can record screen and audio with a workflow built for polished output, then edit with separate tracks, timeline controls, subtitles, cursor effects, and flexible layouts without bouncing between apps.
Ready to create stunning app demos?
SmoothCapture makes it easy to record your screen with 3D device frames, cinematic cursor effects, and professional editing tools.