How to Make a Video on iPhone: Pro Tips 2026
You already have the camera. What you may be missing is a repeatable workflow.
That's why so many iPhone videos look disappointing the moment they leave the Camera app. The footage is sharp enough, but the framing wanders, exposure shifts mid-shot, the audio sounds distant, and editing on the phone gets messy fast. If you're trying to make a product demo, onboarding clip, launch video, or social asset, that gap matters.
Knowing how to make a video on iphone isn't really about tapping record. It's about making a few smart decisions before you shoot, locking in the right settings, and finishing the job in an editing workflow that doesn't fight you.
Table of Contents
- Your iPhone Is a Cinema Camera in Disguise
- Plan Your Video Like a Producer
- Dial In the Perfect iPhone Camera Settings
- Master Composition Audio and Stability
- Advanced Shooting Techniques for Dynamic Videos
- Edit and Export Your Video for Any Platform
Your iPhone Is a Cinema Camera in Disguise
The strange thing about iPhone video is that the hardware stopped being the main problem a long time ago. The weak point is usually the operator. People shoot with default settings, trust auto exposure too much, hold the phone in one hand, and then expect the final edit to feel polished.
That's a workflow issue, not a camera issue.
The iPhone's role in video changed years ago. The iPhone 4 in 2010 introduced 720p HD recording, which helped kick off the mobile video shift, and newer models like the iPhone 15 can shoot 4K at 60 fps and support ProRes Log. In major markets, iPhones now account for 48% of all social media videos according to Skillshare's iPhone video overview. That should tell you something important. The device is already accepted as a serious video tool.
The difference is process
A good iPhone video usually comes from a boring, disciplined approach:
- Plan the sequence: Know your shots before you open the camera.
- Set the camera manually: Don't let defaults decide the look.
- Control sound: Viewers forgive average visuals sooner than bad audio.
- Edit off-device when needed: Especially for screen recordings, multi-angle cuts, and platform-specific exports.
Practical rule: If the video matters to your business, don't treat capture and editing as two separate problems. Treat them as one production pipeline.
That matters even more for tutorials, demos, and launch assets. If your video includes app screens, device framing, or multiple camera angles, the easiest path is usually to think ahead about where the footage will end up. Teams handling iPhone and iPad capture often need a cleaner desktop handoff for iOS and iPad recording workflows, especially when the final deliverable has to look presentable outside the phone.
If your goal is audience growth, not just decent footage, it also helps to study broader tips for growing a YouTube channel so your capture choices support retention, thumbnails, and repeatable publishing. Good-looking footage is only part of the job. Structure still wins.
Plan Your Video Like a Producer
Professionals save time in editing because they make decisions early. Most amateur iPhone videos do the opposite. They capture a pile of clips first, then try to discover the story later.
That usually leads to missing angles, awkward transitions, and footage that doesn't match.
Start with the job of the video
Before you shoot anything, answer three questions:
Where will this video live?
If it's for TikTok, Reels, or Shorts, vertical makes sense. If it's for YouTube, a landing page, or a product walkthrough embedded on your site, horizontal is usually easier to reuse.What does the viewer need to understand by the end?
A launch teaser needs energy. An onboarding tutorial needs clarity. A testimonial needs clean audio and believable eye line.What is the one thing you can't forget to capture?
For a product demo, that might be the hero shot and the screen flow. For a talking-head tutorial, it's the main spoken take with good sound.
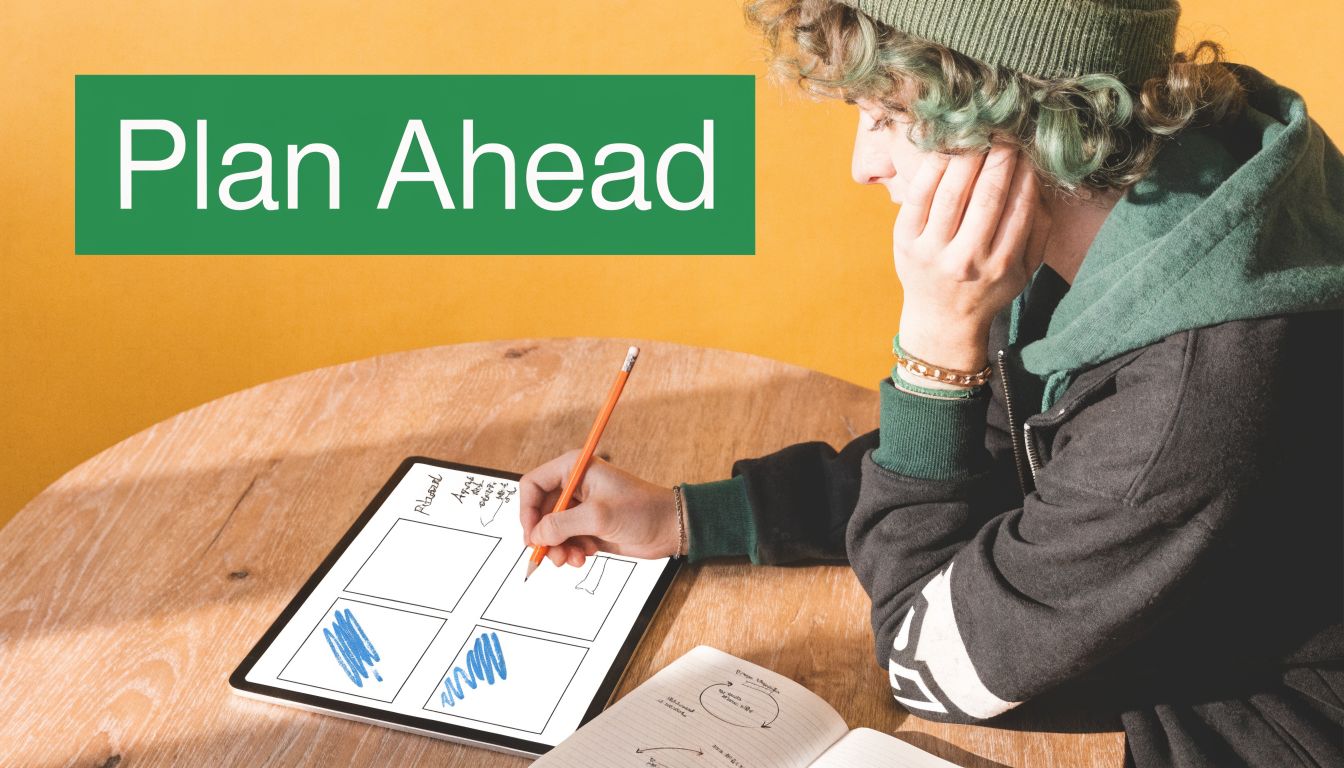
A simple storyboard helps, but it doesn't need to look fancy. A few boxes and arrows are enough if they force you to think in sequence.
Build a shot list you can actually follow
Most useful shot lists fit on one screen. Keep them practical.
For a product demo, I'd structure it like this:
- Opening shot: Establish the product, person, or setting.
- Primary explanation shot: The main angle where the subject speaks or demonstrates.
- Close-ups: Buttons, gestures, materials, reactions, or interface details.
- Cutaway footage: Hands using the product, screen interactions, packaging, environment.
- Ending shot: The cleanest visual that supports the final line or CTA.
A short shot list beats a perfect one you never use.
There's also a planning mistake people rarely catch until edit time. They don't decide whether the footage needs flexibility. If you may want both horizontal and vertical versions later, frame a little wider than feels necessary. That extra space often saves the edit.
Another useful habit is to plan for silence. Capture a few seconds before and after each take without anyone moving or speaking. That gives you cleaner edits, easier room tone, and fewer rushed cuts.
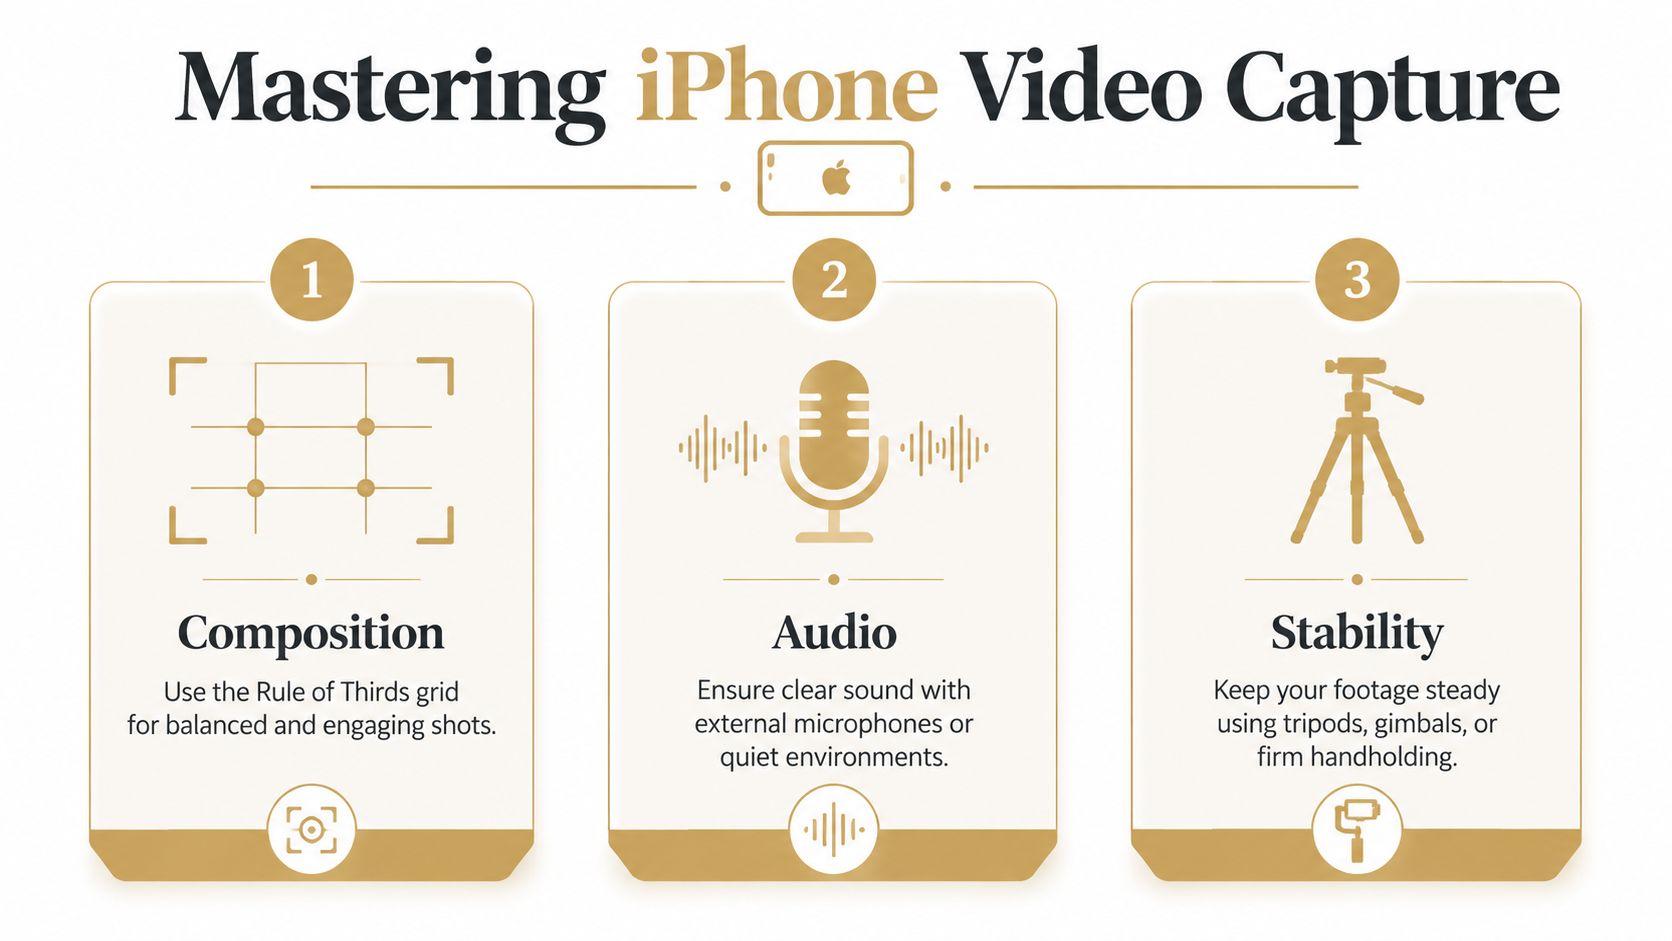
Dial In the Perfect iPhone Camera Settings
The default camera settings on iPhone are built for convenience. Convenience is fine for a family clip. It's not what you want for a polished business video.
When people ask how to make a video on iphone that looks more professional, I usually start here. One menu change can do more than buying another accessory.
The settings that matter most
Start in Settings > Camera > Record Video and choose 4K at 24 fps. That's the baseline setting I'd use for most polished videos because it gives motion a more cinematic feel than the sharper, more “live” look of higher frame rates. Wistia's guidance also recommends this setup and notes that using AE/AF Lock helps prevent the automatic changes that ruin an estimated 68% of amateur clips, as outlined in Wistia's iPhone video settings guide.
While recording, long-press the screen to activate AE/AF Lock. If you skip this, the phone may hunt for focus or shift brightness when a hand moves into frame. That's one of the fastest ways to make footage look accidental.
Then go into Formats and choose High Efficiency if storage is a concern. It's the practical choice for teams shooting lots of footage and moving files often.
If you're using a Pro model that supports it, ProRes Log is worth using when you know you'll color-correct later. Don't use it just because it sounds advanced. It creates heavier files and asks more from your edit. Use it when you need the latitude. Skip it when speed matters more than grading control.
Turn on Grid as well. It's a simple aid, but it immediately improves framing decisions.
For creators who also care about stills and social presentation, some of the same framing discipline shows up in pro Instagram photography tips. The overlap is real. Good composition isn't platform-specific.
iPhone video setting comparison
| Setting | Best Use Case | Look & Feel | File Size |
|---|---|---|---|
| 4K at 24 fps | Product demos, interviews, brand videos | More cinematic, smoother motion blur | Larger |
| 4K at 60 fps | Fast action, footage you may slow slightly | Crisp, very clean, less filmic | Larger |
| High Efficiency | Frequent shooting, limited storage, easier file management | Clean image with efficient compression | Smaller |
| ProRes Log | Color grading, high-end edits, controlled shoots | Flat image with more post flexibility | Much larger |
What I'd actually leave on and off
A clean working setup looks like this:
- Leave Grid on: It helps you frame consistently without slowing you down.
- Use 24 fps by default: It gives the most pleasing motion for general storytelling.
- Lock exposure and focus: Don't trust the phone to hold the look.
- Use ProRes Log selectively: Great for serious edits. Overkill for quick turn content.
The best iPhone setting is the one you can use consistently across the whole shoot. Mixed frame rates and mixed looks get ugly in edit fast.
Master Composition Audio and Stability
A sharp image doesn't automatically feel professional. Three things decide that quickly: where you place the subject, how the voice sounds, and whether the frame stays steady.
People often obsess over camera specs and ignore all three.
Composition that instantly looks more intentional
Use the grid. Then stop centering everything.
If your subject is speaking to camera, place them slightly off-center using the rule of thirds unless there's a strong reason to go symmetrical. That small shift makes the shot feel designed instead of accidental. Also watch the background. A decent subject framed against clutter still looks messy.
Light matters just as much. Window light is often the easiest win. Face the subject toward the light source, not with the bright source behind them unless you know how to manage the exposure trade-off.
A few composition checks before each take help:
- Headroom: Don't leave a huge empty gap above the subject.
- Background edges: Check for objects poking out behind the head or shoulders.
- Distance: Don't stand so far back that the speaker feels disconnected.
- Screen direction: If the subject looks off-camera, keep that direction consistent across takes.
Audio is where cheap-looking videos usually give themselves away
Most viewers will tolerate a slightly imperfect image. They won't stay with muddy dialogue.
An external lavalier mic can improve signal-to-noise ratio by 25dB over the built-in mics, according to the workflow details in this iPhone audio and stabilization tutorial. That's a practical upgrade, not a luxury. If someone is talking, use a mic.
The same source also notes a common production problem with built-in capture. Indoor audio often becomes the weak link long before the image does. In real use, that sounds like room echo, traffic spill, air conditioning, and inconsistent voice level.
If you're recording interviews, remote conversations, or reactions, it also helps to understand cleaner call capture workflows such as recording a FaceTime video properly, because spoken-word content falls apart quickly when sound is an afterthought.
Good lighting impresses people for a moment. Clean dialogue keeps them watching.
Stability is not optional
Shaky footage reads as low effort, even when everything else is right.
The same YouTube workflow above reports that handheld footage without Action Mode is a primary cause of viewer complaints related to motion sickness in 78% of tests. That tracks with what editors run into every day. Tiny hand corrections look much worse on playback than they feel while shooting.
Use the right level of support for the shot:
- Tripod: Best for talking heads, demos, tutorials, and anything that needs clean framing.
- Phone clamp on a desk mount: Good when shooting at a workstation or over a product table.
- Action Mode: Useful for walking shots or handheld movement when you need speed.
- Gimbal: Best when the camera movement itself is part of the shot.
Don't move the camera just because you can. Most bad movement comes from trying to make a static moment feel more interesting. Usually the better fix is to change the angle, not add drift.
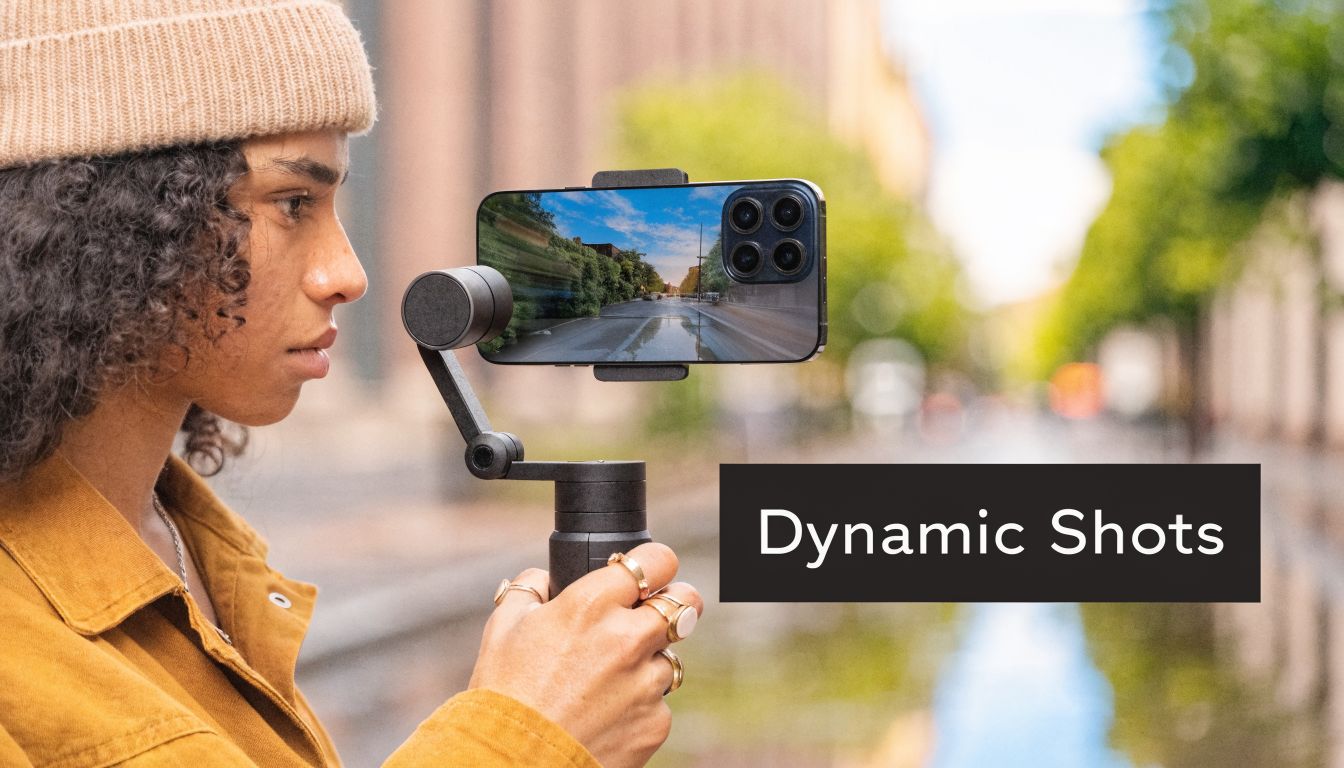
Advanced Shooting Techniques for Dynamic Videos
One locked-off shot can be enough for a quick explainer. It's rarely enough for a strong demo, launch clip, or training asset.
What makes an iPhone video feel finished is usually shot variety. Not expensive variety. Useful variety.
Use A-roll and B-roll like an editor
Think in two layers.
A-roll is the main content. The person explaining, demonstrating, or presenting.
B-roll is everything that helps the viewer understand it without staring at one angle the whole time.
Good B-roll on iPhone usually includes:
- Hands in action: Taps, swipes, setup steps, product interaction
- Detail shots: Buttons, textures, packaging, interface moments
- Environmental shots: Desk setup, workspace, context around the product
- Reaction or outcome shots: The result of the thing being demonstrated
The key is relevance. Random cinematic clips don't help if they don't support what the speaker is saying.
Multi-angle shooting with more than one iPhone
This is one of the best ways to level up your videos without buying a dedicated camera. Put one iPhone on the wide shot. Put another on a tighter angle. Keep both rolling through the full take if possible.
That's especially useful for interviews, tutorials, and product demos where you may want to hide cuts, tighten pacing, or emphasize a key action. It's also an underserved topic. According to the cited research summary, 68% of multi-cam queries go unanswered in forum discussions, which is why so many marketers struggle with syncing footage from multiple iPhones in the first place, as noted in this discussion of multi-angle iPhone capture.
A few rules make multi-angle capture much easier:
- Match frame rate and resolution: Don't mix settings unless you have a reason.
- Clap once at the start: It gives you a visible and audible sync point.
- Keep one angle safe: A steady wide shot can rescue the whole edit.
- Avoid crossing eyelines: Make the second angle feel intentional, not random.
If you want to see dynamic movement setups in action, this example is useful:
Record your iPhone screen the clean way
On-device screen recording is fine for quick internal use. For polished tutorials, it becomes limiting fast. Notifications, inconsistent quality, and awkward file handling get in the way.
For client-facing product videos, I prefer capturing the iPhone screen in a cleaner desktop-connected workflow over USB when possible. It gives you more control, a tidier source file, and easier integration with the rest of the edit. That matters when you need device frames, zooms, callouts, or multiple aspect ratio exports from the same source.
The more technical the tutorial, the less you want your editing workflow trapped on the phone that recorded it.
Edit and Export Your Video for Any Platform
You can absolutely cut a basic video on the iPhone. For quick trims, simple rearranging, or a fast social post, the built-in Photos editor and iMovie are enough. They're fast, familiar, and good at removing obvious mistakes.
The problem starts when the video needs polish instead of just assembly.
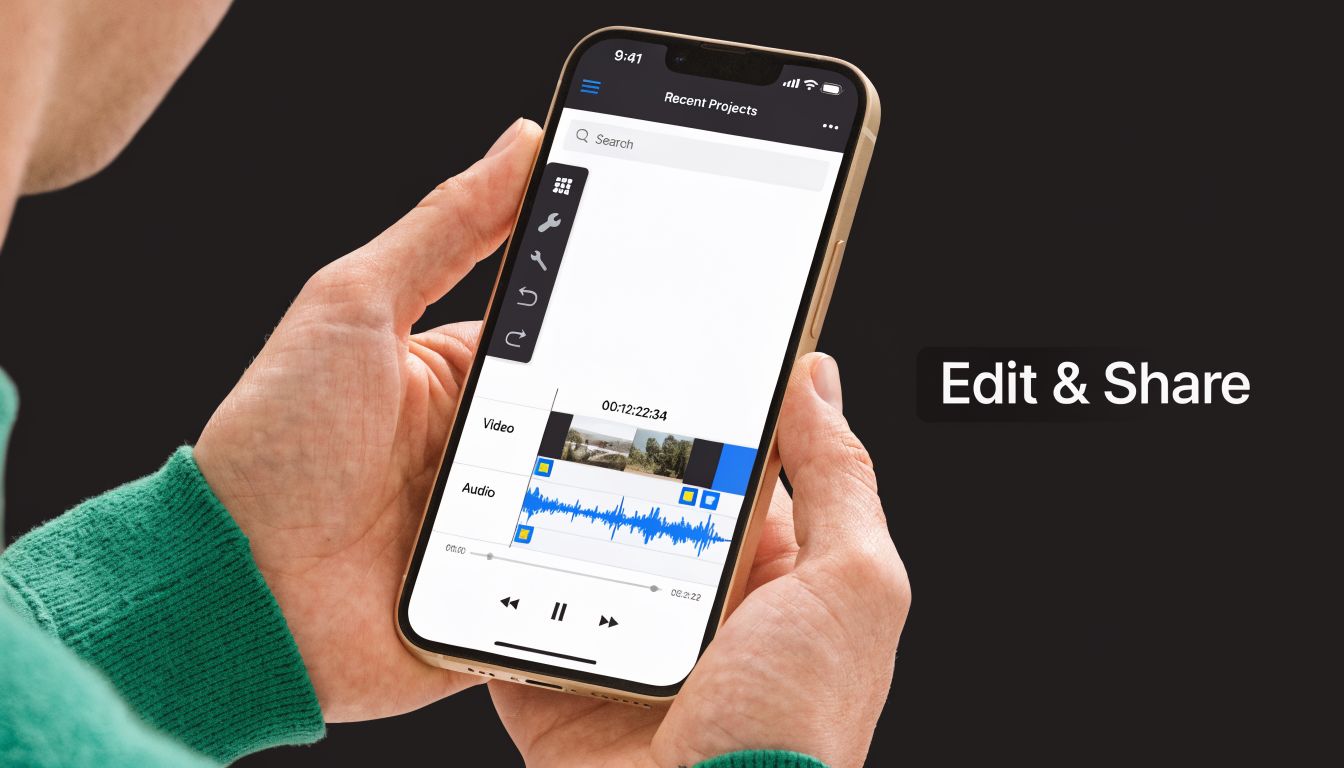
What works on-device and where it breaks down
On-device editing is fine when you need to:
- Trim clips quickly
- Reorder a few shots
- Add a simple title
- Export a fast draft
It gets clumsy when you need to:
- Sync multiple iPhone angles
- Handle screen recordings cleanly
- Reframe for both vertical and horizontal
- Work precisely with subtitles
- Do controlled color work on flatter footage
That's the point where a desktop workflow stops being a luxury and starts being the easier option.
Why desktop finishing gives business videos a cleaner result
Business videos often need more than one output. You might need a horizontal version for a site, a vertical cut for social, and a tighter version for an app listing or internal training library. Doing all of that on the phone is possible. It's just slower and less comfortable.
That editing gap is getting more obvious as capture tools improve. The current landscape described in this overview of iOS subtitle and editing workflow changes notes that iOS 19's on-device Speech framework provides 90% accurate subtitles, but users still need a clean way to integrate those capabilities into a desktop workflow for polished tutorials and demos. That's exactly where a Mac-based finishing process helps.
For simple desktop cleanup, even basic guides on editing video in QuickTime Player are a useful reminder that not every edit needs a heavyweight post stack. But once you're managing screen capture, multi-angle footage, social variants, and presentation details, dedicated tools are easier to live in.
If you want AI assistance in the broader creation pipeline, especially for repurposing or generating variations, it's also worth looking at AI-powered video creation tools alongside your editing process. The useful way to think about AI is as support after capture, not a replacement for clean footage.
The best export habit is simple. Decide the destination first, then export for that destination deliberately. Social clips, tutorials, App Store previews, and client demos all ask for slightly different framing and pacing. One master edit rarely fits every platform without adjustment.
If you're producing iPhone demos, screen recordings, onboarding videos, or launch assets regularly, Smooth Capture is worth a serious look. It gives teams a cleaner desktop workflow for USB iPhone capture, multi-angle framing, subtitles, device frames, and social-ready exports without turning every edit into a workaround.
Ready to create stunning app demos?
SmoothCapture makes it easy to record your screen with 3D device frames, cinematic cursor effects, and professional editing tools.