How to Record a FaceTime Video on Mac & iPhone (2026)
You finish a strong FaceTime demo with a client. The conversation is sharp, the objections are handled, and someone on your team immediately asks for the recording so they can turn it into training, a recap, or a trimmed product clip.
That’s usually the moment people realize FaceTime recording is easy to do badly and surprisingly hard to do well.
If you only need a quick reference copy, Apple’s built-in tools are enough. If you need something polished enough for onboarding, support docs, or a launch asset, the built-in route breaks down fast. The biggest issue isn’t the video. It’s the audio. Most native methods leave you with your voice, partial call audio, or a speakerphone workaround that sounds rough.
Table of Contents
- Why Record FaceTime Calls for Your Business
- Recording on iPhone The Quick and Simple Method
- Using QuickTime for FaceTime Recording on Mac
- The Professional Workflow for High-Quality Recordings
- Mastering Audio Capture and Recording Consent
- Editing and Exporting Your FaceTime Recording
Why Record FaceTime Calls for Your Business
A FaceTime recording can become more than a recap. It can turn into a reusable asset.
A customer success manager can save a walkthrough and hand it to the next rep. A product marketer can clip a clean explanation of a feature for an internal enablement library. An agency can pull short moments from a client review call and turn them into approval-ready edits.

The business use cases are straightforward
- Demo reuse: Record one strong walkthrough, then trim it into onboarding clips or internal training.
- Support documentation: Save a solved issue so the team can reuse the explanation instead of repeating it live.
- Testimonial capture: Keep customer language in their own words for future content review.
- Handoff clarity: Pass context from sales to onboarding or from strategy to production without relying on notes alone.
Native capture is now common. Since Apple introduced built-in screen recording in iOS 11 and later macOS Mojave, native capture has become widespread, with 92% of Mac users adopting the Cmd + Shift + 5 shortcut by 2024, according to this FaceTime recording guide from Noota.
That convenience matters. It means almost anyone on your team can create a recording without installing anything first.
There are really three paths
You will likely choose one of these options:
- iPhone screen recording for speed.
- Mac recording with QuickTime or Cmd + Shift + 5 for better control.
- A dedicated recorder and editor when the file has to be usable beyond a one-off reference.
Practical rule: If the recording only needs to help you remember what happened, native tools are fine. If someone else has to watch it later, production quality starts to matter.
That gap is where most frustration shows up. The built-in options make it easy to capture a call. They don’t make it easy to ship a clean video.
Recording on iPhone The Quick and Simple Method
If you need the fastest answer to how to record a FaceTime video, the iPhone method is the obvious starting point. It’s built in, it’s familiar, and it saves straight to Photos.
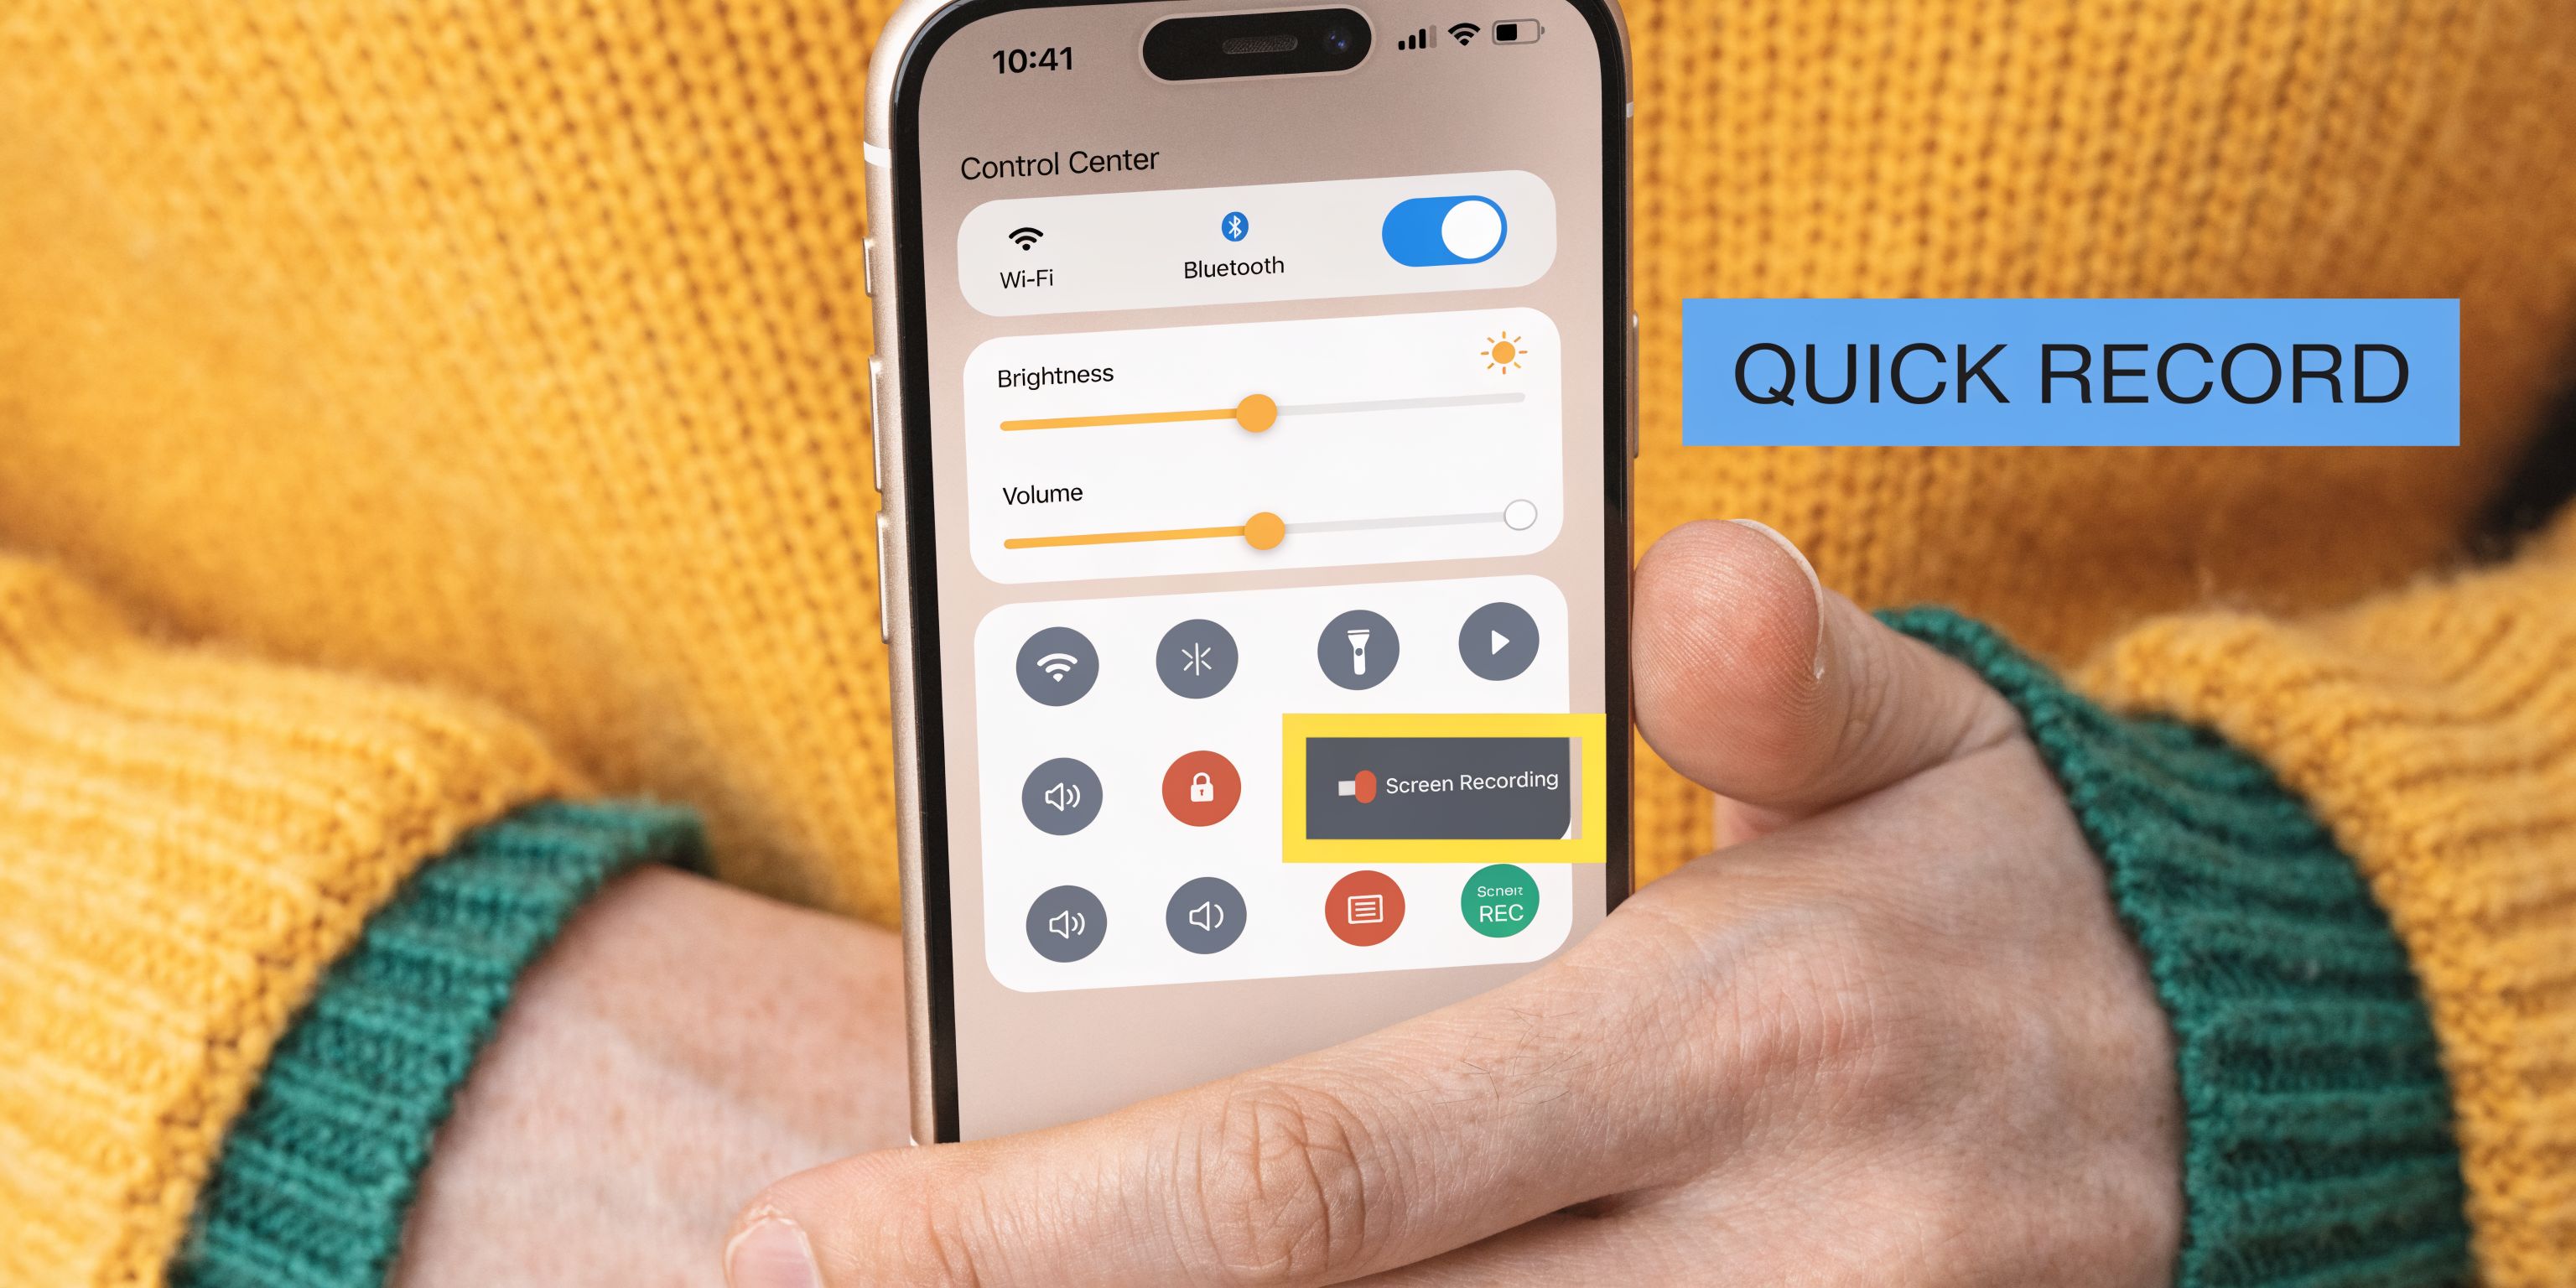
Set up screen recording first
Before the call, make sure Screen Recording is available in Control Center.
- Open Settings.
- Go to Control Center.
- Add Screen Recording if it isn’t already there.
- Open Control Center.
- Long-press the Screen Recording icon.
- Turn on Microphone.
That microphone step matters. Without it, you’ll often end up with video only.
For teams that want a more polished way to capture iPhone or iPad screens for product footage, this iOS and iPad recording workflow is worth reviewing.
Record the call
Once the control is added, the actual recording process is short:
- Start in Control Center: Tap the Screen Recording button.
- Wait for the countdown: iPhone gives you a brief countdown before recording begins.
- Open or return to FaceTime: Start the video call or continue it.
- Stop the recording: Tap the red status indicator or return to Control Center and stop.
- Find the file in Photos: The recording saves automatically.
A quick visual walkthrough helps if you’re setting this up for the first time:
Where this method falls short
The iPhone workflow is good for convenience. It’s not good for polish.
You’re recording the screen as it exists on the device. That means incoming notifications, unstable framing if you switch apps, and limited control over what the viewer sees. You also don’t get a real editing workflow attached to the capture.
The bigger issue is audio. Even when the microphone is enabled, the result often works better as a personal reference than as a team asset.
Use the iPhone method when speed matters more than quality, or when you just need to review a conversation later.
If you’re creating client walkthroughs, launch clips, or repeatable training content, this is usually the point where people move to Mac.
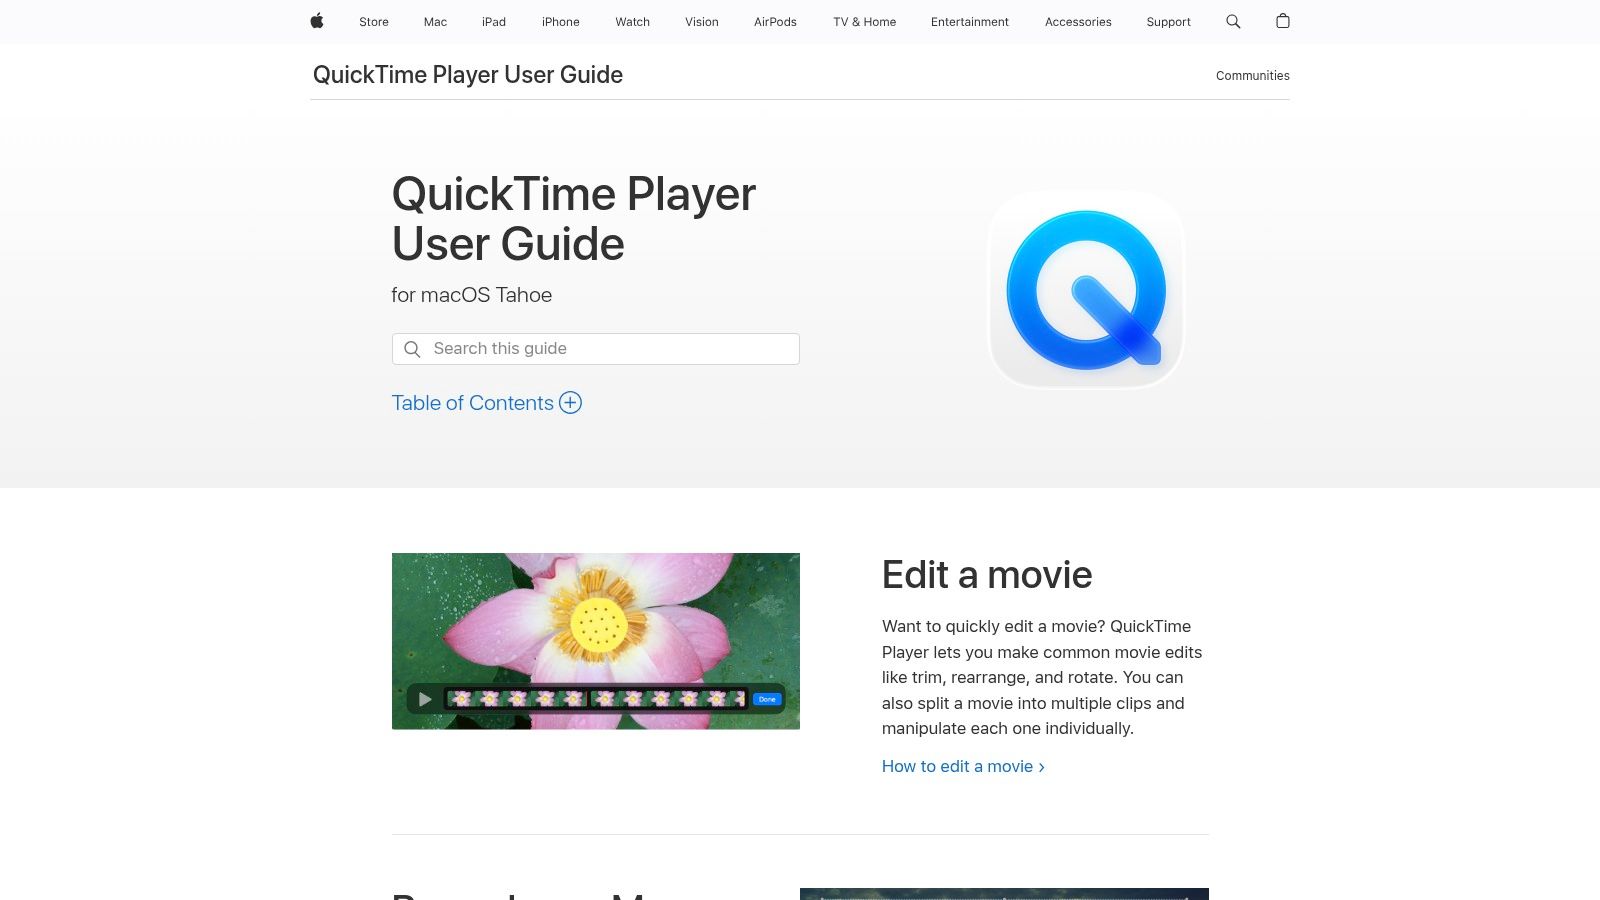
Using QuickTime for FaceTime Recording on Mac
On Mac, FaceTime recording becomes more manageable. You get a larger canvas, better window control, and a cleaner file to work with after the call.
You also have two built-in options. You can use Cmd + Shift + 5 or open QuickTime Player and start a new screen recording.
Use the built-in toolbar or QuickTime
The simplest Mac workflow looks like this:
Open FaceTime and place the window where you want it.
Press Cmd + Shift + 5 or open QuickTime Player and choose File > New Screen Recording.
In Options, choose your microphone input.
Decide whether to record the full screen or just part of it.
Start the recording.
Run the FaceTime call.
Stop the recording from the menu bar and save the file.
If you only remember one setup detail, remember this one.
How to frame the recording properly
When using QuickTime Player, experts recommend selecting Record Selected Portion to draw a box around the FaceTime window. This can reduce final file sizes by 40-60% compared to a full-screen recording and removes desktop distractions, as noted in this QuickTime FaceTime recording guide from FonePaw.
That’s the difference between a rough capture and something your team can reuse.
A cleaner frame helps with all of the following:
- Review speed: People don’t need to ignore your desktop clutter.
- Edit speed: You start with a tighter composition.
- Consistency: Repeated demos look more intentional.
The Mac limitation that still matters
Mac is better than iPhone for FaceTime capture. It still doesn’t solve the core production issue on its own.
QuickTime’s default setup records through your microphone. That means your voice is straightforward to capture, but the other participant’s audio may not come through the way you expect unless you route audio more deliberately.
Better framing doesn’t fix bad source audio.
That’s why native Mac recording is often a middle step. It’s fine for internal review, rough training material, or low-stakes documentation. It’s less reliable when the final video has to sound balanced and clean.
The Professional Workflow for High-Quality Recordings
If the recording has to leave your laptop and go to customers, prospects, teammates, or clients, the standard changes.
The goal isn’t just to capture the call. The goal is to create a file you can edit, brand, trim, repurpose, and publish without apologizing for the sound or the framing.
What a business-grade workflow needs
A professional workflow for how to record a FaceTime video should handle five things well:
- Separate audio sources: You need your microphone and the call audio in a controllable form.
- Clean capture area: Record the exact window or region you want, not the whole desktop by accident.
- Stable visuals: Cursor movement, focus, and framing should feel deliberate.
- Actual editing tools: Trimming the start and end isn’t enough for repeated business use.
- Flexible output: Teams need horizontal, vertical, and cut-down formats depending on where the recording goes.
Native tools cover the first five minutes. They don’t cover the full workflow.
A dedicated Mac recorder with editing built in closes that gap. It lets you record the call, clean it up immediately, and ship multiple versions without bouncing through separate apps. If you’re comparing options for that setup, this review of screen recording software for Mac is a useful starting point.
FaceTime Recording Method Comparison
| Feature | iPhone (Built-in) | Mac (QuickTime) | Mac (Smooth Capture) |
|---|---|---|---|
| Setup speed | Very fast | Fast | Fast after initial setup |
| Video framing control | Limited | Better | Strong |
| Caller audio handling | Weak for professional use | Better, but often needs routing help | Built for higher-quality workflow |
| Editing after recording | Minimal | Minimal | Full timeline workflow |
| Best use case | Personal reference | Internal review and rough demos | Polished business assets |
| Output flexibility | Low | Medium | High |
The practical decision is simple.
Use iPhone when you need a quick copy. Use QuickTime when you want a tighter recording on Mac. Use a dedicated workflow when the recording will become part of marketing, training, onboarding, support, or client delivery.
Native tools help you capture. A production workflow helps you publish.
Mastering Audio Capture and Recording Consent
A FaceTime recording for business usually fails in one of two places. The audio is only half there, or the team never handled consent in a way they can stand behind later.
Why FaceTime audio is the real production problem
Video issues are often fixable in editing. Bad call audio usually is not.
The common failure is uneven capture. You get your own mic clearly, but the other person comes through faintly, through room noise, or not at all. That happens because Apple’s built-in recording paths were not designed as a polished two-person production setup. If someone watches the file for training, customer education, support review, or a product walkthrough, that imbalance makes the recording feel rough fast.
A quick workaround like putting the call on speaker creates a different problem. It brings in echo, keyboard noise, HVAC hum, and the room itself. This analysis of FaceTime recording audio problems shows the kind of capture issues teams run into with native methods.
Two workable ways to capture both sides cleanly
On Mac, there are two realistic options if the recording needs to hold up beyond personal reference.
Use a virtual audio driver and test it properly
Tools like BlackHole can route system audio into your recording chain. That gives you more control over what gets captured, and it can produce a usable result.
It also adds setup risk. Someone has to create the routing, choose the right input and output devices, run a test call, and confirm nothing changed after a macOS update or an audio device switch. I would only use this path if the team is comfortable troubleshooting audio before an important call.
Use a recorder built to capture mic and system audio together
A dedicated recorder is the better workflow for repeatable business recordings. A Mac screen recorder with audio support reduces the routing guesswork and makes it much easier to get balanced source audio on the first pass.
That does not remove the need for basic recording discipline. It just gives you a cleaner foundation.
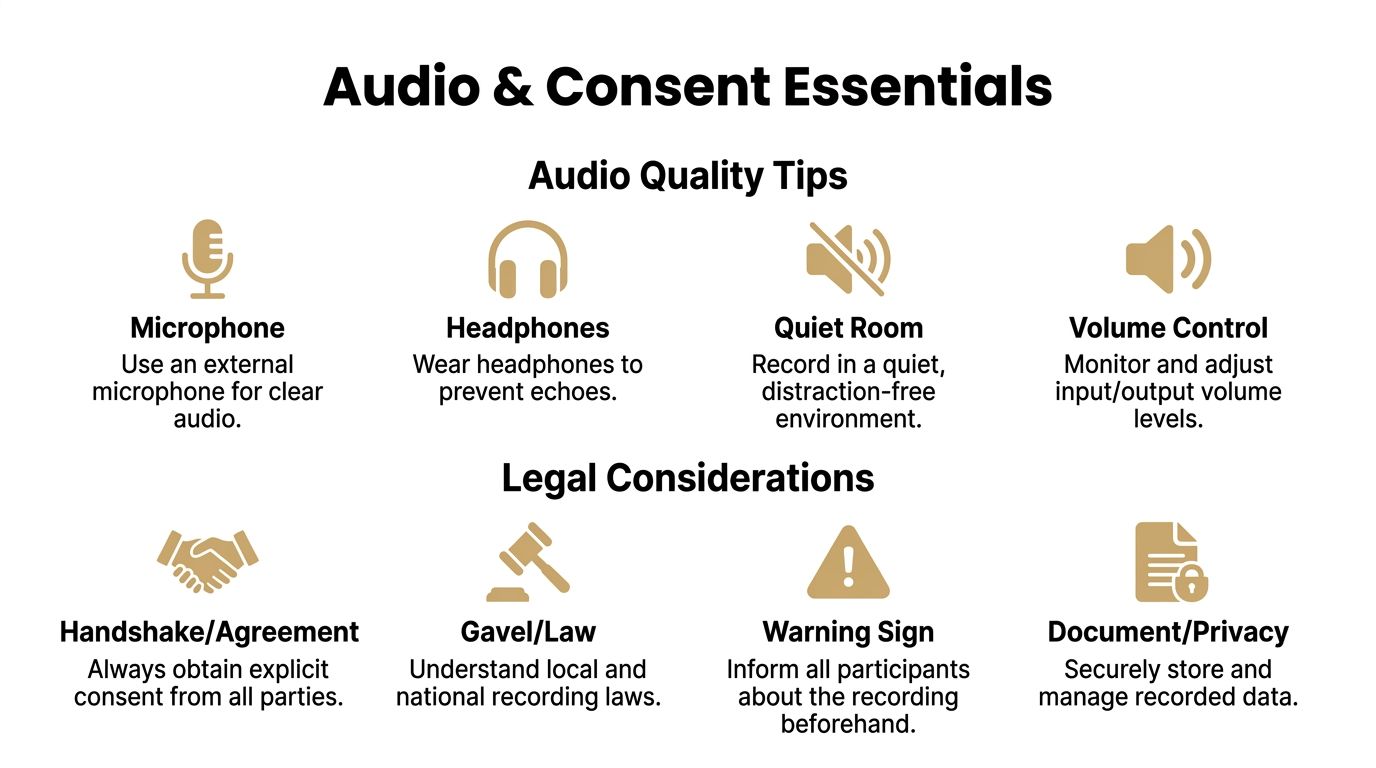
For better audio every time:
- Use headphones: They cut speaker bleed and reduce echo.
- Use a real microphone if the recording will be shared: Built-in laptop mics are acceptable for internal reference, not polished demos.
- Close noisy apps and notifications: Pings and alert sounds ruin otherwise good takes.
- Record a 20-second test clip: Check both voices before the actual conversation starts.
- Keep people close to their mic: Distance changes are obvious in spoken demos.
Clean audio affects credibility. Viewers will forgive a plain layout before they forgive a call that sounds accidental.
Recording consent needs a repeatable process
Consent is not a throwaway disclaimer at the start of the call. For business use, it should be part of the workflow.
Teams that record customer calls, onboarding sessions, agency reviews, or internal walkthroughs need a standard that works even when participants are in different regions. Broad advice to "check local laws" is not enough for an operating process, especially if the recording may be reused later for training or documentation.
A practical process looks like this:
- Ask before you start recording: Get permission before pressing record, not after.
- Say why you are recording: Internal training, meeting recap, product documentation, or customer support review.
- Get a clear verbal yes: Silence or a nod on video is weak documentation.
- Store the context with the file: Include participants, date, and intended use in your notes or asset name.
- Use a stricter standard for cross-region calls: If the jurisdictions differ, treat the call with the more cautious approach.
Use plain language. “I’d like to record this FaceTime call so our team can review the walkthrough later. Is that okay with you?”
That script works because it is specific, short, and easy for any teammate to repeat consistently.
Editing and Exporting Your FaceTime Recording
A FaceTime recording is rarely ready to share the moment the call ends. For business use, the gap between "captured" and "presentable" shows up fast. There is usually dead air at the top, off-topic chatter in the middle, and uneven audio that makes the whole video feel less credible than the product or team behind it.
Built-in recording methods give you a file. They do not give you a finished asset.
Clean up the raw recording
Start by cutting anything that makes the video feel unprepared. Remove the first few seconds before the conversation settles, trim setup talk that only matters to the people on the call, and cut the long tail at the end where everyone is confirming they can hang up. If someone spends 20 seconds hunting for a menu or waiting for a page to load, tighten that too.
Then fix the parts that affect watchability and trust:
- Trim to the point: Keep the viewer on the exact workflow, feature, or answer they came for.
- Correct speaker balance: If one voice is noticeably quieter, level it before export.
- Add visual guidance: Use zooms, highlights, or callouts where the viewer needs to focus.
- Add a light wrapper: A title card, lower-third, or simple branded outro is enough for most internal and customer-facing use.
- Name the file properly: Include product, topic, date, and audience or region so the asset is usable later.
The disparity in production quality becomes evident. A quick screen recording may be enough for a one-off recap, but polished demos need editing headroom. Clean audio, visible focus cues, and tight pacing are what make the recording reusable for sales, onboarding, support, or training instead of disposable after one viewing.
File handling matters too. Store the recording with clear context on who joined, what the session covered, and how the clip is approved for use. As noted earlier, that metadata matters as much as the edit if your team reuses recordings across regions or departments.
Export for the channel you actually use
Export with the destination in mind. A single master file is useful for archiving, but it is rarely the version you should send out.
Use the export that fits the job:
- Internal knowledge base: Keep full context, readable UI detail, and clear audio.
- YouTube or webinar archive: Export a clean horizontal version at a resolution that preserves interface text.
- LinkedIn or short social clips: Cut a tighter segment with faster pacing and stronger visual focus.
- Sales follow-up: Export only the relevant answer or demo segment so the buyer does not have to scrub through the full call.
I usually recommend keeping one high-quality master, then creating smaller exports from that version. That approach saves time, preserves quality, and avoids repeated re-edits every time another team asks for the same moment in a different format.
If your team records product demos, onboarding walkthroughs, or client calls regularly, Smooth Capture is built for that workflow on Mac. It gives you a cleaner way to capture, edit, and export polished videos without stitching together multiple tools after every call.
Authored using Outrank app
Ready to create stunning app demos?
SmoothCapture makes it easy to record your screen with 3D device frames, cinematic cursor effects, and professional editing tools.