Mac Screen Recording App: Top Choices for 2026
You’ve probably done this already. A launch is coming up, support needs a tutorial, or the App Store preview still isn’t done. You open the built-in Mac recorder, capture the flow, then watch it back and realize the video is technically fine but commercially weak. The cursor feels twitchy, the important clicks don’t read, the framing is flat, and turning that raw capture into a polished asset suddenly requires three more tools.
That gap explains why the modern mac screen recording app category matters. Recording is no longer just about saving pixels off a display. Teams use it to explain product value, reduce support load, train users, create launch assets, and ship video in formats that match where the video will live.
Table of Contents
- Beyond QuickTime A New Era of Mac Screen Recording
- Understanding Core Screen Recording Features
- Professional Use Cases for Screen Recording
- Performance Privacy and Technical Nuances
- How to Choose the Right Mac Recording App
- Pro Workflow From Capture to Polished Demo
- Frequently Asked Questions
Beyond QuickTime A New Era of Mac Screen Recording
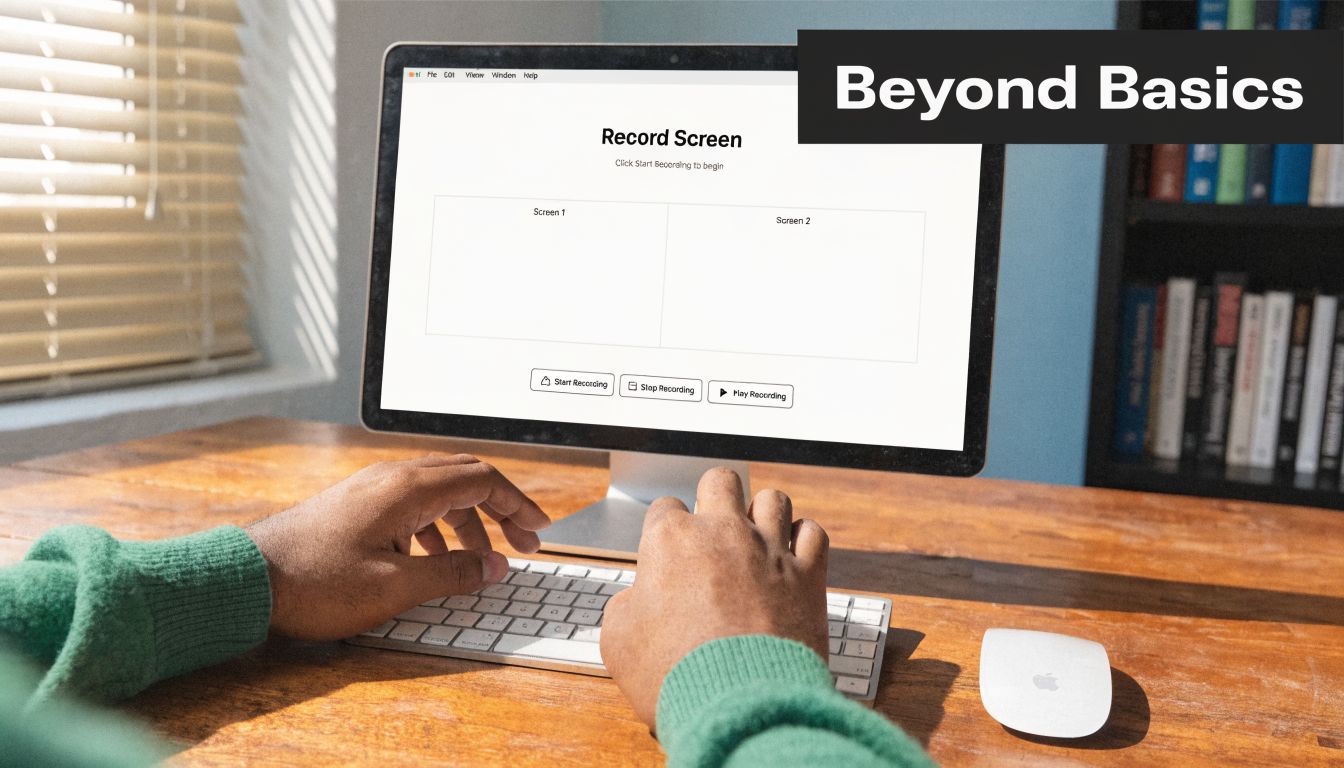
The built-in tools on macOS are useful. QuickTime Player is there, the Screenshot Toolbar is easy to trigger with Cmd+Shift+5, and for a quick proof or internal handoff they often do the job. Apple’s privacy model also changed the category in a meaningful way. Starting with macOS Mojave, screen recording apps require explicit user consent through system alerts, and macOS shows visible recording indicators so apps can’t capture in the background unnoticed, as outlined in McAfee’s overview of screen recording privacy on Mac.
That privacy-first design helped push the market toward more trustworthy tools, but it didn’t solve the production problem. A raw capture still looks raw. If you need a walkthrough that feels deliberate, branded, and easy to follow, the built-in recorder is only the first step.
QuickTime and the Screenshot Toolbar are great for simple capture. They’re weak when the work starts after capture. You still need to guide attention, clean up mistakes, adjust pacing, package the video for a destination, and sometimes wrap it in a device frame so it looks like a finished product asset instead of a desktop recording.
A usable recording shows what happened. A strong recording shows viewers what matters.
That difference becomes obvious the moment the same clip has to serve multiple teams. Product marketing wants polish. Customer education wants clarity. A founder wants one source recording that can become a website demo, a social cutdown, and an app listing asset. If your process begins with a basic capture and ends with a pile of manual edits, you’re spending more time on formatting than communication.
If you still use Apple’s built-in recorder for quick jobs, it helps to know its limits up front. This QuickTime screen recording guide is a solid reference for the basic workflow. For repeat production, though, dedicated tools exist because much of the work starts after you press stop.
Understanding Core Screen Recording Features
A good buying decision starts with the terms vendors use. Most apps advertise 4K, cursor effects, editing, or exports. Those labels matter less than understanding what they change in the final video.

Capture settings that change the final result
The first layer is the recording itself. Modern macOS tools can capture from 720p to 4K with frame rates up to 60 FPS, and can record both system audio and microphone audio on macOS 13 and later, which allows a tutorial or demo to be created in one pass rather than stitched together afterward, as shown in this overview of current macOS recording capabilities.
Here’s what those choices mean in practice:
- Resolution affects flexibility: 1080p is often enough for internal tutorials and documentation. 4K gives you more room to crop, zoom, and reframe for other outputs without the image falling apart.
- Frame rate affects motion: 30 FPS is acceptable for many walkthroughs. 60 FPS looks cleaner when your app has animated UI, scrolling lists, draggable panels, or quick cursor movement.
- Capture area affects focus: Full-screen recording is easy, but often wasteful. Window or region capture reduces distractions and makes the recording feel intentional.
- Dual-audio affects speed: If the app records system sound and your mic together, you can explain interactions while letting interface sounds remain audible.
Editing and visual guidance
Recording quality alone doesn’t create clarity. The next layer is how the app helps the viewer follow the action.
A non-destructive timeline editor means you can trim, split, and rearrange clips without damaging the original recording. Think of it as working with instructions layered on top of your source footage rather than cutting the source itself apart. That matters when a stakeholder asks for “the earlier version, but with the second intro and without the last click sequence.”
A few features consistently make a screen recording feel professional:
- Cursor smoothing and interpolation: These reduce the jumpiness that makes desktop recordings look frantic.
- Click ripples and callouts: Useful when small interactions need to be obvious without adding voiceover for every tap.
- Automatic zoom: Helps direct attention to the active area instead of relying on the viewer to scan the whole screen.
- Webcam overlays: Best when the presenter’s presence adds trust or context, not just because the software allows it.
- Background replacement: Helpful for team intros, training modules, and social edits where visual consistency matters.
Practical rule: If a feature only looks good in the app’s marketing video but doesn’t reduce editing decisions in your own workflow, it’s decoration.
Export tools matter too, even if buyers skip them during evaluation. Built-in Mac recorders output MOV only and don’t support MP4 export, which is one reason they create friction once a clip needs to move across marketing, social, app listing, or client channels. Understanding capture, edit, and export as one chain is what separates a casual recorder from a production tool.
Professional Use Cases for Screen Recording
Teams rarely record screens for the sake of recording screens. They record to ship something. That’s why the most useful way to judge a mac screen recording app is by the business workflow it supports after capture.
Product marketing and launch assets
Product marketing teams need more than a faithful recording of the interface. They need a video that communicates polish, speed, and direction. That’s where treatments like cursor emphasis, controlled zoom, perspective styling, and device framing start to matter.
One persistent gap in most reviews is post-production prep. As noted in Screen Studio’s discussion of this workflow gap, many roundups focus on recording quality but don’t spend enough time on device frames and orientation swapping, even though those details are critical when a team has to turn one source capture into App Store previews and social media assets without jumping into separate design tools.
A product marketer usually needs all of this from the same source recording:
- A polished horizontal demo for the website or YouTube
- A framed device version for app-focused presentation
- A vertical cutdown for social distribution
- A shorter feature clip for launch notes or paid promotion
Without integrated output options, teams end up rebuilding the same asset several times.
Education support and agency delivery
Customer education teams care about different things. They need consistency, clear narration, readable cursor movement, and repeatability. Their challenge isn’t usually making one beautiful hero video. It’s building a library that feels coherent across onboarding, help center content, and feature updates.
Agencies and consultants sit somewhere in the middle. They need polish, but they also need speed. A client demo often becomes a pitch asset, a training clip, and an internal review file. The app that wins in that environment is the one that reduces handoffs between recording, editing, framing, and formatting.
A few practical patterns show up again and again:
- Onboarding libraries benefit from stable templates: Similar zoom behavior, title treatment, and cursor styling reduce visual inconsistency.
- Support walkthroughs need legibility over flair: Fast effects are less important than making each click and menu choice easy to follow.
- App preview work needs packaging tools: Device shells, aspect-ratio changes, and clean text overlays save time that would otherwise go to Figma or a full NLE.
- Client-facing work needs predictable exports: Agencies don’t want to guess whether a codec or aspect ratio will get rejected downstream.
A recorder becomes a business tool when one capture can serve more than one team without being rebuilt from scratch.
Performance Privacy and Technical Nuances
A screen recorder can have an attractive interface and still fail where it counts. If your Mac stutters during capture, if your fans ramp up, or if your audio path is unreliable, the rest of the feature list won’t save the result.
Why Metal matters during capture
Professional tools separate themselves at the architecture level. According to ScreenCharm’s explanation of macOS recording performance, pro recorders use Apple’s Metal framework for GPU acceleration, which enables high-frame-rate 4K capture with minimal system load, while CPU-heavy approaches often introduce lag and broader performance degradation.
That technical detail matters because screen recording is not passive. While you record, you’re also moving through the product, opening panels, triggering animations, typing, clicking, and sometimes monitoring a live preview. If the recorder leans too heavily on the CPU, the app you’re demonstrating may stop behaving the way it normally does.
The practical difference shows up in small but expensive ways:
- Cursor motion stays consistent instead of turning uneven under load
- Animations remain readable instead of dropping frames at the exact moment you need to show product smoothness
- Live effects are more trustworthy because the app can process them without choking the system
- You can record and work at the same time without every background task becoming a risk
Privacy permissions and audio capture
Privacy is part of performance too, just in a different sense. macOS now requires permission-based access for screen capture, and visible indicators signal when recording is active. That doesn’t just protect users. It gives teams a cleaner trust baseline when they decide which software they’re willing to install across a company.
Audio is where many workflows still go wrong. Clean microphone capture is only half the job. For product demos, support tutorials, and anything with sound cues, you often need system audio too. Native Core Audio integration is the cleaner route because it avoids the awkward plugin-heavy setup that older workflows often required.
If system sound is part of your process, this guide to recording internal audio on Mac covers the practical side well.
If a recorder makes you think about drivers, routing hacks, or “maybe we can fix it in post,” it’s already costing more than its price tag suggests.
The invisible parts of a recorder decide whether your recording day feels stable or fragile. That’s why performance testing should always happen with your real app, your real screen setup, and your real audio path, not just with a blank desktop and a vendor demo file.
How to Choose the Right Mac Recording App
Picking a recording tool by feature count is how teams end up with software they barely use. The better question is simpler. What happens to the recording after capture?
Start with workflow not features
Most reviews compare tools as if every buyer is a solo creator. That misses a major issue for business use. Setapp’s overview of Mac screen recorders highlights a gap that matters to companies shipping video regularly: team workflow integration is rarely discussed, even though sharing, reviewing, and standardizing recordings are central needs for product marketing and customer education teams.
That changes the evaluation criteria. Instead of asking only “Can it record in high quality?” ask these:
- Who needs the file next: Just you, or marketing, education, support, legal, and clients?
- How often do you publish: Occasionally, or as part of a repeating content operation?
- Do you edit inside the recorder: Or does every asset move to another editor immediately?
- How many output formats do you need: One export, or several versions from one source capture?
- Do you need consistency: Shared shortcuts, repeatable framing, and standard export behavior often matter more than one extra visual effect.
If your recordings are one-off internal explainers, built-in tools may be enough. If your work involves demos, launch clips, tutorials, and repeat distribution, workflow features matter more than novelty features.
Screen Recorder Archetypes on Mac
| Archetype | Best For | Key Limitation | Example |
|---|---|---|---|
| Free and built-in | Quick captures, internal handoffs, basic recording | Limited post-capture workflow and format flexibility | QuickTime Player |
| All-in-one utility | General-purpose screenshots and recordings with some editing | Can feel broad rather than production-focused | CleanShot X |
| Specialized production tool | Teams creating polished demos, tutorials, and multi-format assets | Better fit for recurring production than occasional casual use | Smooth Capture |
The archetype matters because each one optimizes for a different job.
QuickTime is hard to beat for zero-friction access. CleanShot X fits people who want a utility that handles capture plus a wider set of desktop tasks. A specialized tool like Smooth Capture fits teams that need timeline editing, cursor treatment, device frames, orientation changes, and repeatable exports inside one native macOS workflow.
The right choice is rarely “most powerful.” It’s the tool with the fewest painful handoffs for the work you do.
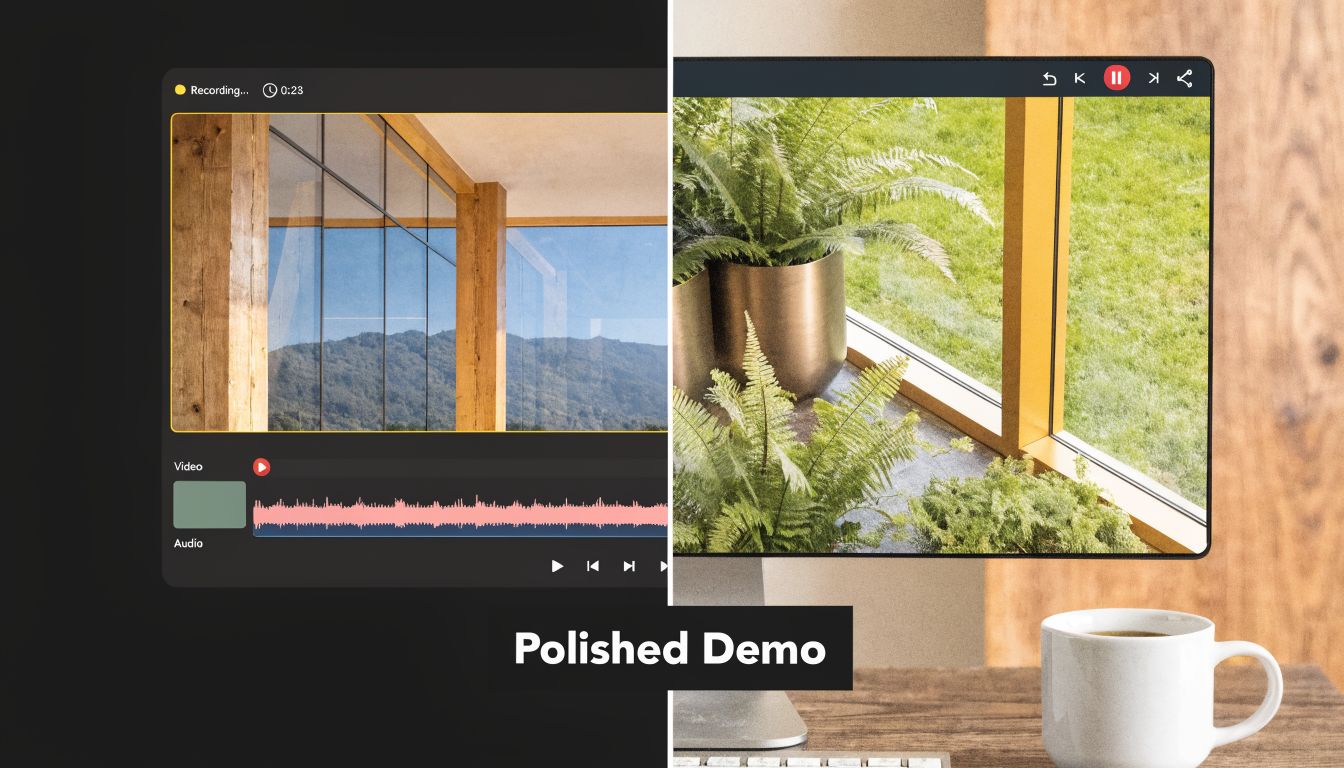
Pro Workflow From Capture to Polished Demo
A polished demo usually falls apart for one of two reasons. The recording itself is messy, or the team records once and then rebuilds the asset three different ways for three different channels. A better workflow treats the first capture as the master and shapes versions from there.
Record the clean master first
Start with the actual user journey you need to show. Don’t record the whole product and decide later. If the goal is a feature announcement, record the shortest path from entry point to payoff. Close notifications, simplify the desktop, enlarge anything that might be unreadable, and script your click path before you press record.
A clean master capture usually follows this sequence:
Set the frame deliberately Choose full screen, window, or region based on the final use. If the end asset may become vertical later, leave yourself visual room and avoid placing important UI at the extreme edges.
Capture narration and product sound in one session
When the recorder supports both sources, you avoid the brittle process of syncing separate audio later. This is especially useful for onboarding videos where interface sound reinforces the action.Record one ideal take, then a few pickups
Don’t restart from the top for every small mistake. Capture the clean main pass, then record short correction clips for sections you may swap later.
After capture, move into the timeline immediately. Trim dead air at the beginning and end, cut obvious stumbles, then tighten pauses between actions. Most product demos improve as soon as you remove the hesitation that felt harmless during recording.
For the basic recording setup itself, this walkthrough on how to record your Mac screen is useful as a starting point.
Shape the recording into deliverables
Dedicated tools save time. Apply cursor smoothing so mouse movement reads as intentional. Add click emphasis where a small action controls the flow. Use automatic zoom or manual keyframes to bring focus to dense interface areas.
Then package the asset for the destination, not for your editing timeline.
A practical finishing sequence looks like this:
- Add a device frame when context helps
This is especially useful for app previews, launch visuals, and social clips where the product needs presentation, not just evidence. - Use webcam overlays sparingly
Add them when trust, instruction, or presenter presence improves comprehension. - Create subtitles on device
Captions help in silent autoplay environments and in education contexts where clarity matters. - Generate multiple aspect ratios from one project
One horizontal master can feed a website demo, social cutdown, and mobile-first version if the app supports reframing well.
This last step is where export tooling has real operational value. According to American SPCC’s overview of macOS recording workflows, professional software can reduce multi-platform export work from 3 to 5 manual steps to a single platform-selection click, improve file sizes by 30 to 50 percent through codec-aware compression, and save a 3-person team roughly 15 to 20 hours monthly when they regularly prepare versions for different destinations.
The polished look usually comes from fewer handoffs, not from more effects.
That’s the production mindset that changes results. One recording session. One editable project. Multiple outputs that stay visually consistent.
Frequently Asked Questions
Can a Mac screen recorder capture system audio
Yes, but it depends on the app and the macOS version. Modern macOS recorders can capture both system audio and microphone audio on macOS 13 and later, which is the cleanest setup for tutorials, walkthroughs, and narrated demos. If your current tool only records the mic, you’ll feel that limitation fast when product sounds matter.
Do you need a high-end Mac for professional recording
Not always. What matters more is how the recorder is built and how demanding your workflow is. If you record high-resolution demos with motion, effects, or simultaneous audio sources, an efficient app matters a lot. In practice, GPU-aware tools are much easier to work with than CPU-heavy recorders that slow the machine during capture.
Should you export MOV or MP4
Use the format that matches the destination. MOV is common in built-in Mac workflows and works well for editing or archiving. MP4 is usually easier for wider distribution because more platforms, teammates, and clients expect it. If your recorder only outputs MOV, you may need an extra conversion step later.
Is QuickTime enough for professional work
Sometimes. It’s enough for simple internal videos, rough walkthroughs, and basic capture. It becomes limiting when you need timeline editing, better cursor treatment, multiple output formats, or packaging features like framed device presentation and aspect-ratio variants.
What should teams evaluate first
Start with repeatability. A recorder should make it easy to create consistent outputs, not just attractive one-offs. That means reliable capture, practical editing, straightforward exports, and a workflow your whole team can follow without inventing a new process each week.
If your team creates demos, onboarding videos, App Store previews, or social cutdowns on a regular basis, Smooth Capture is worth a look. It’s a native macOS recorder and editor built around the full production workflow, including timeline editing, cursor effects, device frames, orientation changes, and export paths for polished business video.
Ready to create stunning app demos?
SmoothCapture makes it easy to record your screen with 3D device frames, cinematic cursor effects, and professional editing tools.