How to Record Mac Screen: A Guide to Polished Video
You’re probably trying to get one of three things done right now. A feature demo for a launch. A quick customer walkthrough. Or a bug reproduction for engineering that’s faster than writing five paragraphs and attaching screenshots. That’s why learning how to record mac screen well matters. On a Mac, the free built-in tools are good enough for a surprising amount of work. They’re fast, already installed, and perfect for raw capture. The gap appears later, when you need cleaner audio, repeatable framing, branded visuals, subtitles, or edits that don’t eat half your afternoon. A practical workflow starts simple. Capture with native tools when speed matters. Add a more structured setup when you need system audio, iPhone footage, or reusable output formats. If your team ships product videos regularly, the key win isn’t just recording the screen. It’s creating a process that turns rough captures into polished assets without rebuilding the setup every time.
Starting Your Mac’s Screen Recording Journey
Recording high-quality video doesn't require a complicated stack for every project. Professionals need a reliable way to transform a working product flow into something another person can understand in a few minutes. That requirement changes how you should approach screen recording. For internal demos, support replies, and one-off walkthroughs, start with what’s already on the Mac. It’s faster to open, easier to teach across a team, and usually enough for the first pass. For public-facing videos, though, “good enough” starts to show its limits. Cursor movement feels loose. Audio takes cleanup. Framing isn’t consistent. Edits happen in too many places. There are really two paths. One is the free native path. You use the macOS toolbar or QuickTime, keep the setup light, and focus on speed. That’s the right choice when the recording is disposable or mainly informational. The other is the production path. You still care about speed, but you also need consistency. Product marketing, customer education, and SaaS teams usually end up here because one recording turns into several deliverables: a help article clip, a launch teaser, an onboarding lesson, maybe a social cutdown too. A simple way to choose:
- Use built-in tools when the recording is short, single-purpose, and doesn’t need internal app audio.
- Use a dedicated workflow when the recording needs editing, branded polish, alternate aspect ratios, or repeatable output.
- Upgrade sooner than you think if multiple people on your team create videos. Process drift shows up fast. If you want a broader view of the trade-offs before you choose a setup, this roundup of screen recording software for Mac is a useful comparison point.
Practical rule: If you’re going to publish the recording anywhere customer-facing, plan the full workflow before you hit record.
Using Your Mac’s Built-In Screen Recorder
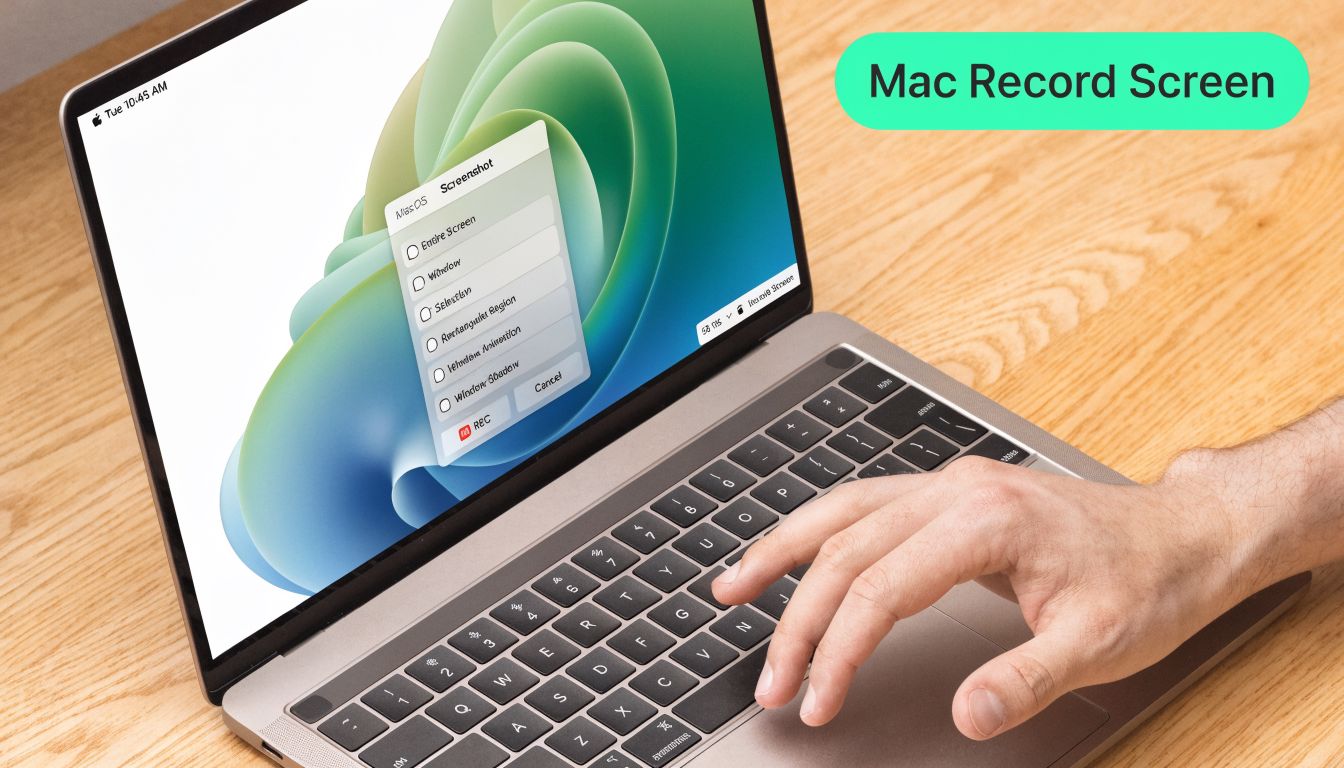
Mac users already have a strong starting point. Command + Shift + 5, introduced in macOS Mojave in 2018, opens a screen capture toolbar that’s much faster than the older QuickTime-only route, and recordings save as .mov files to the Desktop by default according to Apple’s screen capture documentation.
Know when native tools are enough
For many SaaS workflows, the built-in recorder handles the first capture well. I’d use it for:
- Bug reports: Record the exact issue, narrate briefly, and send the file.
- Support replies: Show the click path instead of describing it in text.
- Draft demos: Capture the product flow first, decide later whether it deserves full polish.
- Internal reviews: Share a rough walkthrough before anyone spends time editing. QuickTime still works too. Open it, choose File > New Screen Recording, and start there if that’s your habit. But the toolbar from Command + Shift + 5 is the faster daily driver because it puts the important controls in one place.
Use Command + Shift + 5 for the fastest capture
Press Command + Shift + 5 and you’ll see options to record the full screen or a selected portion. For most product demos, a selected portion gives you better focus because it removes Slack, menu bar clutter, and anything else that competes for attention. A clean recording setup usually looks like this:
- Choose the capture area
Use full screen when your app uses the whole display. Use a region when you want to isolate a browser window, app frame, or a specific feature area. - Open Options
In the toolbar, click Options and check the items that matter:- Microphone: Choose your mic if you’re narrating.
- Timer: A short delay helps when you need a second to switch windows or settle your cursor.
- Show Mouse Clicks: Useful for tutorials because clicks become visible in the recording.
- Prepare the desktop
Close distracting apps, hide notifications, and put the relevant windows in order before you begin. Recording always reveals the clutter you stopped noticing. - Record, then stop from the menu bar
Once you start, macOS places the stop control in the menu bar. When you stop, a thumbnail appears for quick review.
Don’t record while figuring out the flow. Click through the sequence once before the take. The smoother performance usually matters more than advanced editing later.
Dial in cleaner-looking recordings
Most blurry Mac demos come from display choices, not the recorder itself. For crisp captures, set your display scaling to Larger Text, which forces 2x Retina pixel scaling, and avoid More Space, which can cause a 30 to 40% quality loss according to this high-resolution Mac capture guide. A few production habits make a visible difference:
- Record on the built-in Retina display: External monitors often introduce scaling artifacts.
- Close extra apps: Fewer background demands means fewer dropped frames.
- Use headphones if narrating: That helps avoid feedback during mic capture.
- Choose the right frame rate later: For tutorials, 30 fps is usually the sensible export target. If playback looks choppy after a QuickTime recording, the issue can be variable frame rate. In practice, that often shows up when you drop the file into an editor and motion feels uneven. Converting to constant frame rate before editing usually fixes it. Native tools are strongest at capture, not polish. They help you get footage quickly. They don’t give you much help shaping that footage into a repeatable business asset.
Advanced Audio Setups and iOS Device Recording
Mac recording workflows often get more technical than people expect. The built-in recorder handles screen plus microphone well enough, but it doesn’t capture internal system audio on its own. And if you need to show a mobile app, you’ll want a different setup entirely.
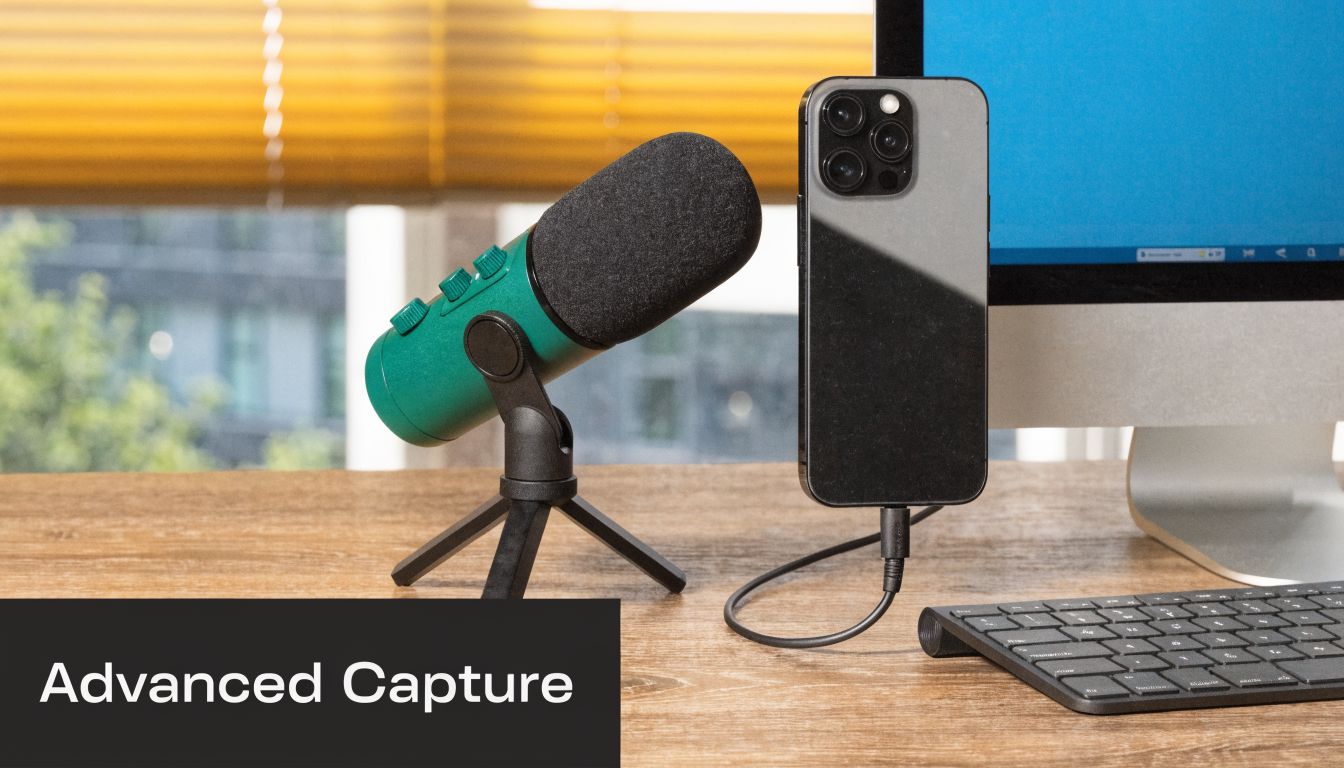
Record an iPhone or iPad on your Mac
If you need to demo an iOS flow, connect the iPhone or iPad to your Mac with USB, open QuickTime Player, and create a New Movie Recording. Then switch the camera source from your webcam to the connected device. That method is useful when your launch video or onboarding flow spans desktop and mobile. It also gives you a steadier result than trying to film the phone screen with a camera. Teams that produce mobile walkthroughs regularly usually want a workflow built around connected-device capture rather than improvising each time. If that’s your use case, this page on iPhone and iPad recording on Mac is relevant. For teams also thinking about mobile clips in a broader B2B content workflow, Cloud Present has a good read on professional screen recording for B2B content that’s worth comparing against your current process.
Capture internal system audio the reliable way
macOS blocks internal app audio in its built-in screen recording tools, so if you need the sound from the app itself, you need a workaround. The standard free setup is BlackHole plus OBS Studio. According to Itarian’s guide to recording screen and audio on Mac, you must install a virtual audio driver like BlackHole, route system sound through it, and configure OBS with the right permissions. The same guide notes that permissions cause 90% of initial failures, and that hardware-accelerated encoding on M-series Macs can deliver zero-lag performance when configured correctly. In practical terms, that setup looks like this:
- Install BlackHole: This creates a virtual audio path OBS can listen to.
- Open OBS and add sources: One for display capture, one for system audio, and one for your microphone if needed.
- Approve permissions in System Settings: Screen Recording and Microphone access both matter.
- Monitor with headphones: That helps avoid echo and keeps you from recording your own playback loop. Here’s a walkthrough format many people find easier to follow before building the setup:
Free setups can produce excellent results. They just ask you to become part-time IT support for your own recording process.
OBS is powerful. It’s also a tool you maintain. If you only need system audio a few times a year, that’s fine. If you need it every week, the setup cost starts repeating itself.
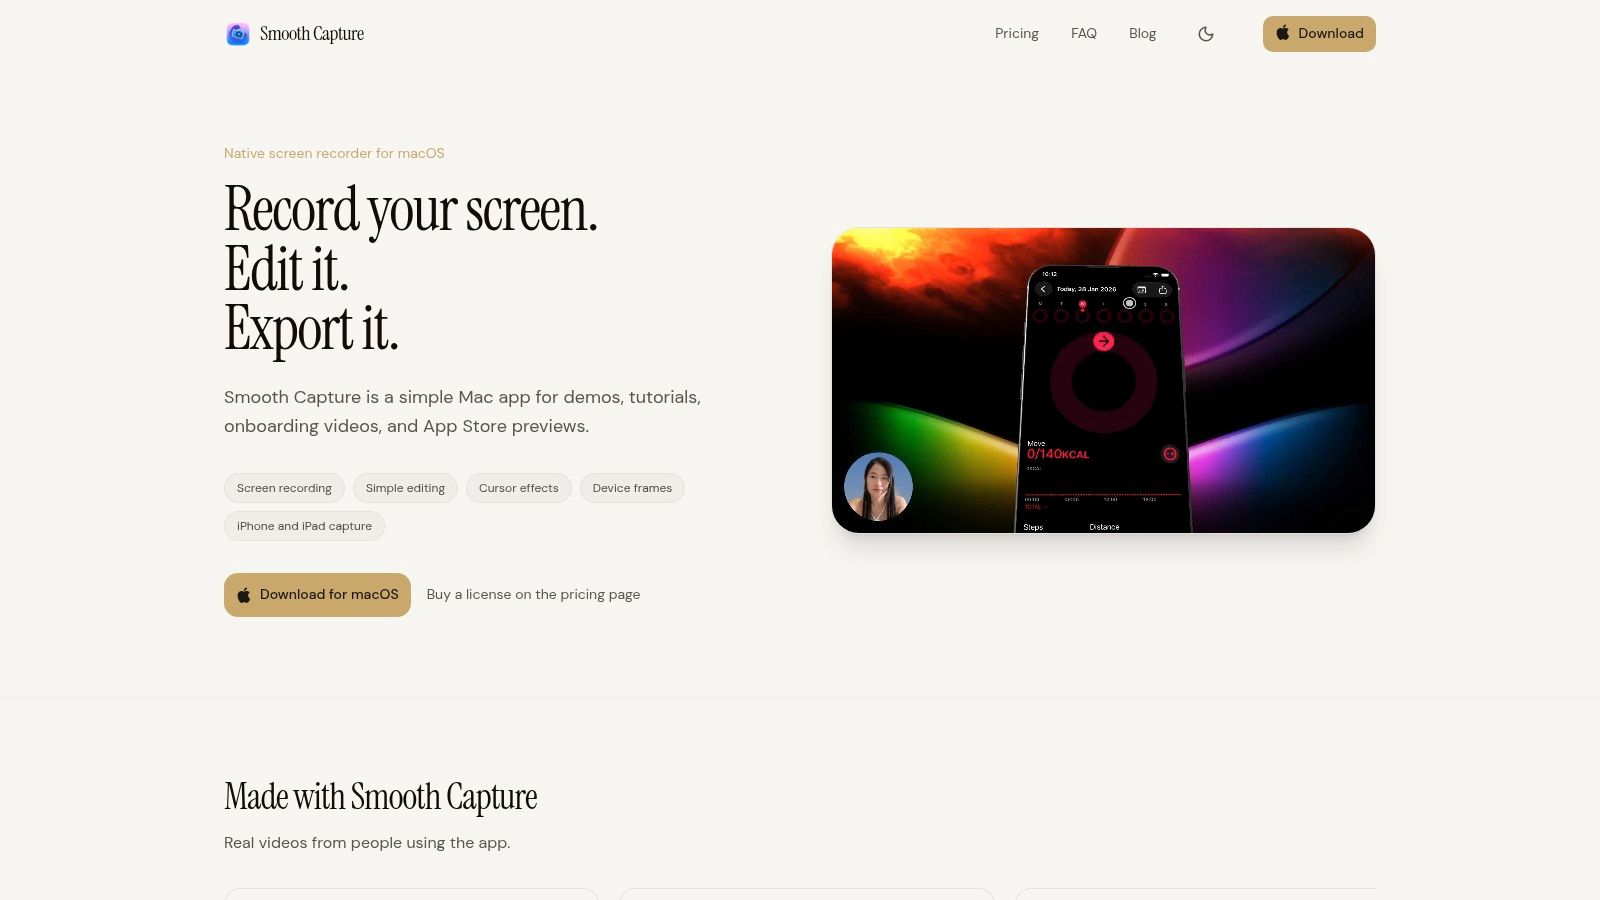
Adopt a Professional Workflow with Smooth Capture
The pain point usually isn’t recording. It’s everything around recording.
A raw capture turns into trimming mistakes, separating mic and app audio, reframing for another channel, highlighting the cursor, adding subtitles, exporting multiple versions, and trying to make each video look like it came from the same company. Native tools and OBS can do parts of that, but they spread the work across multiple steps and apps.
What changes when recording becomes regular work
The workflow changes once videos become part of your operating rhythm. Product marketing needs launch assets. Customer education needs lesson libraries. Support needs reusable answers. Founders need demos that look presentable without hiring an editor for every small update. That’s the point where a dedicated app stops being a luxury and starts being infrastructure. Smooth Capture is a native macOS app built for that kind of repeatable production. It records the full screen, a window, or a region, supports webcam capture, handles cursor effects, works with connected iOS devices, and includes editing and export controls in the same environment. For teams that also need presentation polish, device framing ideas like the ones shown in this guide on adding a device frame to screen recordings can help make demos look more intentional.
Native tools vs. Smooth Capture at a glance
| Feature | macOS Native Tools (QuickTime/Toolbar) | Smooth Capture |
| Screen capture | Full screen or selected area | Full screen, window, or region |
| Microphone recording | Yes | Yes |
| Internal system audio | No native built-in workflow | Supported in the app workflow |
| Webcam overlay | No built-in option in the recorder | Supported |
| iPhone and iPad recording | Possible through separate QuickTime workflow | Supported with USB-connected device workflow |
| Cursor effects and click styling | Basic mouse click visibility | Cursor effects, click ripples, magnifying lens, smooth cursor interpolation |
| Editing after capture | Minimal | Timeline editing with trim, split, rearrange, and keyframing |
| Device frames and perspective treatments | No | Available |
| Subtitle workflow | Separate tool required | On-device subtitles using Apple’s Speech framework |
| Multi-format output | Manual rework | Horizontal and vertical outputs from one capture |
What actually saves time in production
The features that matter most aren’t always the flashy ones. Significant savings come from reducing handoffs. A few examples:
- Separate tracks matter: When app audio and microphone audio stay isolated, fixing balance later is much easier.
- Timeline edits matter more than expected: Trimming dead air and cutting mistakes inside the recording shouldn’t require another app.
- Motion cues matter for comprehension: Automatic zoom, cursor emphasis, and click effects reduce the need to narrate every tiny action.
- Reusable visual framing matters: If every video needs to look on-brand, device frames, background treatments, and webcam layouts save a lot of repetitive setup.
Production note: The fastest workflow is the one that avoids exporting raw footage just to solve a problem you could have fixed before export.
If your needs are occasional, stick with native tools and add OBS only when you need system audio. If video is becoming a recurring business asset, an integrated workflow usually pays off in fewer steps, fewer mistakes, and more consistent output.
A Repeatable Process for Polished Videos
A polished screen video is usually decided in the first editing pass. Raw captures contain pauses, missed clicks, awkward mouse movement, and moments where the presenter is waiting for the product to catch up. Leave those in, and the video feels amateur even when the product looks good.
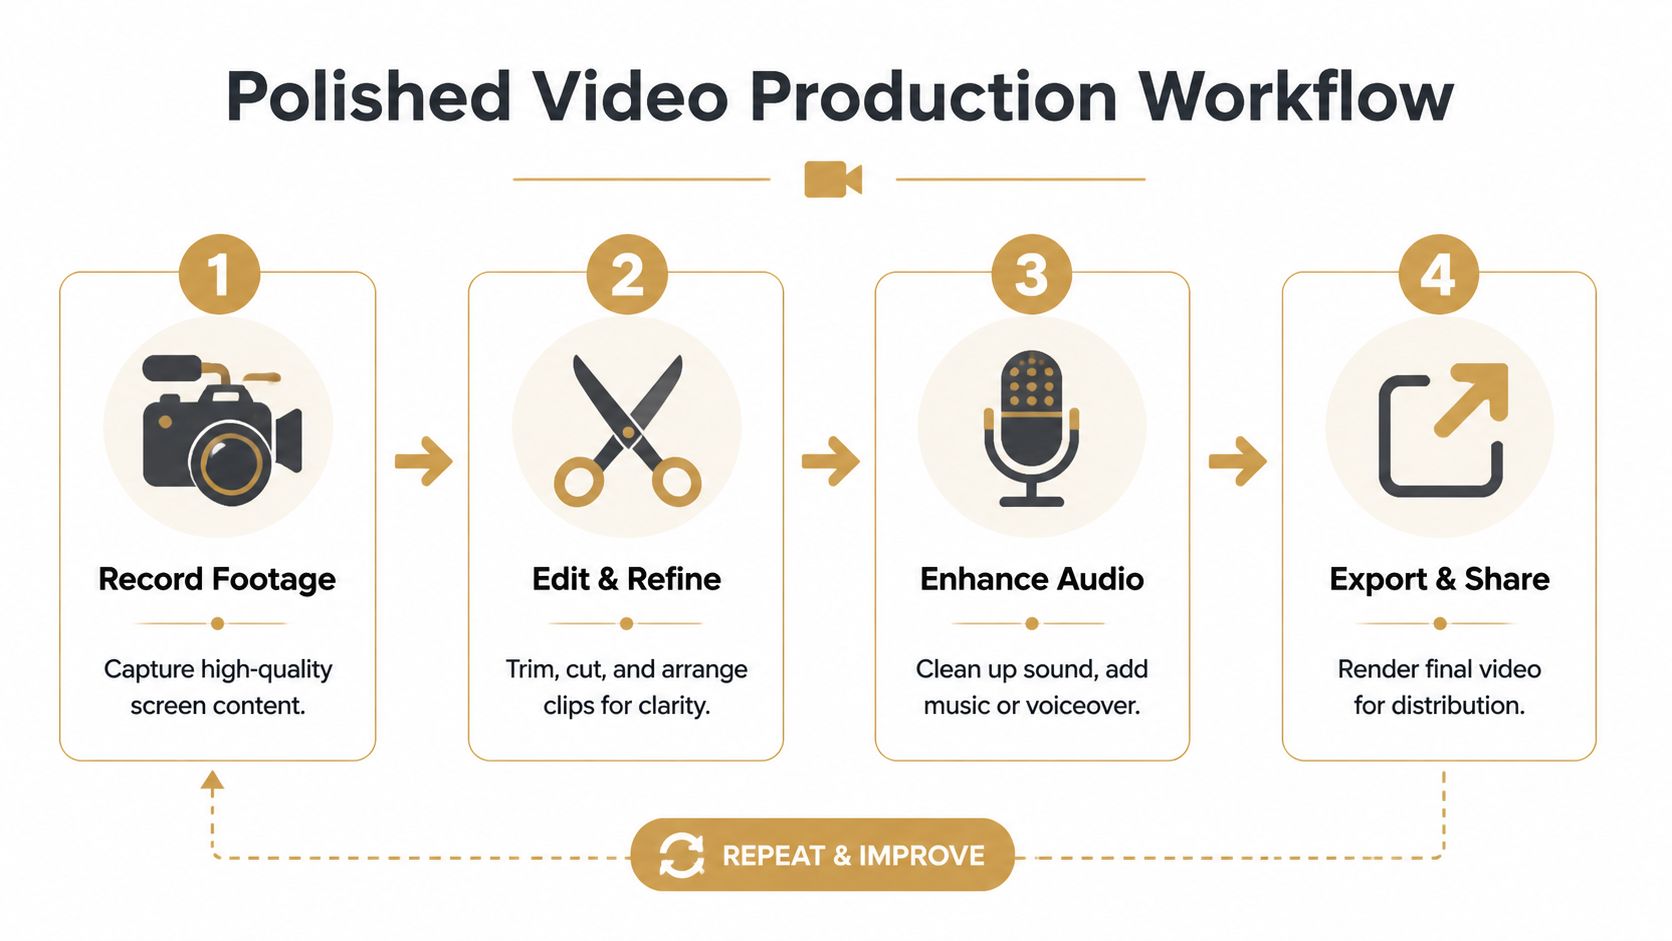
Edit the raw capture first
Start by cutting anything that slows comprehension. Trim the opening while you get into position. Trim the ending after the last useful action. Then work through the middle and remove loading delays, repeated clicks, false starts, and any narration that explains something the screen already makes obvious. A reliable first pass looks like this:
- Cut dead space firstSilence and hesitation make a short demo feel long.
- Remove mistakes before stylingZooms, captions, and cursor effects should only go on footage you plan to keep.
- Reorder only with a clear reasonTutorials usually work best in sequence. Marketing clips often work better when the outcome appears early and the setup follows. This is also where the trade-off between free tools and dedicated software becomes obvious. With QuickTime or the Screenshot toolbar, the usual pattern is capture first, then move the file into another app for cleanup. It works, but each handoff costs time. Smooth Capture shortens that loop because trimming, rearranging, and presentation polish can happen in the same project instead of across multiple apps.
Add cues that help the viewer follow the screen
After the cut is tight, add guidance. The goal is not decoration. The goal is reducing cognitive load so the viewer knows where to look and what changed. In practice, a few cues do most of the work:
- Cursor emphasis: Helps viewers track motion across dense interfaces.
- Click feedback: Useful in onboarding, support, and training videos where a missed click creates confusion.
- Zooms: Best for settings, form fields, menus, and small state changes.
- Subtitles: Good for accessibility, silent playback, and faster scanning. Use these selectively. A bug reproduction video should stay plain and literal. A customer onboarding walkthrough usually benefits from stronger guidance. Product marketing sits somewhere in the middle. Enough motion to direct attention, not so much that the editing calls attention to itself.
Export for the destination
Export decisions should match the job the video needs to do. A help center tutorial needs readable text and manageable file size. A social cutdown needs reframing and tighter pacing. An app marketing clip needs cleaner composition, stronger brand consistency, and closer review of subtitles, framing, and margins. A practical checklist helps:
- Tutorials: Keep text sharp and motion steady.
- Social versions: Reframe manually rather than trusting a generic center crop.
- Internal docs: Compress for sharing, but check that UI labels still read clearly.
- Marketing assets: Review captions, safe areas, backgrounds, and device framing before final export. Teams that publish often should not make these choices from scratch every time. Save templates by format and use case. One for support. One for onboarding. One for launch content. That is how screen recording turns from a one-off task into a repeatable workflow, starting with the Mac tools everyone already has and improving from there when production volume, brand standards, and review cycles demand more control.
Troubleshooting and Team Workflow Tips
When screen recordings fail on Mac, the issue is usually mundane. Permissions weren’t granted. The wrong microphone was selected. The desktop was cluttered. The file came out too large because nobody chose export settings for the actual destination. A quick fix list helps:
- If recording won’t start: Check Screen Recording and Microphone permissions in System Settings.
- If audio sounds wrong: Verify the selected input and use headphones during narration.
- If the video looks soft: Record on the built-in Retina display and simplify the screen before capture.
- If files are unwieldy: Export for the use case, not as a giant master by default. For teams, the bigger win is standardization. Create a short style guide that defines window size, cursor treatment, subtitle style, intro framing, and export naming. Keep logos, music, and reusable backgrounds in one shared location. Save template projects so people start from a known baseline rather than improvising each time. That’s how you move from random screen captures to a working video system. Use the Mac’s built-in tools for fast, disposable recordings. Use a more structured production workflow when the video represents your product, your brand, or your customer experience. If your team records often enough that setup, editing, and export are starting to blur together, it’s worth trying Smooth Capture. It gives macOS teams one place to record, refine, and package screen videos for demos, onboarding, launch content, and social cutdowns without stitching the workflow together manually.
Ready to create stunning app demos?
SmoothCapture makes it easy to record your screen with 3D device frames, cinematic cursor effects, and professional editing tools.