How to Record from Live Stream on Mac in 2026
You ran a live webinar, product launch, or training session. The event went well. Then the key work starts.
Someone asks for a shorter demo clip. Sales wants a clean walkthrough without the Q&A. Support needs a version for onboarding. Social needs vertical cut-downs. If you didn't plan how to record from a live stream on your Mac, you're stuck cleaning up a rough archive instead of producing usable assets.
That's the gap most recording guides miss. They treat capture as the finish line. For teams that ship video regularly, capture is only the intake step. The better workflow is simple: record once, keep quality intact, and shape that session into multiple deliverables without rebuilding the whole thing from scratch.
Table of Contents
- Why You Should Record Live Streams for Repurposing
- Choosing Your Mac Recording Method
- Configuring Your Perfect Capture Setup
- The Legal and Ethical Side of Recording Streams
- Editing and Exporting for Professional Results
- Troubleshooting Common Recording Issues
- FAQ About Recording Live Streams on Mac
Why You Should Record Live Streams for Repurposing
Many view recording as simply keeping a copy. That's too narrow. Its true value is turning one live session into a content library you can keep using after the audience has moved on.
Live video isn't a niche habit anymore. One 2025 industry roundup estimated the market at $87.5 billion, reported 36.4 billion hours watched worldwide, and said the average live session lasts 25.4 minutes, which it described as 34% longer than VOD viewing sessions, according to LiveReacting's live streaming statistics roundup. That matters for marketers, educators, and product teams because a format people already watch for sustained periods can support launches, demos, onboarding, and customer education.
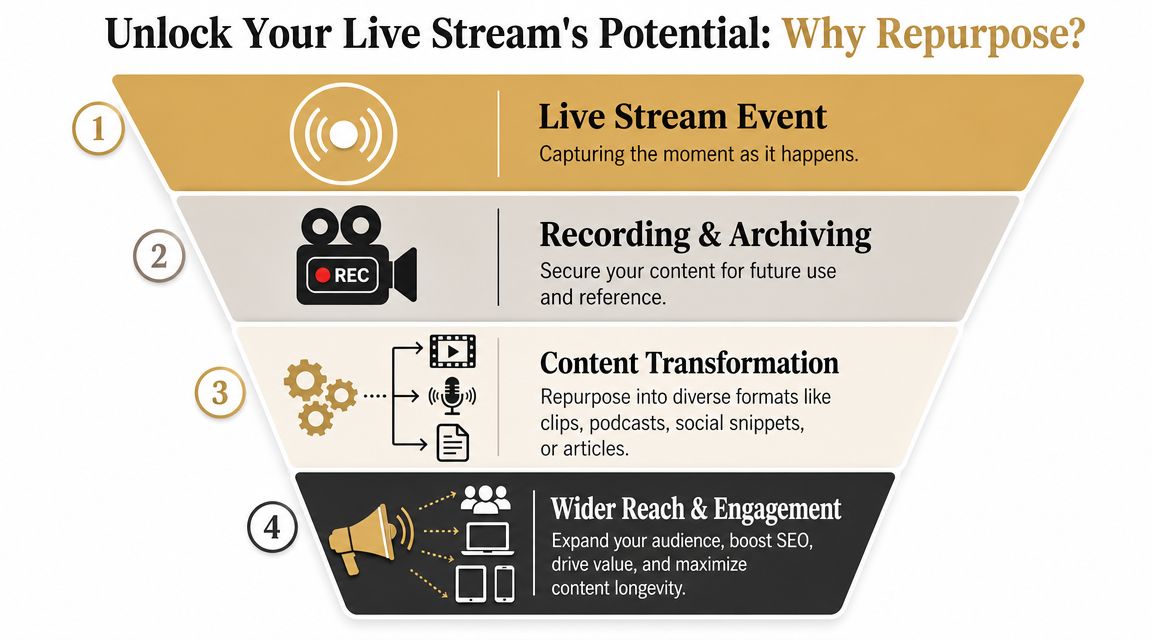
A raw replay rarely does the job on its own. What works better is treating the stream as source footage. The launch becomes a product teaser, a feature walkthrough, a training clip, an FAQ answer, and a set of short snippets for social distribution.
Repurposing creates leverage
Here's what a single recorded live event can become:
- Customer education assets that remove dead air, chat interruptions, and off-topic Q&A.
- Product demos trimmed to the exact feature path a prospect needs to see.
- Internal enablement clips for support, sales, and success teams.
- Short-form social edits pulled from the strongest moments instead of posting a full replay and hoping people scrub to the good part.
Practical rule: If the only output from a live session is a replay link, you left most of the value on the table.
Teams that already think in content systems usually perform better here. If you need a broader planning model for that, these data-driven content marketing strategies are useful because they push you to map each recording to specific business outcomes instead of treating video as a one-off production task.
Archiving is passive. Repurposing is operational
Archiving asks, "Did we save it?" Repurposing asks, "Can we use it next week without re-recording?"
That difference changes how you record from a live stream. You care more about clean audio, stable framing, a short pre-roll buffer, and an edit-friendly file than about just hitting record before the event starts. The teams that get the most value from live video don't just preserve the broadcast. They design the capture so post-production is fast and repeatable.
Choosing Your Mac Recording Method
On Mac, there isn't one best recording method. There are three good ones, and the right choice depends on whether you need speed, control, or a cleaner production pipeline.
Built-in macOS tools
QuickTime Player and the macOS Screenshot toolbar are the fastest way to record from a live stream when the job is simple. If you need a quick internal capture, a reference copy, or a rough archive, they work.
They don't give you much creative control. Editing is basic. Audio routing can become annoying. If your goal is polished content for distribution, you'll hit the ceiling quickly.
Dedicated recording software
OBS Studio gives you more control over scenes, sources, overlays, and routing. It's still a strong option for technical users who don't mind configuration work and separate post-production.
That flexibility comes with overhead. OBS is powerful, but it's easy to overbuild a setup for a task that only required a clean screen recording and later editing. If your team records often, that friction adds up. A simpler Mac-focused workflow is often better for repeatable production. This guide to a Mac screen recording app for polished workflows is useful if you're comparing tools built for speed versus broadcast-style setup.
External capture devices
If you're recording an external camera feed, a console, or another machine over HDMI, hardware capture can make sense. It takes load off the Mac and gives you a cleaner path for external sources.
It's also more setup. More cables, more points of failure, and more gear to manage. For browser-based live streams, webinars, product demos, and software training, it usually isn't necessary.
A quick comparison
| Method | Best for | Strength | Trade-off |
|---|---|---|---|
| QuickTime or Screenshot | Fast internal captures | Native and simple | Limited editing and routing |
| OBS Studio | Complex source control | Deep customization | Steeper learning curve |
| External capture hardware | External video feeds | Strong input reliability | Added hardware complexity |
Recordings fail less often when the workflow matches the job. Overcomplicated setups are a common source of mistakes.
How to choose without overthinking it
Use the built-in tools when all of these are true:
- You need speed: The recording is mostly for reference or simple reuse.
- You don't need layered scenes: One window, one screen, one output.
- You'll do minimal editing: Trim the ends and move on.
Choose OBS or similar software when these apply:
- You need source control: Multiple inputs, overlays, or scene switching.
- You want live production options: Not just post-production.
- You can support setup time: Someone on the team is comfortable managing it.
Use external capture hardware in narrower cases:
- The source is external: Camera feed, console, or second computer.
- You want separation: Capture load stays off the streaming Mac.
- You accept more setup: Better for fixed production stations than lightweight workflows.
For most Mac-based marketing, product, and education teams, the best method is the one that produces an edit-ready recording with the least operational drag. That's usually the method worth standardizing.
Configuring Your Perfect Capture Setup
The most common recording problems aren't dramatic. They're small setup misses that ruin usable footage. Wrong window. No system audio. Mic too hot. Webcam covering the UI.
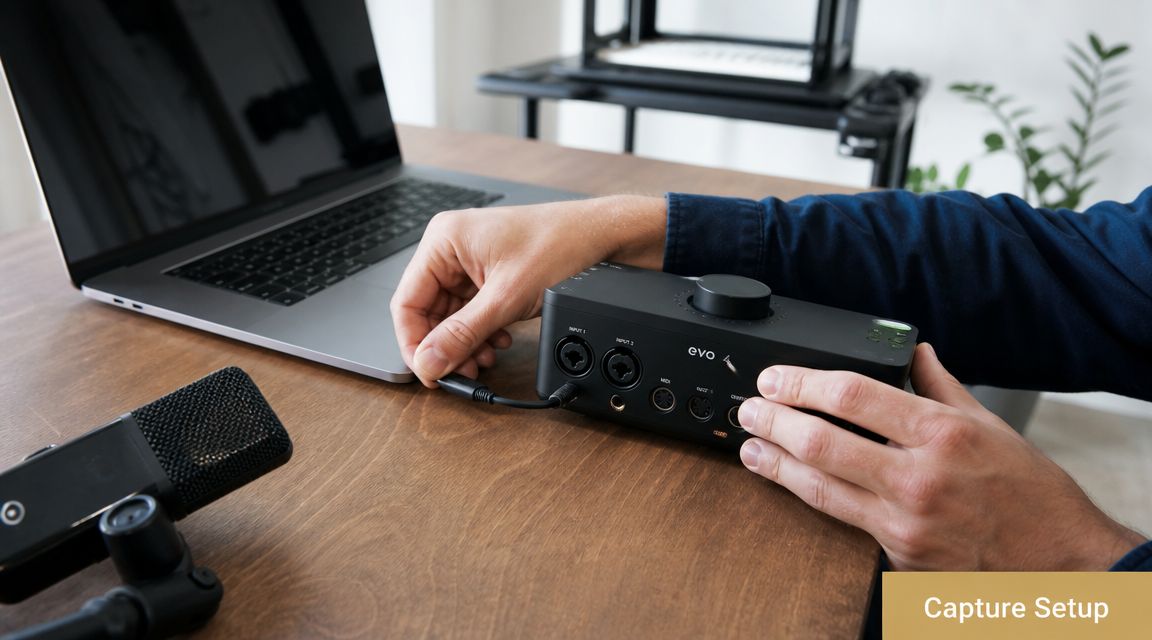
A solid workflow starts the same way every time. Make sure the source is in the output area, enable system audio if you need the program sound, start capture, and trim a short pre-roll buffer after the session. Practical recording guidance from TechSmith on recording live streaming video highlights this sequence because it helps avoid common failures like missing audio or capturing the wrong region.
Start with the capture area
Before you press record, decide what you're capturing:
- Full screen when the stream may switch apps, windows, or layouts.
- Window capture when you want a cleaner frame and fewer distractions.
- Region capture when only part of the screen matters and you want tighter composition.
Don't guess. Preview the capture area and check for notifications, browser tabs, menu bar clutter, and anything else that doesn't belong in the final asset.
A short pre-roll helps more than people expect. Start early, let the stream settle, then trim the lead-in. That buffer protects the opening moments, which are easy to lose if the player stalls or you hit record a beat too late.
Get Mac audio right before you record
Mac users hit the same problem constantly. The video records, but the stream audio doesn't.
The fix is operational discipline. Check audio routing before every session, not just once when you install a tool. If you're capturing a webinar, livestream, or app demo with sound, test whether the file includes the actual program audio and not just your microphone.
If you need a deeper walkthrough, this guide on how to capture sound from your computer on Mac covers the setup decisions that usually trip people up.
Silence in a finished file almost always starts as a routing mistake, not an editing mistake.
If you're publishing to YouTube as part of your workflow, account setup can also slow distribution at the worst time. These Mifu's YouTube verification tips are worth reviewing before launch day so uploads, thumbnails, and channel controls don't become the bottleneck after you've finished the recording.
Add voice and camera without clutter
For repurposing, commentary matters. A clean mic track turns a passive recording into training material or a narrated demo. But don't force a talking head into every asset.
Use your mic when context adds value:
- Narration during a demo helps future viewers understand what changed.
- Presenter commentary is useful for onboarding and customer education.
- Clean voiceover later is often better than live mic audio if the original session was noisy.
Webcam overlays should support the content, not compete with it. Keep them small, place them away from key interface elements, and be ready to remove them entirely for clips that need tighter framing later.
A visual walkthrough helps if you're building this setup for the first time:
Capture an iPhone or iPad stream cleanly
A lot of modern product footage starts on mobile. If you're demoing an iPhone or iPad app, tethered capture is usually cleaner than trying to point a webcam at a device screen.
Use a wired connection, keep the device charged, and lock down distractions first. Turn off notifications, set brightness consistently, and decide whether you need portrait, horizontal orientation, or both later in post. If the final deliverables include app previews, tutorials, and social versions, capture with enough empty margin around the device UI so reframing doesn't feel cramped later.
The best setup is the one you can repeat without thinking. Build a checklist once, then use it before every stream.
The Legal and Ethical Side of Recording Streams
The technical part is usually the easy part. The harder question is whether you should record the stream, who agreed to it, and what you're allowed to do with the result afterward.
Most advice about live capture stays focused on production technique. A more useful angle is the legal and operational one. As noted in this discussion of legal recording gaps in live-stream workflows, teams often need answers about rights, consent, retention, and platform terms more than they need another tutorial on camera angles.
Rights come before editing
Recording a stream doesn't automatically give you the right to clip, repost, localize, or package it into future assets. The key questions are practical:
- Who owns the underlying content
- What the platform terms allow
- Whether guest appearances, slides, music, or demos introduce third-party rights
- How the recording will be reused after the live event
If your team records calls, interviews, or live customer sessions, this breakdown of whether screen recording records calls is a helpful reminder that technical capability and legal permission aren't the same thing.
Consent should be operational, not informal
A casual "everyone okay with this?" isn't enough for repeatable team workflows. Treat consent as part of production ops.
Use a simple internal process:
- State that the session is being recorded before it begins.
- Clarify reuse if clips may appear in training, marketing, or public channels.
- Document approvals for guests, customers, and outside collaborators.
- Check regional issues when hosts and participants are in different jurisdictions.
The safest recording workflow is the one with documented expectations before anyone goes live.
Ethics matter even when the law is unclear. Teams build better libraries when participants understand the purpose of the recording and where it may appear later. That reduces risk, avoids awkward takedown requests, and makes the editing process simpler because you're not second-guessing what can be published.
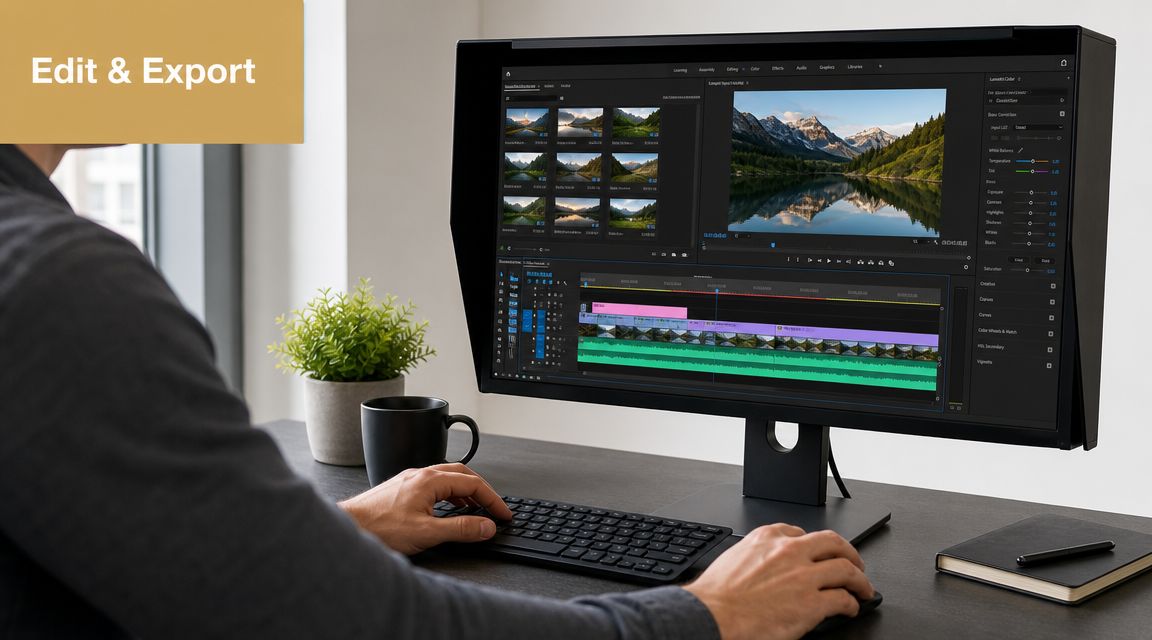
Editing and Exporting for Professional Results
The recording isn't the deliverable. The deliverable is what you make from it.
Most stream tutorials obsess over live switching. That's useful during the event, but it misses the part that matters most for many teams: turning one recorded session into a set of finished assets for training, product marketing, and social distribution. That gap is the core point raised in this video about post-live editing and repurposing workflows.
Cut for usefulness, not for chronology
The default mistake is exporting the whole session with cleaner ends and calling it done. That gives you an archive, not a strong asset.
Edit around intent instead:
- Tutorial version: Remove setup chatter, pauses, and audience housekeeping.
- Demo version: Keep the exact feature path and tighten transitions.
- Social clips: Pull the strongest single insight, feature reveal, or before-and-after moment.
- Onboarding asset: Reorder sections so the viewer gets the path they need, not the order the event happened in.
A polished recording usually feels shorter than the live event because it respects the viewer's task.
Titles, chapter cards, cursor emphasis, and zooms help when they clarify action on screen. They hurt when they're just decoration. The test is simple. If an edit helps someone understand where to click, what changed, or why a step matters, keep it.
Build outputs from one master recording
A smarter workflow starts with one master edit, then branches into multiple exports. That keeps your content consistent and prevents version chaos.
Use a structure like this:
| Output | Goal | Editing approach |
|---|---|---|
| Master horizontal version | Full replay or training asset | Clean trim, title card, balanced audio |
| Short horizontal demo | Sales or product page use | Remove tangents, tighten pacing |
| Vertical social cut | Reels, Shorts, TikTok | Reframe key area, enlarge important UI |
| Support snippet | Help center or reply asset | Isolate one task, add concise captioning |
Horizontal-to-vertical conversion needs planning. Don't just crop the center and hope the important action stays visible. Reframe based on the active area of the interface, and be ready to separate webcam, captions, and on-screen text so the vertical version doesn't feel cramped.
Professional exports are boring in the best way. They play everywhere, sound consistent, and make the viewer feel like the video was built for that format from the start.
Troubleshooting Common Recording Issues
Most recording failures trace back to one of three constraints: the stream itself, your Mac, or the path between them. Because live playback and recording rely on the same delivery chain, the stream is typically compressed, segmented, distributed through a CDN, and then decoded at your end. Cloudflare explains that local recording quality is affected by encoded source quality and network stability, and notes that capture workflows often write to formats such as MP4 or AVI while audio may be saved as WAV or MP3 in some tools, which is why storage throughput matters during continuous recording in Cloudflare's overview of live streaming architecture.
Dropped frames or stuttering playback
If the recording looks choppy, don't assume the app is broken. Start with load and stability.
- Check network conditions: If playback is unstable, the recording will often inherit that instability.
- Reduce competing activity: Close browser tabs, sync tools, and heavy apps.
- Record the cleanest feed available: A poor incoming stream can't be repaired by the recorder.
Audio drift or sync problems
When sync slips over time, the cause is often strain during capture or inconsistent source playback.
Try this sequence:
- Test a short recording first and play it back immediately.
- Avoid routing complexity unless you need it.
- Use one primary mic source instead of stacking multiple live audio paths.
- Keep the session on a fast drive so the file can be written without interruption.
Black screen or wrong window captured
This is one of the most avoidable failures. The fix is a better preflight routine.
- Preview the source area before the event starts.
- Recheck window selection if the app or browser changes state.
- Confirm permissions on macOS if the recorder can't see the screen properly.
Files that are too large to manage
Big files usually reflect long sessions and high-quality capture. That's fine until editing, upload, or team sharing becomes painful.
The practical fix isn't to compromise the original unnecessarily. Keep a high-quality master, then export smaller deliverables for distribution. That gives you an archive worth keeping and files that are easy to publish.
FAQ About Recording Live Streams on Mac
What's the best format for export on Mac
For broad compatibility, MP4 is usually the safest choice. It's a common default in modern capture workflows and tends to behave well across browsers, platforms, and internal review tools. Keep a higher-quality master if your editing workflow benefits from it, then create MP4 exports for delivery.
Why won't some streams record properly
Some services use content protection or platform restrictions that interfere with capture. In other cases, the stream may show a black screen, missing video, or degraded playback in the recording. That's usually a rights or protection issue, not something you should try to bypass. If the content isn't yours, check the platform terms and your permission to record it.
Why is my recording silent
On Mac, the usual culprit is missing system audio. The recording app may be capturing your screen but not the stream's playback audio.
Run this quick check:
- Confirm system audio is enabled in the recorder.
- Test with a short clip before the actual session.
- Verify the output after recording instead of assuming it worked.
- Keep mic and program audio separate when possible so fixes are easier later.
A reliable record-from-live-stream workflow is less about one magic setting and more about repeatability. Choose the right capture method, verify your source area and audio path, record with a short buffer, and edit for the asset you need, not just the event you hosted.
If your team records on Mac often and wants polished output without stitching together separate tools, Smooth Capture is worth a look. It gives you native macOS recording plus fast editing in one workflow, which is exactly what helps when a live stream needs to become tutorials, demos, onboarding videos, and social cut-downs instead of just another replay file.
Ready to create stunning app demos?
SmoothCapture makes it easy to record your screen with 3D device frames, cinematic cursor effects, and professional editing tools.